ThinkPad Mother Board Self-repair Tool for Right-to-Repair - SN and MTM writing Tool
ThinkPad Mother Board Self-repair Tool for Right-to-Repair - SN&MTM writting Tool
ThinkPad Mother Board Self-repair Tool for Right-to-Repair - SN&MTM writting Tool
Description
After replacing the Mother Board, you are required to write the original personal computer Serial Number (SN) and Machine Type Model (MTM) to new Mother Board/System Board, then select corresponding Product Name and Keyboard language ID of the Personal Computer (PC). The ThinkPad Mother Board Self-repair Tool will automatically display on the first power-on after the Mother board replacement. Make sure the correct SN and MTM been been entered. The Serial Number is related to the PC's warranty. These values cannot be changed once been submitted. For Keyboard Language ID, it can be changed on BIOS Setup later.
In general, the MTM is the PC Type number, a code of 10 characters, the SN is PC Serial Number, a code of 8 characters, the Product name is the PC model name such as “ThinkPad X1 Carbon Gen9”. For information on locating this information, see the following: How to find serial numbers - PC.
Note: Make sure that the correct product information is entered into the tool. The input cannot be edited once confirmed through the tool. If the tool is exited during the process, the computer will shut down, and the tool will be launched again automatically each time the computer is turned on until the input is confirmed. The process of writing product information can only be used once and if unsure, consider getting support from a Lenovo-authorized service technician or contact Lenovo Service Support: www.lenovo.com/support.
Applicable Brands
ThinkPad
Applicable Systems
|
Product |
MT |
BIOS Version |
|
ThinkPad X1 Carbon Gen 12 |
21KC/21KD |
N3YET68W |
|
ThinkPad X1 2-in-1 Gen 9 |
21KE/21KF | N3YET68W |
|
ThinkPad X1 Carbon Gen 11 |
21HM/21HN |
N3XET56W |
|
ThinkPad X1 Yoga Gen 8 |
21HQ/21HR |
N3XET56W |
| ThinkPad L14 Gen 5 | 21L1/21L2 | R2HET32W |
| ThinkPad L14 Gen 5 AMD | 21L5/21L6 | R2IET28W |
| ThinkPad L16 Gen 1 | 21L3/21L4 | R2HET32W |
| ThinkPad L16 Gen 1 AMD | 21L7/21L8 | R2IET28W |
Solution
Note: As the ThinkPad System Board Self-repair tool is depended on specific BIOS version, if a System Board without most current BIOS is received, you need to update the BIOS to the current BIOS and refer to How to update system BIOS - Windows.
Video:
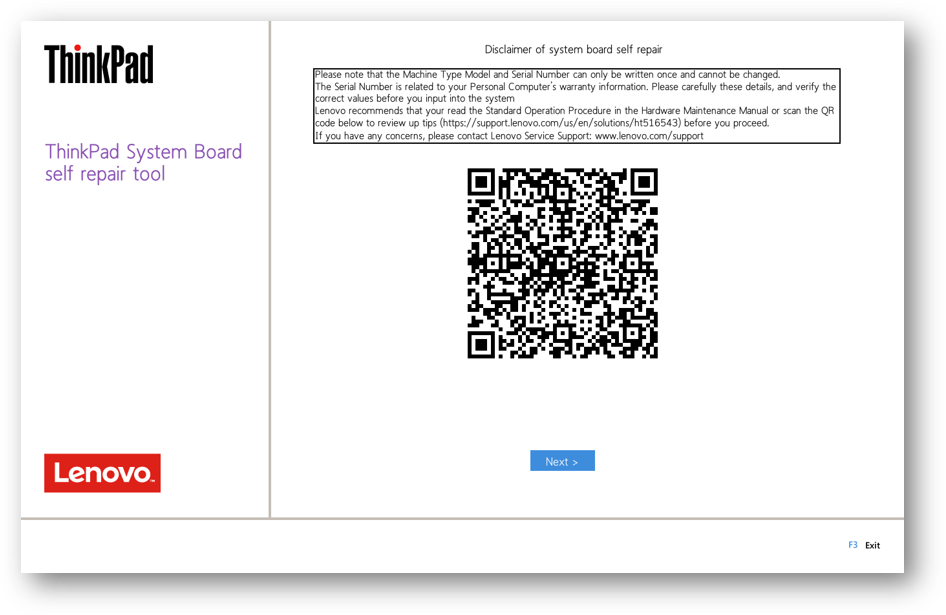
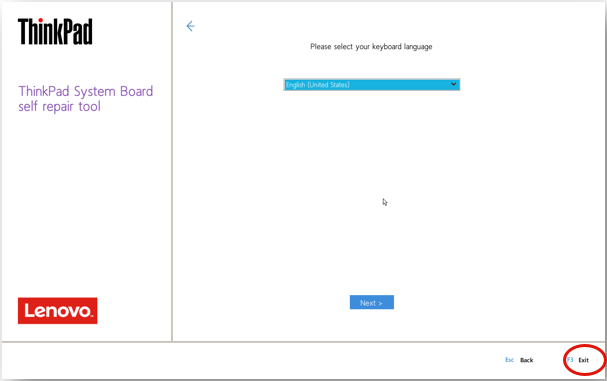
1. After finishing the Mother Board replacement, connect the AC power adapter and turn on the computer. The tool will automatically start and the following page will be shown. Scan the QRcode or access the Tips link to read detailed operation information. Press the Next > button, to go to the next page.
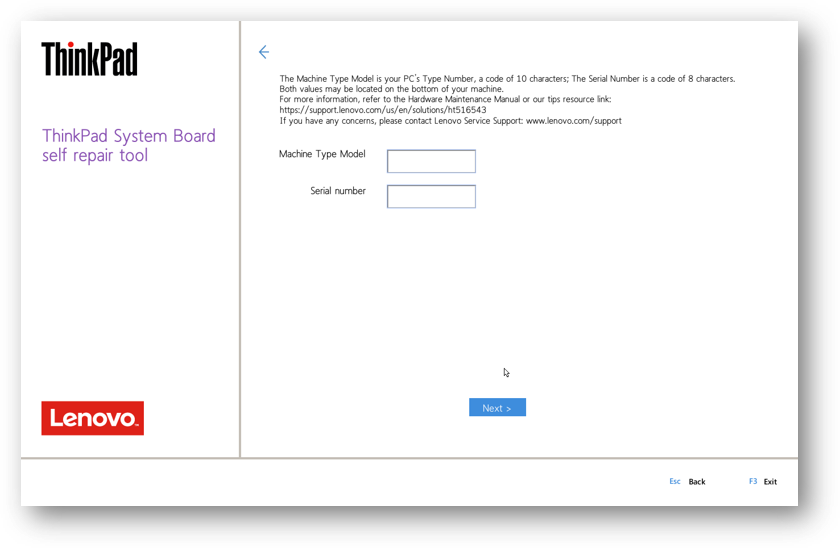
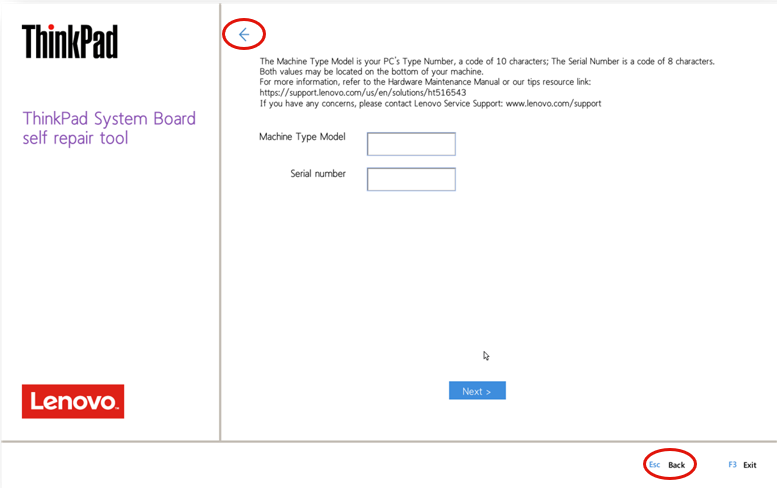
2. On the following Machine Type Model and Serial number input page, enter Machine Type Model number and Serial Number from the bottom of the machine. The MTM is 10 characters, the SN is 8 characters. Press the Next > button. If the correct Machine Type Model and Serial number are entered successfully, go to Next page. If Machine Type Model or Serial number was not entered, then a warning message window is displayed.
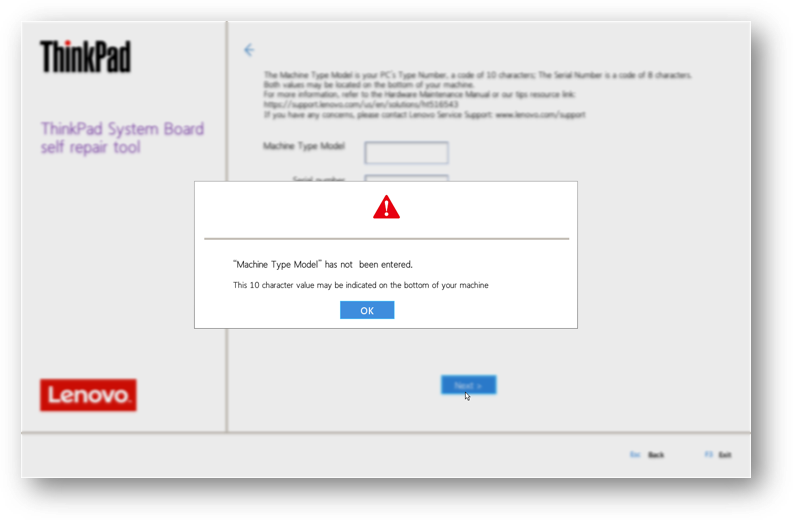
The following image displays warning of not entering the Machine Type Model. Press the OK button to return to MTM/SN page.
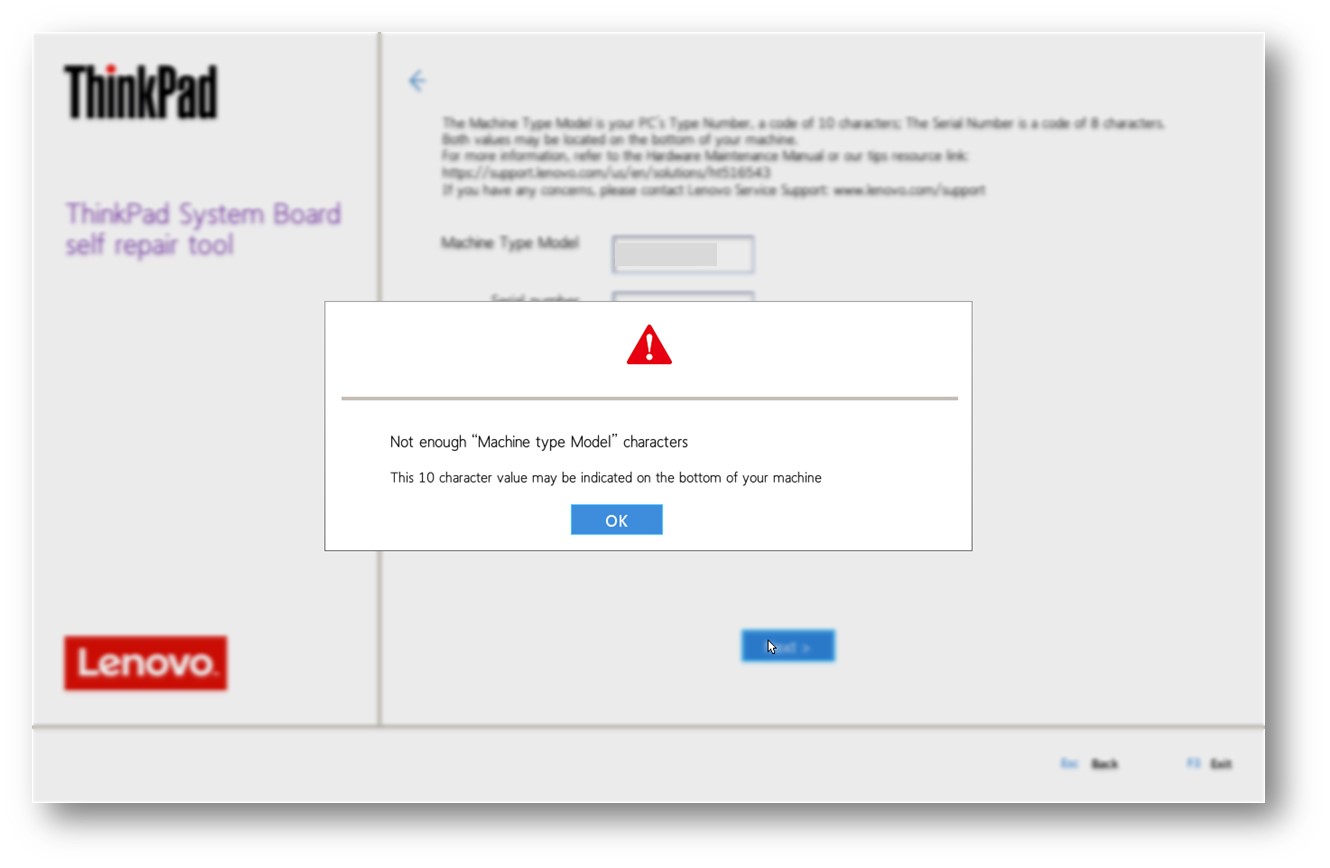
The following image displays a warning of not enough Machine Type model characters. Press the OK button to return to MTM/SN page.
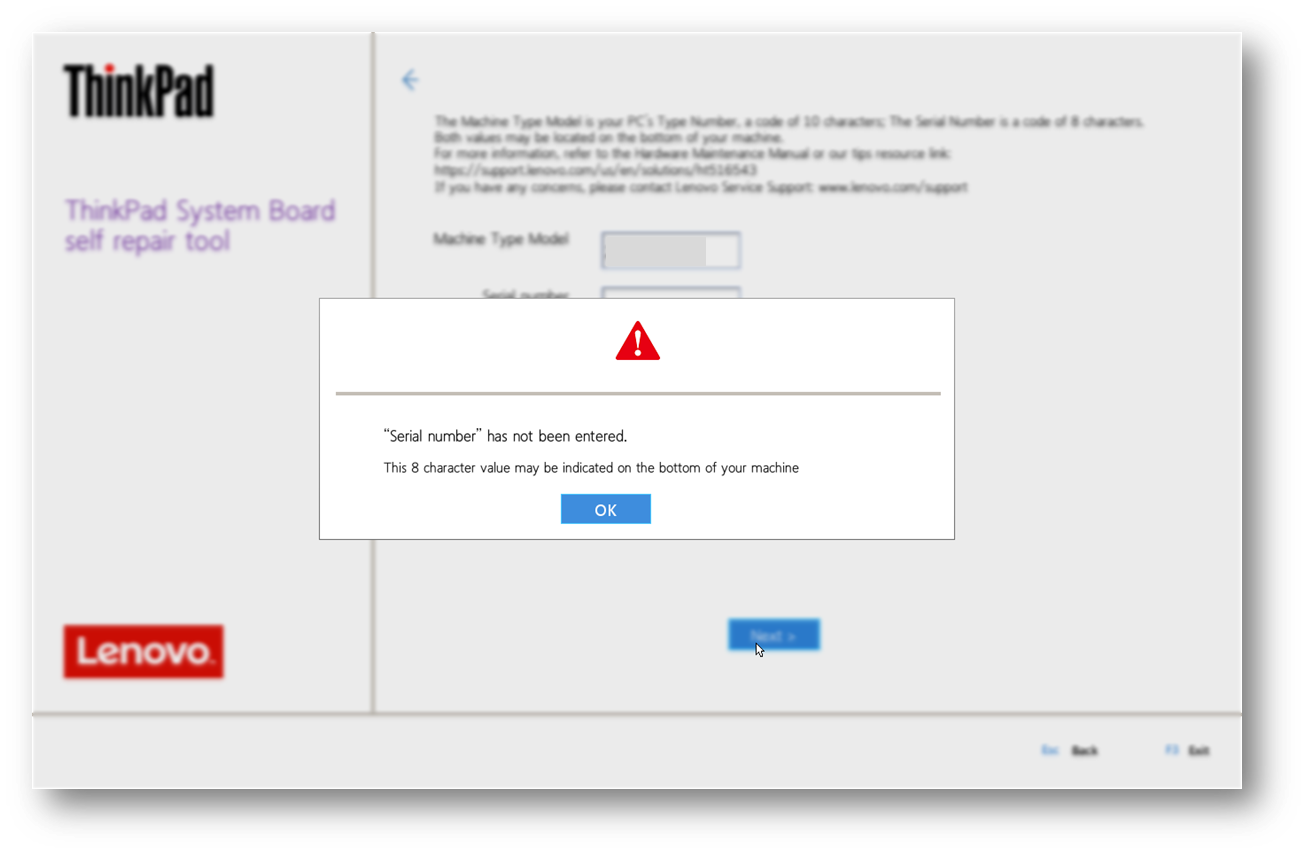
This image displays a warning of no Serial number entered. Press the OK button to return to MTM/SN page.
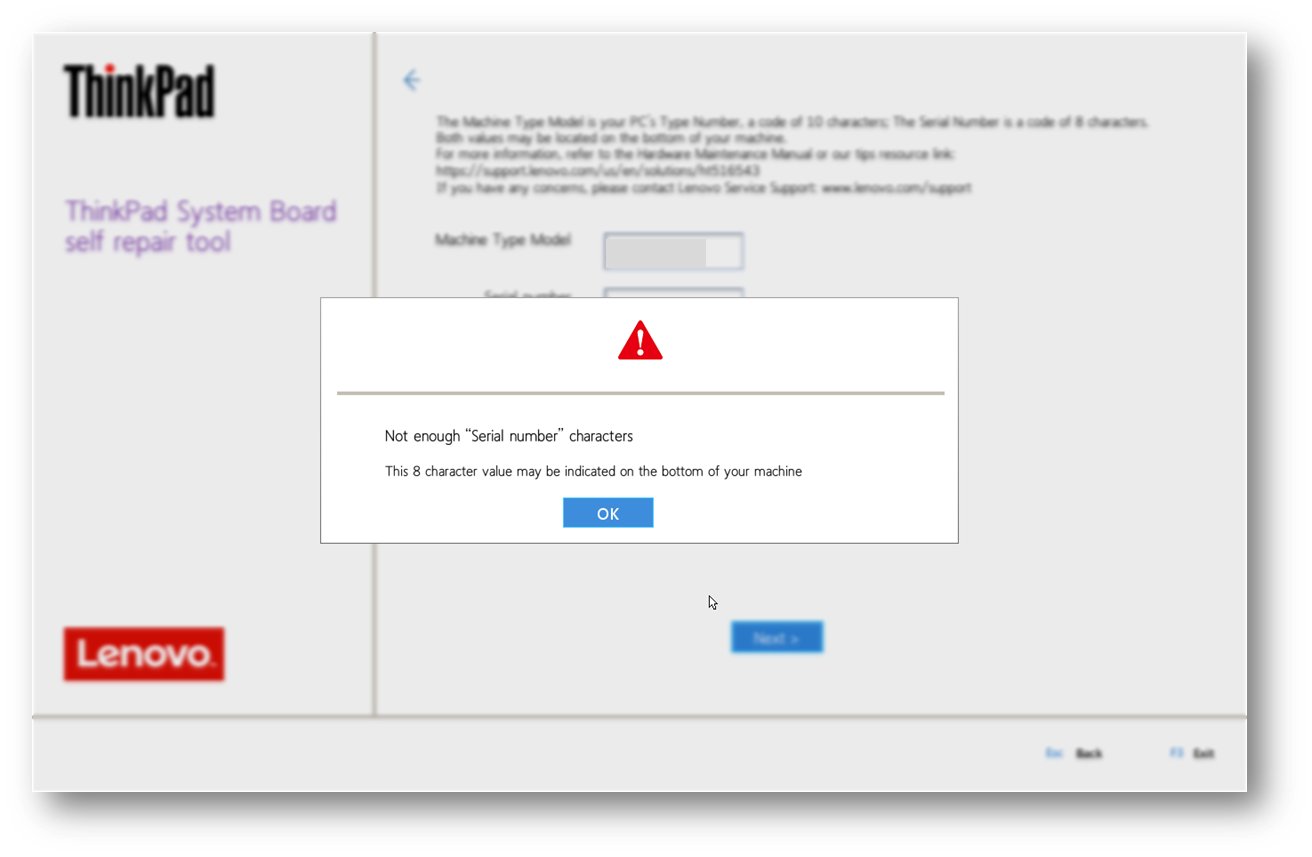
The following image displays a warning of not enough Serial number characters. Press the OK button to return to MTM/SN page.
The following image displays a warning of entering invalid number. Press the OK button to return to MTM/SN page.

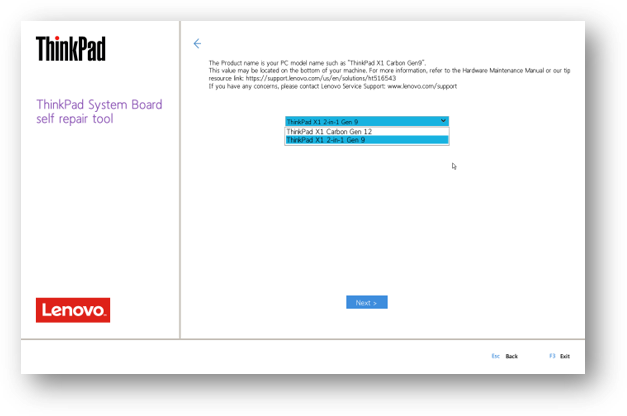
3. Select Product Name (PC model name such as “ThinkPad X1 Carbon Gen9”, can be found on the bottom of the computer) from drop-down list. After selecting Product Name, press the Next > button, then go to next page.
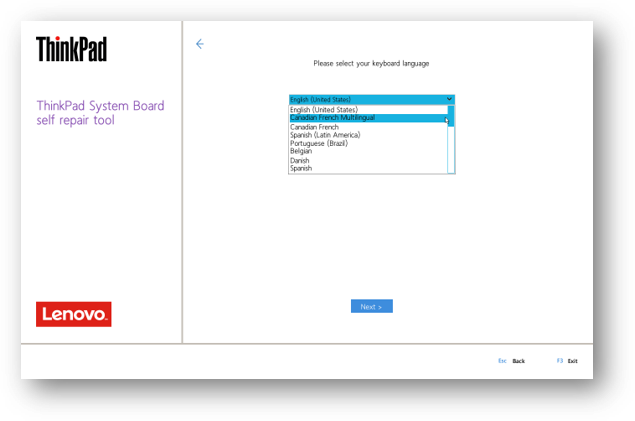
4. Select Keyboard language from drop-down list. The default value is English (United States), which can be changed in the BIOS Setup later. After selecting Keyboard language, press the Next > button, then go to next page.
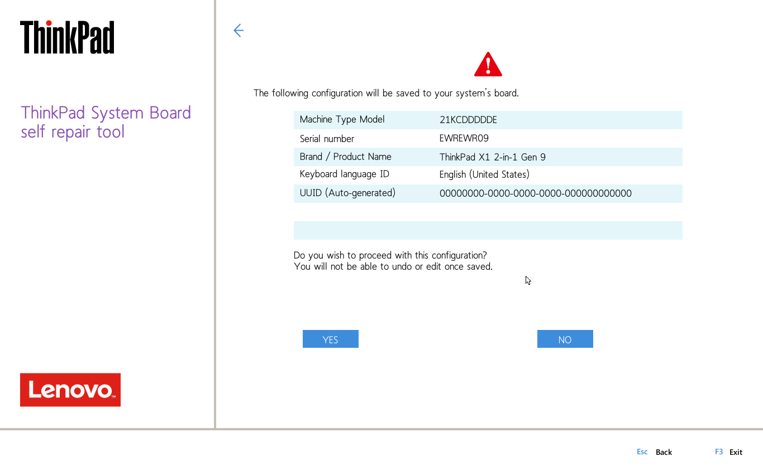
5. The following Confirmation page shows the entered values and auto-generated UUID.
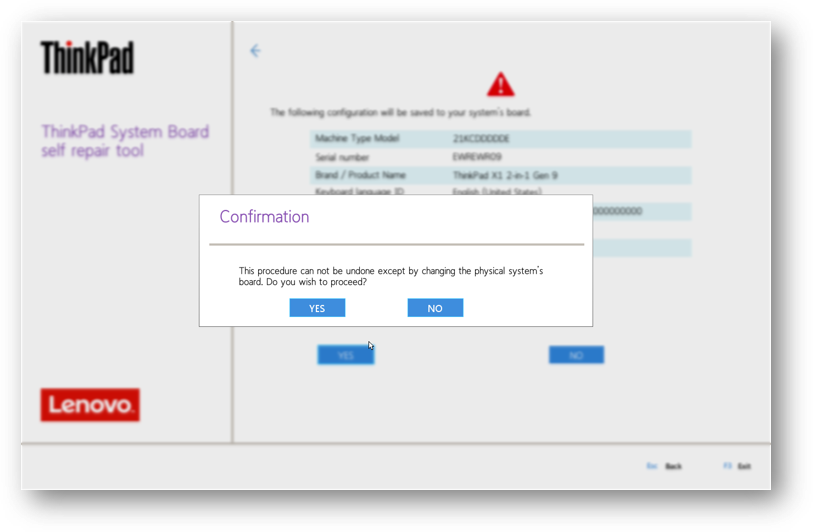
If YES is selected, a final pop-up confirmation window is shown.
Press YES to write SN and MTM and then restart PC. Press No to return to confirmation page.
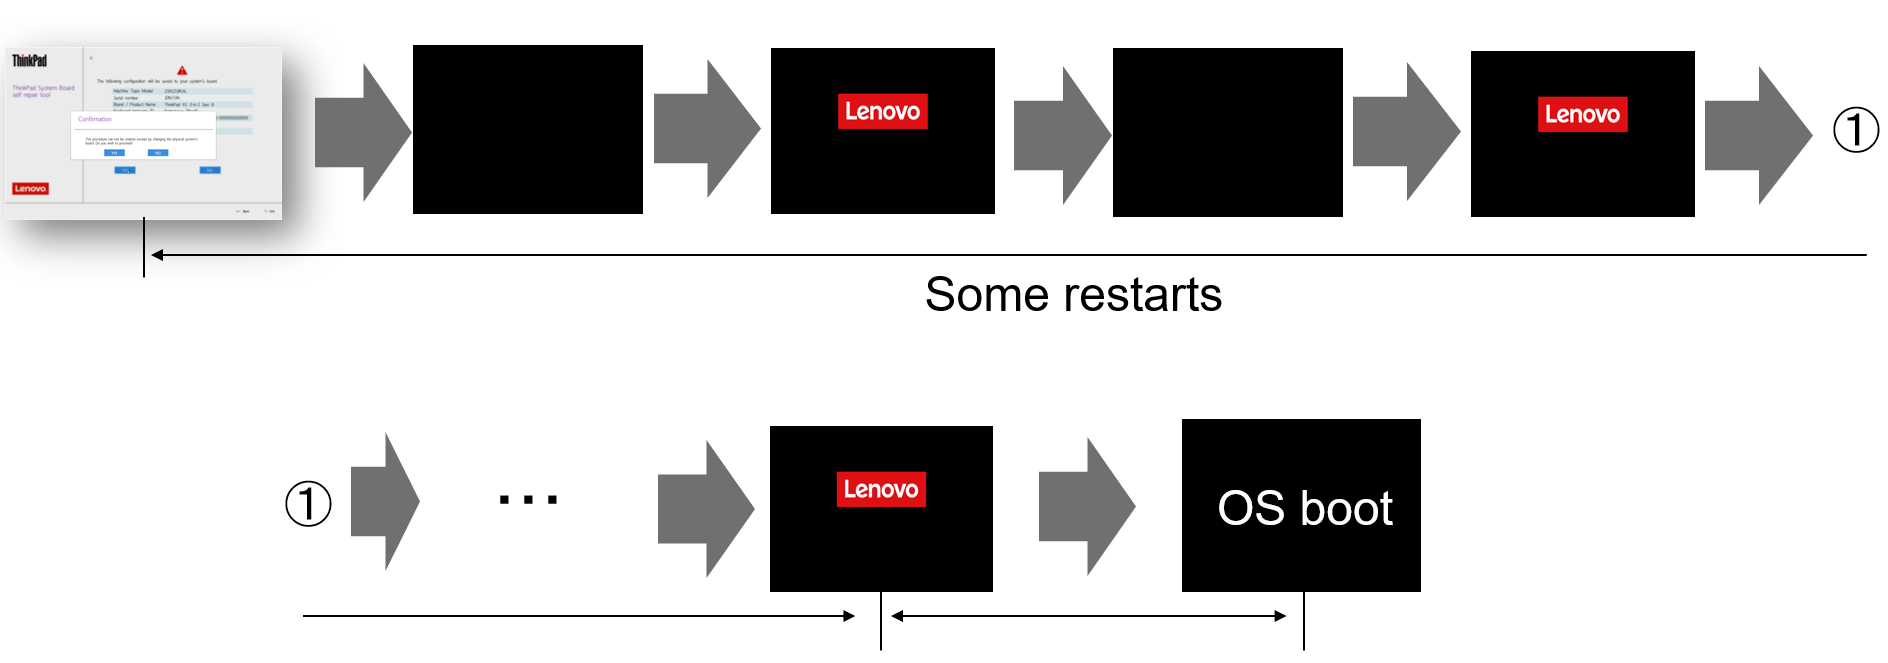
After clicking YES to confirm the values, the computer will start to write the entered values into the new Mother Board. The process takes a few minutes to complete and you will see some restarts as below picture shown. When the process is finished, the computer will restart automatically. Do not turn off the computer or disconnect the computer from AC power during the entire process.
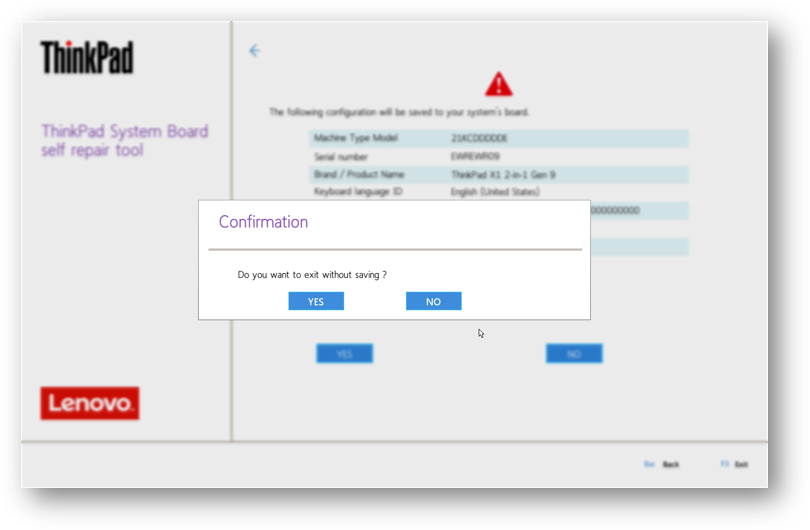
If No is selected, a Confirmation window is displayed. Press YES to shut down the PC. Press No to return to previous confirmation page.
- Function key:
1. On any page, selecting F3 displays a pop-up window. Press YES, to shut down the PC. Press No to return to F3 page.
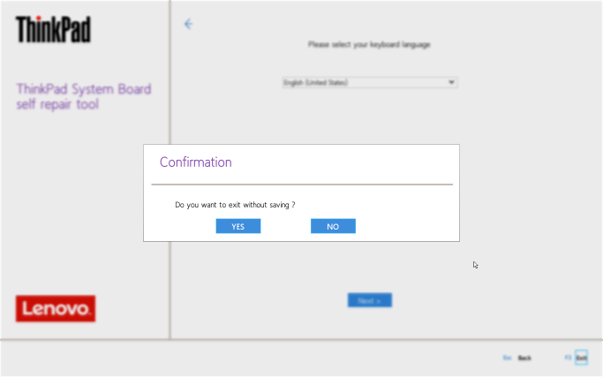
2. On any page, press <- or Esc, to go to previous page.
Additional Information
1. Run Lenovo Vantage to check confirmed SN(Serial Number) and MTM(Product Number) on the dashboard of Lenovo Vantage.
2. Run Lenovo Vantage to update BIOS to latest version after finishing the Motherboad replacement and assembly.
Use the following steps to update BIOS:
- Search for Vantage on Windows search bar.
- Open Lenovo Vantage. Select System Update.
- Click Check for Updates.
- Install all updates or select updates. For more information, check How to get the latest drivers and BIOS With Lenovo Vantage.
If you cannot find Lenovo Vantage, see the link and the section: "How to download Lenovo Vantage from the Start menu" to download Lenovo Vantage.
3. Run Lenovo Vantage Hardware Scan after finishing the Motherboad replacement and assembly to check if main components of the computer are working.
Use the following steps to run Hardware Scan:
- Open Lenovo Vantage.
- Select Hardware Scan.
- Select Quick Scan or Customize to run Hardware Scan checking key compoments. For more information, check [Video] Scan Your Computer Hardware for Issues Using Lenovo Vantage.
Related Articles
Lenovo Diagnostic can be also used to run hardware scan and test.
Your feedback helps to improve the overall experience

