How to enable or disable ThinkPad Touchpad - Windows 10, 11
Steps and instructions to enable or disable ThinkPad Touchpad - Windows 10, 11
Steps and instructions to enable or disable ThinkPad Touchpad - Windows 10, 11
Description
This topic describes various methods to enable and disable the ThinkPad Touchpad. For general touchpad issues in Windows, see this Microsoft link Fix touchpad problems in Windows.
Watch our videos:
- [Video] How to enable/disable your Touchpad in Windows 10 - ThinkPad, IdeaPad, Lenovo
- [Video] TouchPad Settings in Windows 10- ThinkPad
For ideapad/Lenovo notebooks, click the following:
- How to enable and disable the TouchPad - Idea/Lenovo laptops
- [Video] TouchPad Settings in Windows 10 - IdeaPad, Lenovo
Methods:
- Enable or disable in Mouse Properties
- Enable or disable in BIOS
- Enable or disable Precision Touchpad for Windows 10 (for ThinkPad 2017 models or later)
Applicable Brands
ThinkPad
Operating Systems
- Windows 11
- Windows 10
Solution
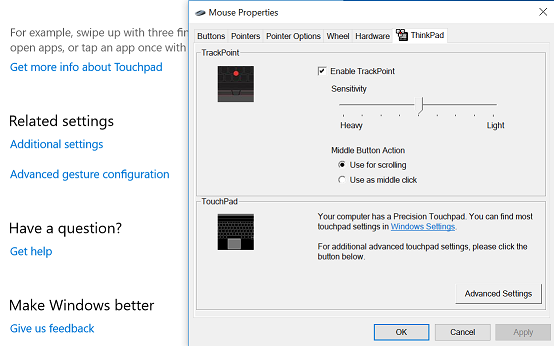
Enable or disable in Mouse Properties
Windows 10
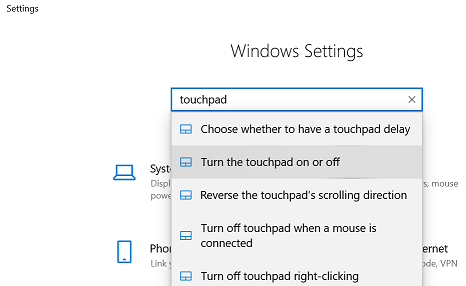
- Search for touchpad using the search option.
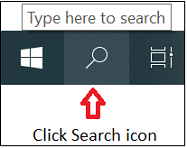
- Select Touchpad settings.
- Touchpad options are displayed in the right pane. Verify that Touchpad is set to On. Set Touchpad to Off to turn the touchpad off. If the option is not available or all settings are greyed out, download and install the latest touchpad/mouse driver from Lenovo support site or launch Lenovo System Update and get all the new updates.
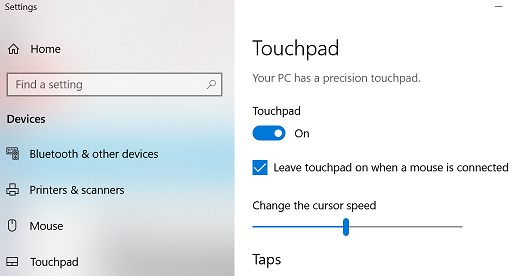
- Scroll down to the bottom and select Additional Settings to see additional Touchpad settings.
If the touchpad is not working, use these steps to access Touchpad options:
- Select the Windows logo key + I.
- Type touchpad.
- Select options (use the arrow key to move down the list and Enter to select).
Note: For additional information, see this Microsoft link: Keyboard shortcuts in Windows.
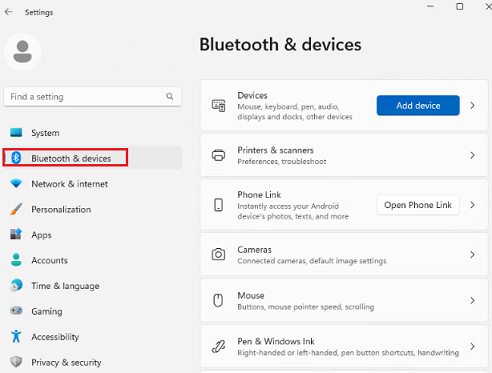
Windows 11
Touchpad settings in Windows 11 can be found under Start, Settings, Bluetooth and devices, Touchpad.
Related Articles
- For a touch-enabled device, see this Microsoft link Open the on-screen touchpad
- Popular Topics: Popular Topics: Keyboard, Mouse, Touchpad
- Popular Topics: Drivers
- How to adjust Touchpad Sensitivity - ThinkCentre, ThinkPad
- How to enlarge, reduce, or zoom the text size by using TouchPad
- TouchPad auto zoom in and out - ThinkPad
- TouchPad or Trackpad is not working - ThinkPad
- Lenovo Vantage: Using your PC just got easier
Was this information helpful?
Your feedback helps to improve the overall experience
Document ID:HT075599
Original Publish Date:05/27/2015
Last Modified Date:08/20/2024

