Migrating from Lenovo ID to Okta Active Directory Single Sign-On (SSO) for the ThinkSmart Manager portal
Migrating from Lenovo ID to Okta Active Directory Single Sign-On (SSO) for the ThinkSmart Manager portal
Migrating from Lenovo ID to Okta Active Directory Single Sign-On (SSO) for the ThinkSmart Manager portal
Description
Describes how to convert authentication from Lenovo ID to Okta Single Sign-On (SSO) for the ThinkSmart Manager portal.
For more information on ThinkSmart Manager portal, ThinkSmart Manager mobile app, and the ThinkSmart Manager Service (TSMS), visit: ThinkSmart Manager platform.
Solution
Follow these steps described below.
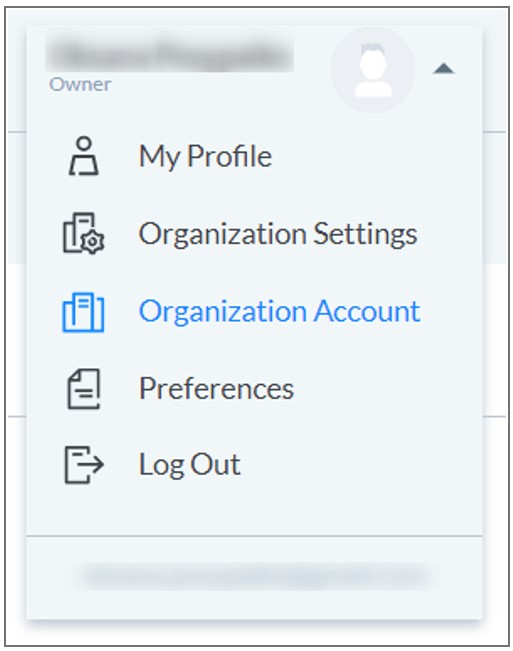
- In ThinkSmart Manager (portal.thinksmart.lenovo.com) portal, click user profile image and navigate to Organization Account.
Note: This option is available only for Owners.
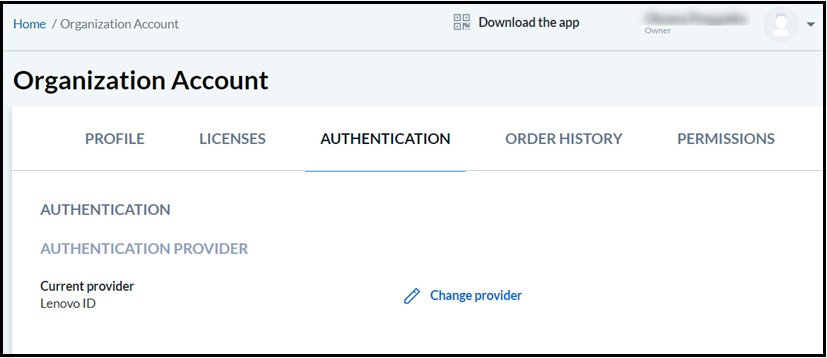
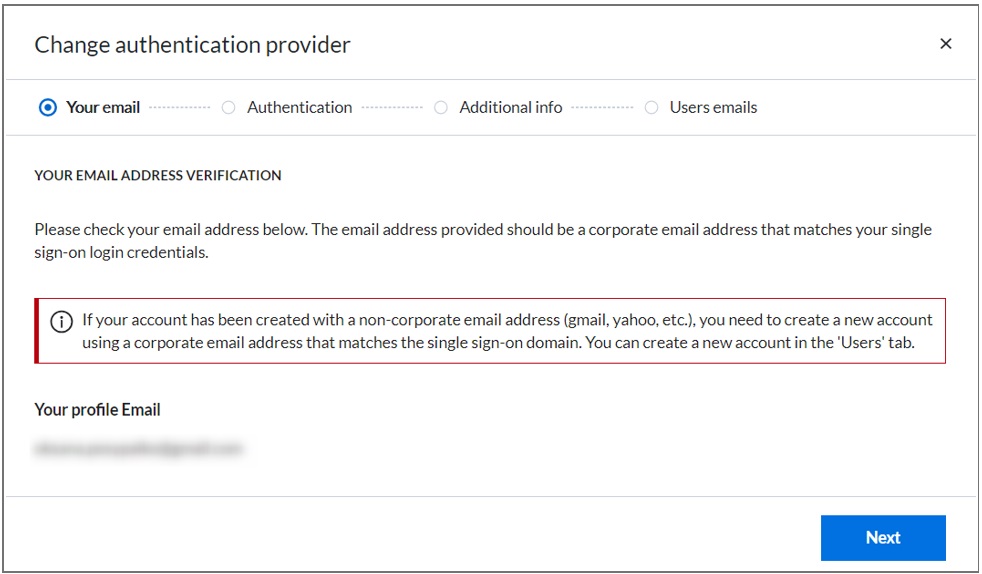
- In Organization Account, from Authentication, click Change provider and follow the on-screen instructions.
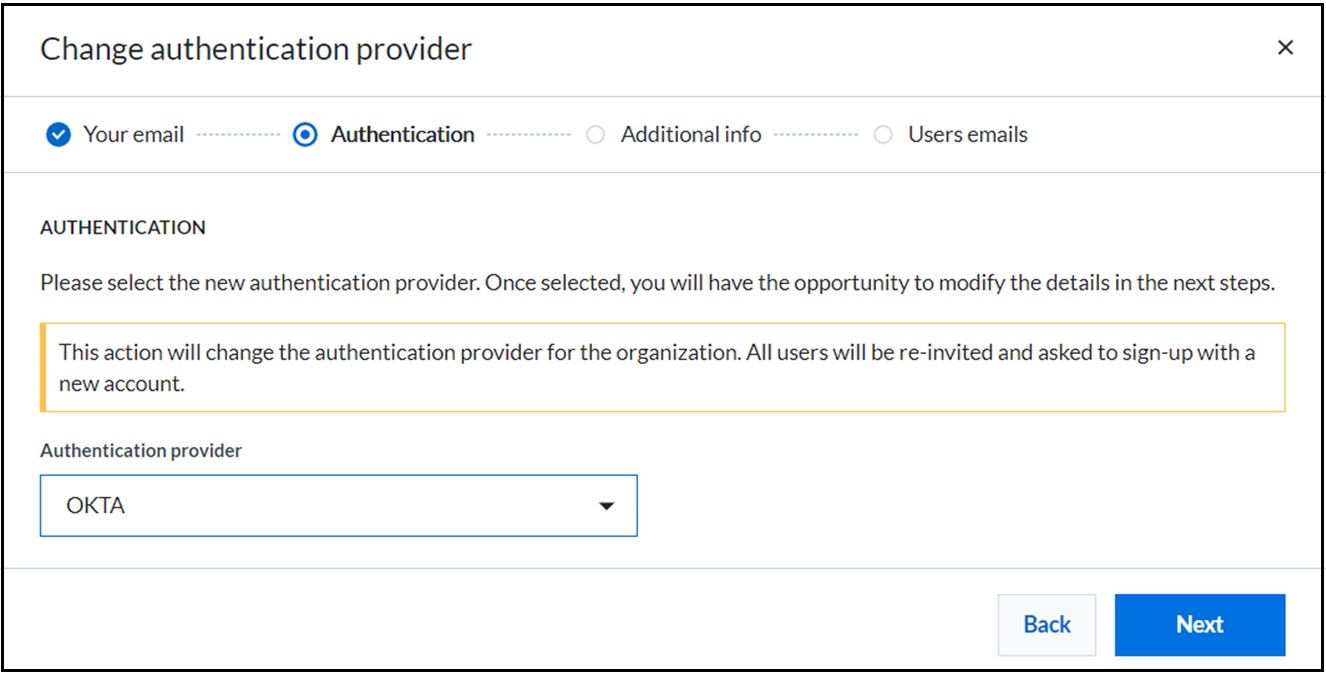
- On Authentication provider, select Okta. then click Next.
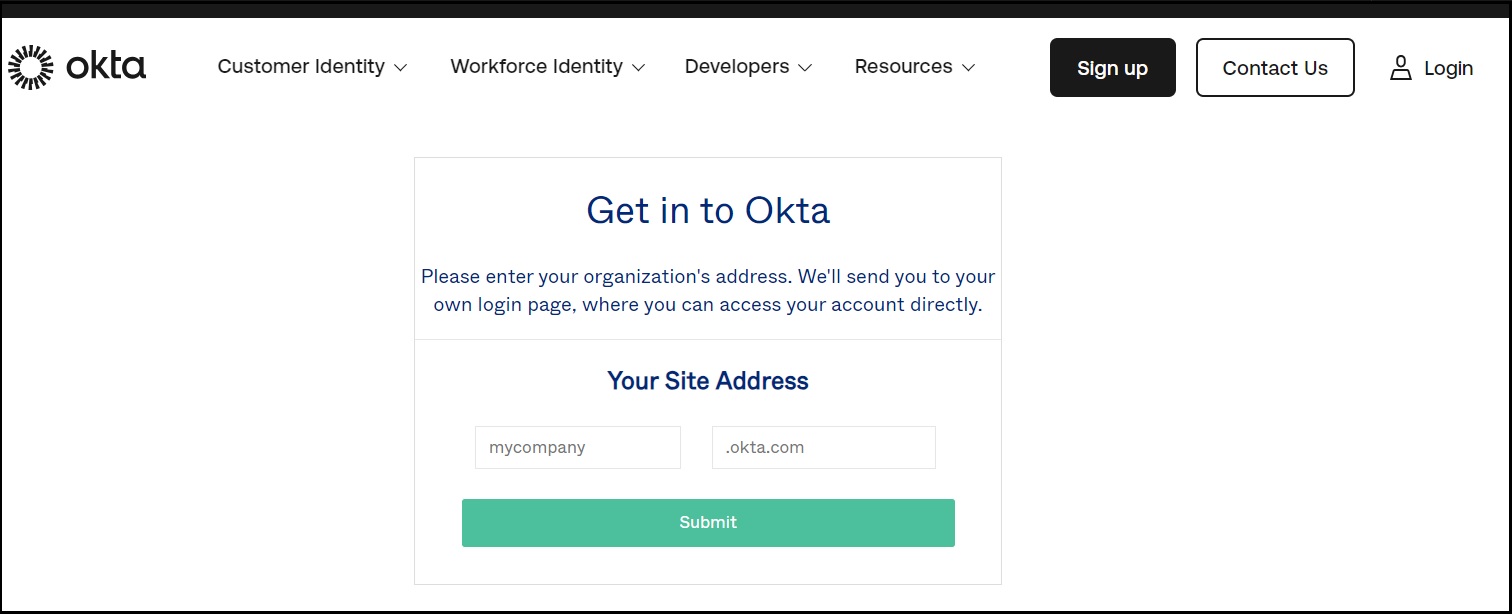
- Log in to Okta (https://okta.com/login).
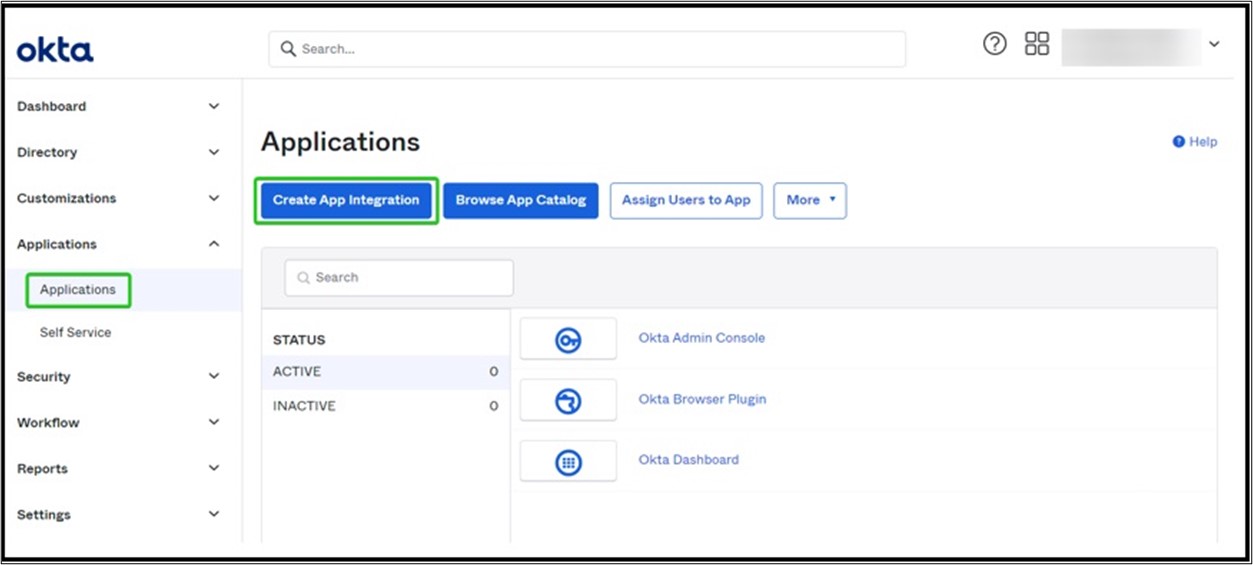
- Proceed to Applications. Click Create App Integration.
Note: Create a new App if there is already one app in the list.
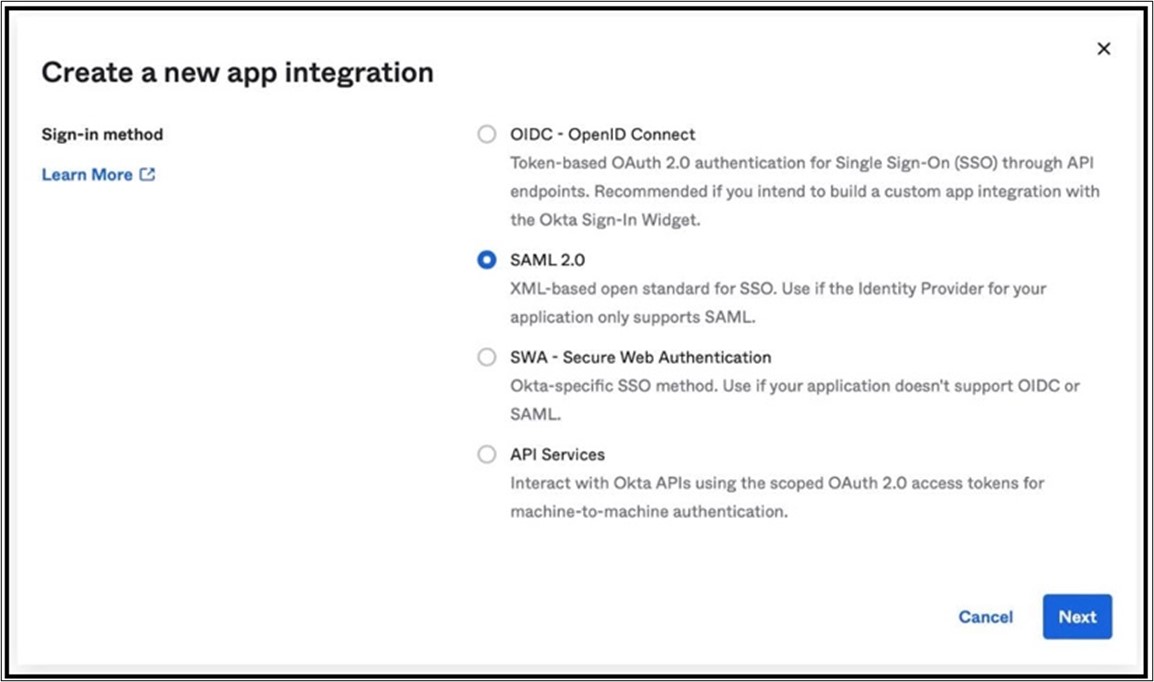
- Select the SAML 2.0 sign-on method, and create an application.
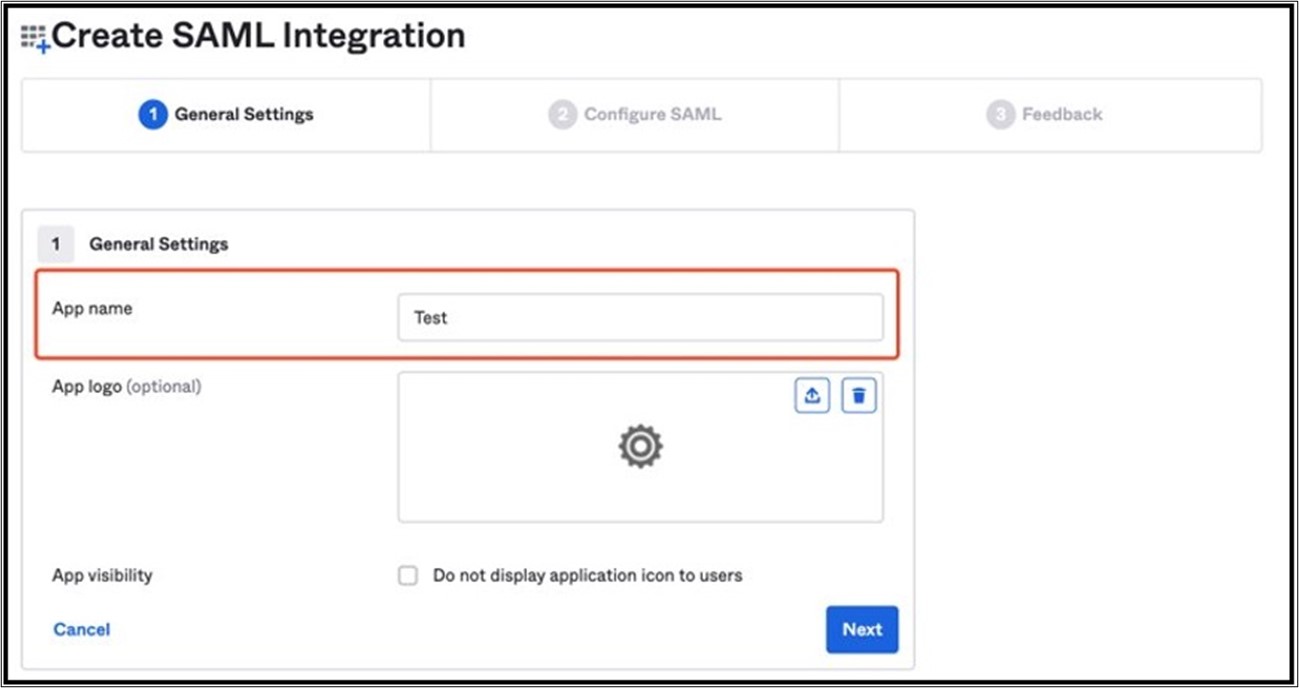
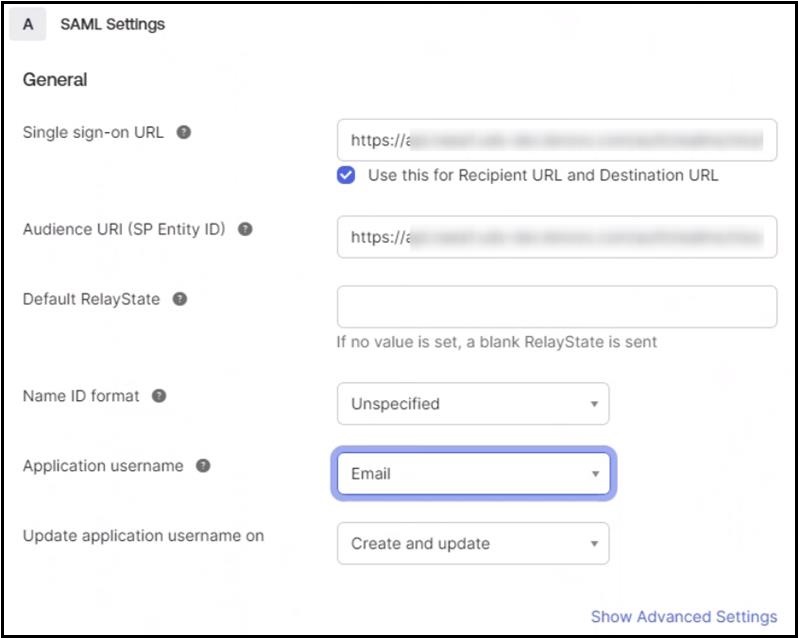
- Within Create SAML Integration, on the General Settings step, enter the App name.
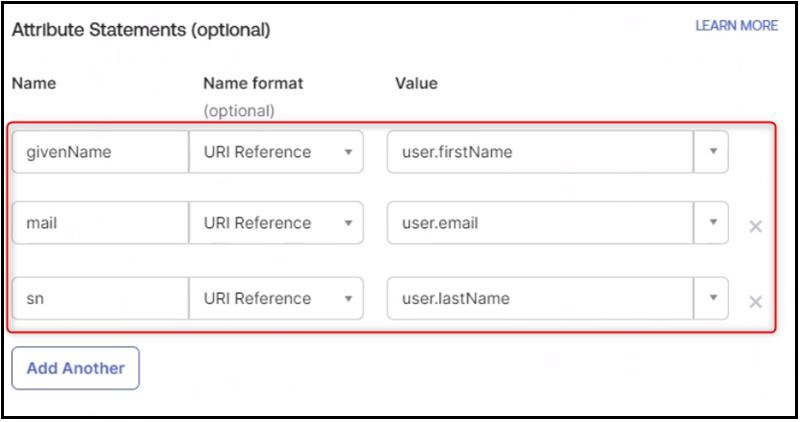
- On Configure SAML step, enter the Attribute Statements as shown below. The rest of the required fields can be filled in with random data. For example, Single sign-on URL and Audience URI values will be changed later on. Attribute Statements will be needed to fill one of them in the Additional Info step.
- Complete the application creation flow.
- In SAML Signing Certificates section, from the Actions drop-down, select View IdP metadata. IdP metadata opens in a separate tab in browser.
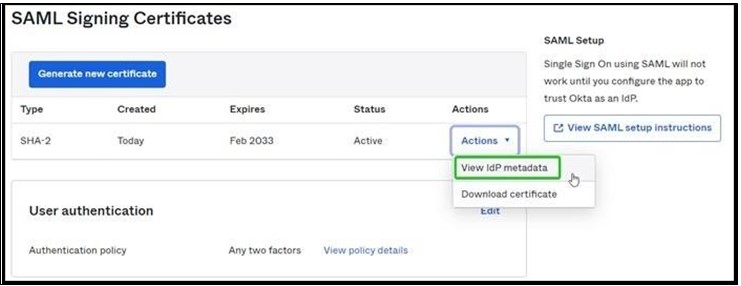
- Download the page information to your computer. This becomes the IDP Configuration file that is required to change organization authentification type to OKTA.

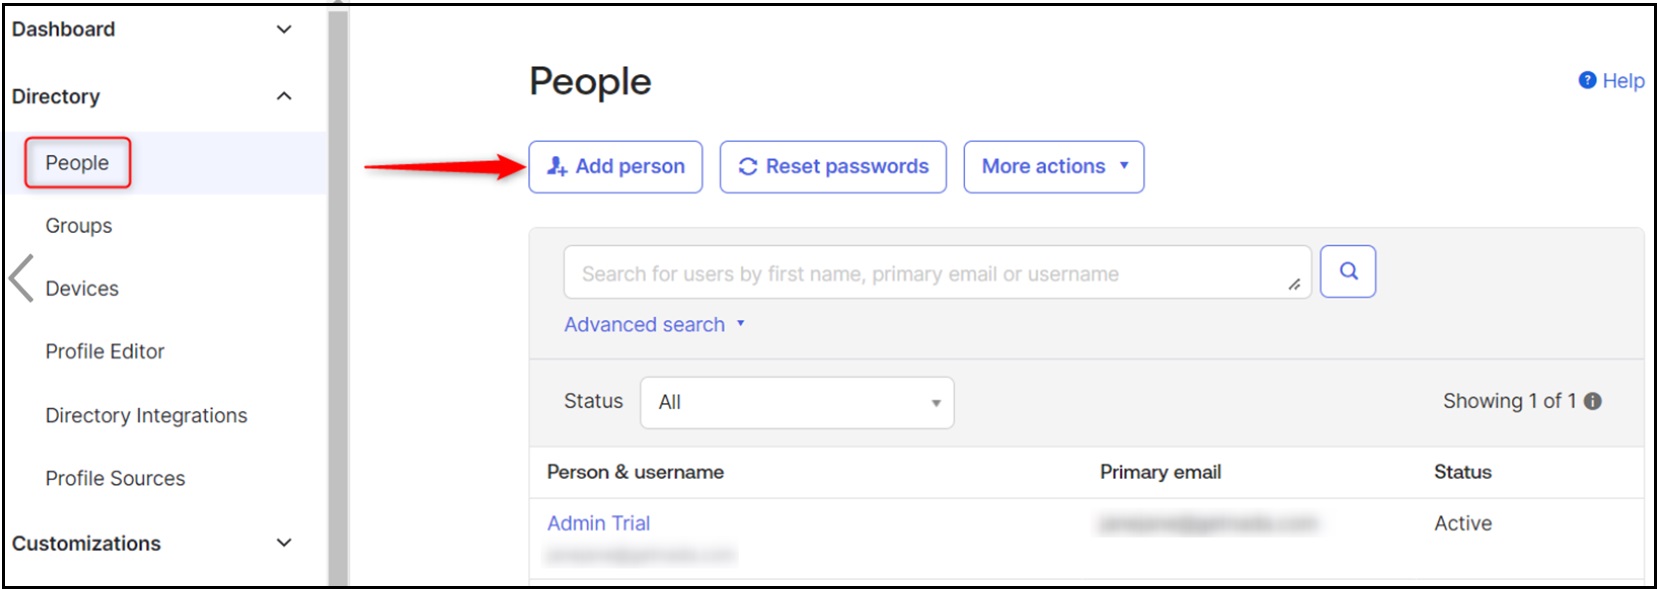
- To further be able to log in with OKTA, users should be created and assigned to your OKTA app. Also, these users should be added to the Portal. Their emails on the Portal and in OKTA should match.
- To add a user, navigate to Directory - People. Click Add person. Complete all the required fields and click Save.
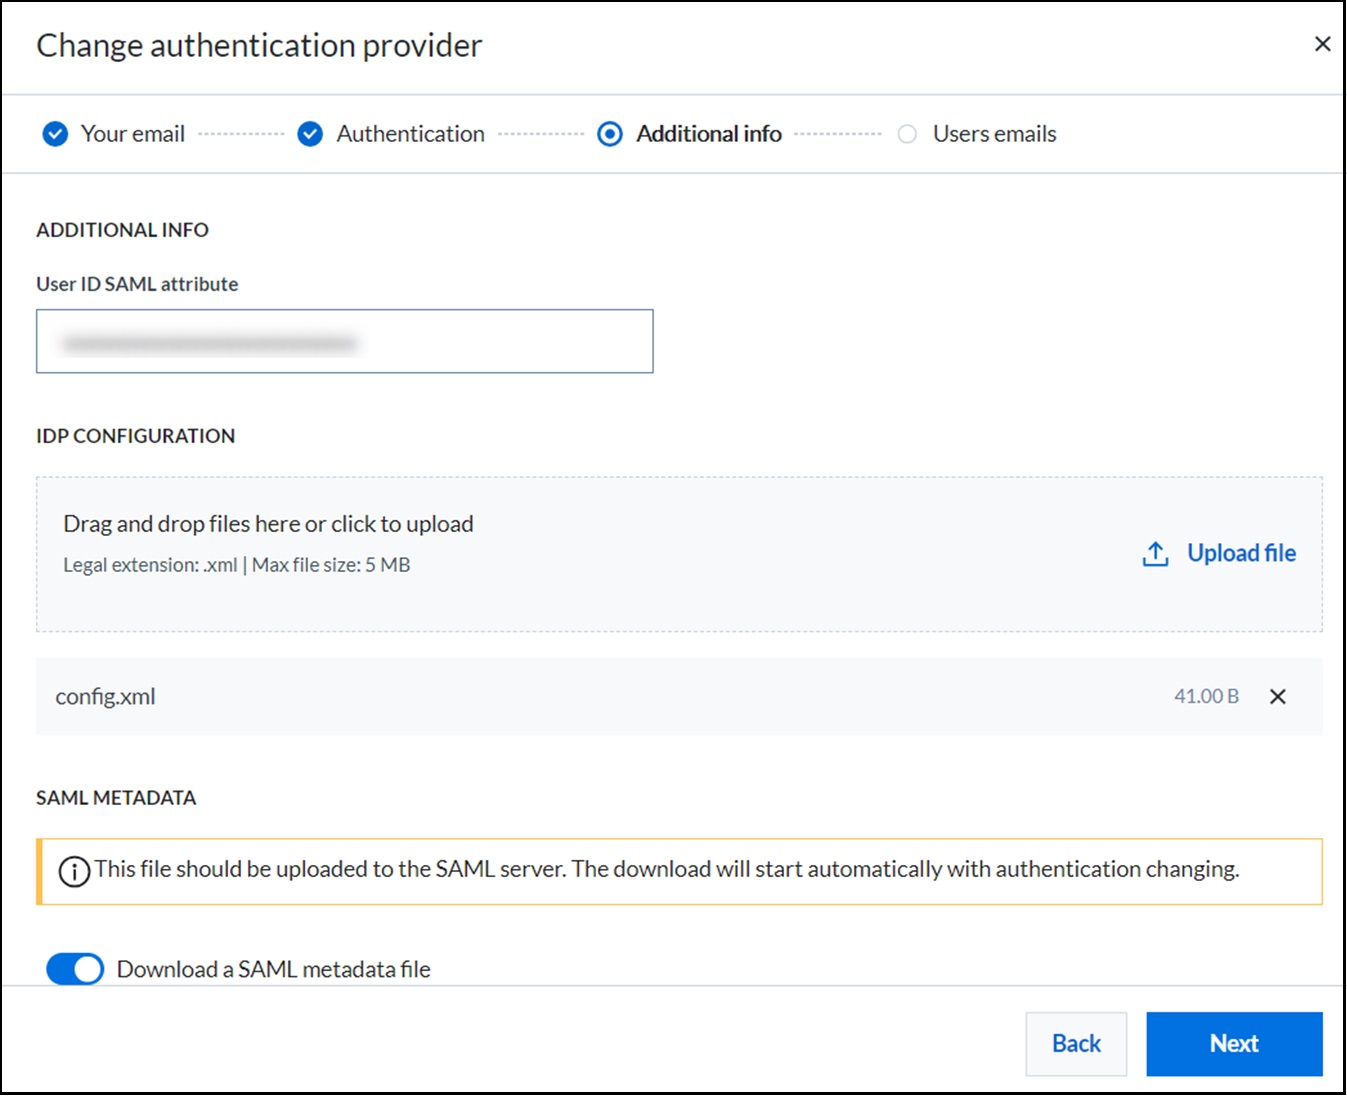
- In Additional Info window, enter User ID SAML attribute (givenName or email) and upload IDP configuration file.
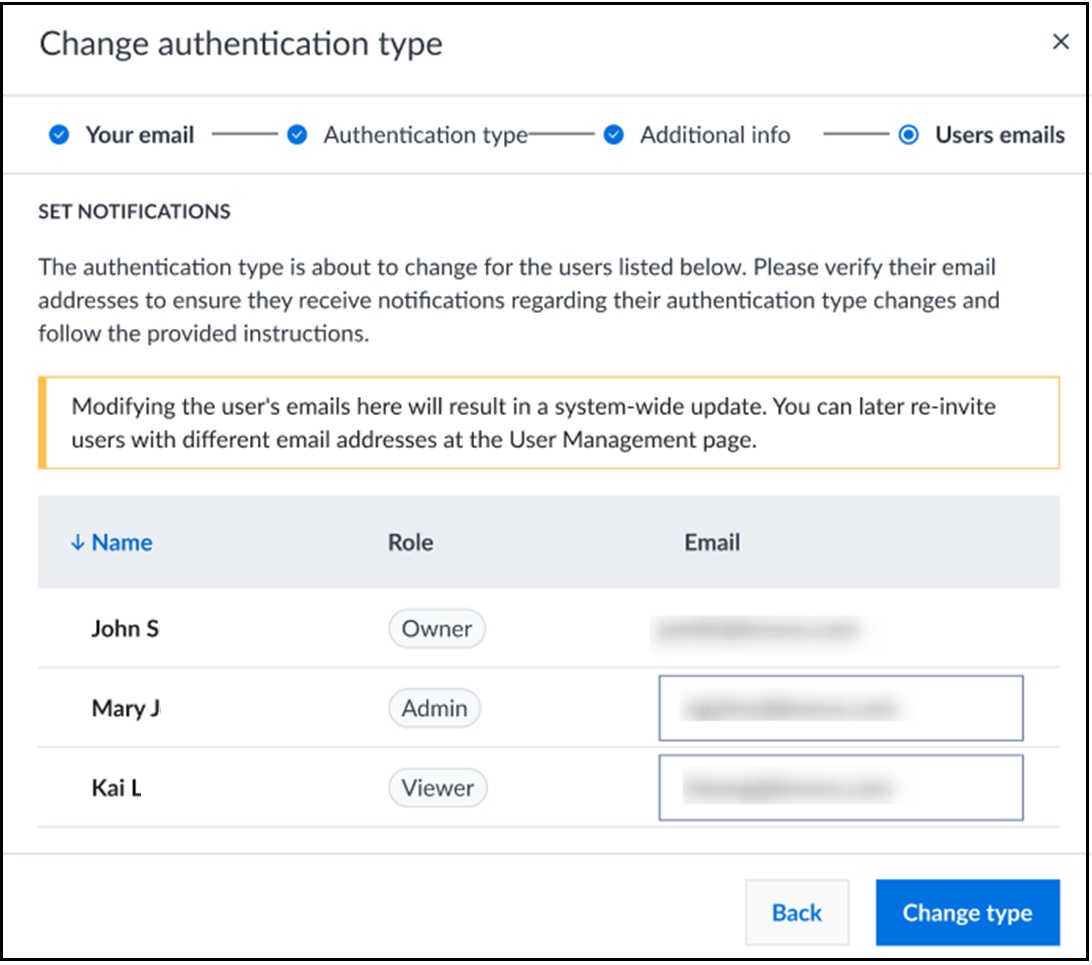
- Check if user emails are correct and update them if needed.
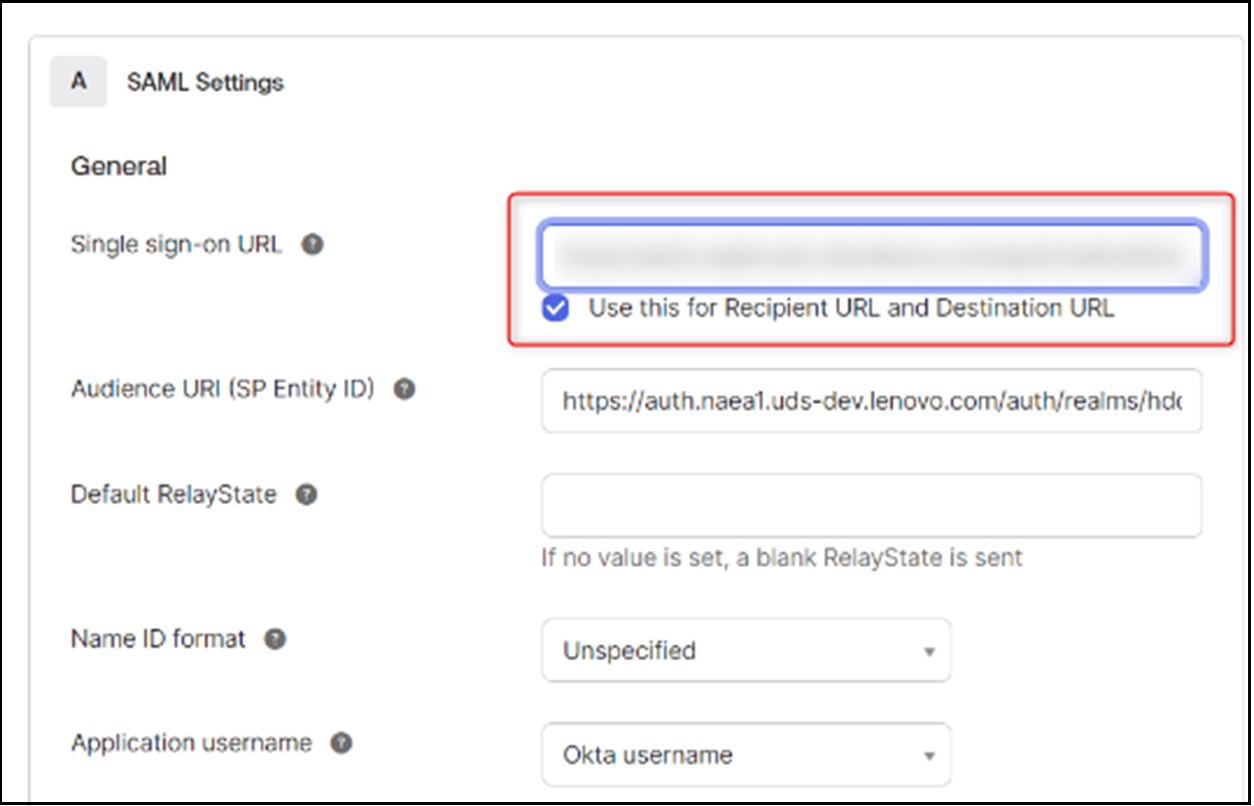
- Copy the Redirect URL. This is required during OKTA setup process within OKTA (https://okta.com). Then click Close to complete the SSO setup process.

- Paste Redirect URL, copied from Step 16, into Single Sign-on URL and Audience URI to complete the SSO setup.
OKTA setup is complete.
Var denne informasjonen nyttig?
Tilbakemeldingen din bidrar til å forbedre den generelle opplevelsen
Dokument-ID:HT515581
Opprinnelig publiseringsdato:08/14/2023
Siste endrede data:02/26/2025

