How to enable touchpad or mouse virtual scrolling (Mouse wheel) on ThinkPad - Windows 10
Steps and instructions to enable touchpad or mouse virtual scrolling (Mouse wheel) on ThinkPad - Windows 10
Steps and instructions to enable touchpad or mouse virtual scrolling (Mouse wheel) on ThinkPad - Windows 10
Description
This topic describes how to enable touchpad or mouse virtual scrolling (Mouse wheel) on ThinkPad.
Applicable Brands
- ThinkPad S Series Laptop
- ThinkPad T Series Laptop
Operating Systems
Windows 10
Solution
1. Select Start, then click or tap Settings.
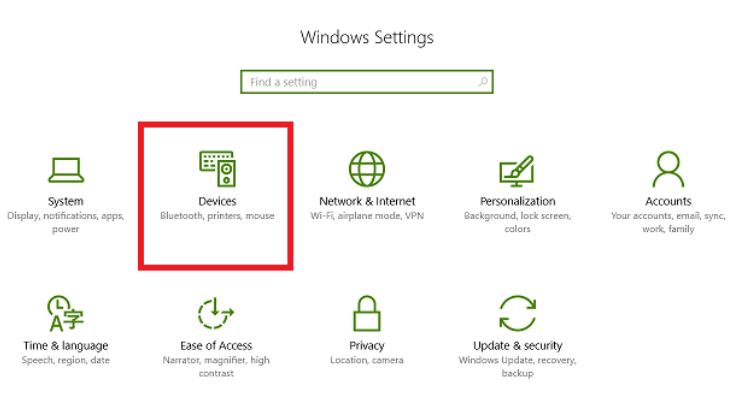
2. Click or tap Devices.
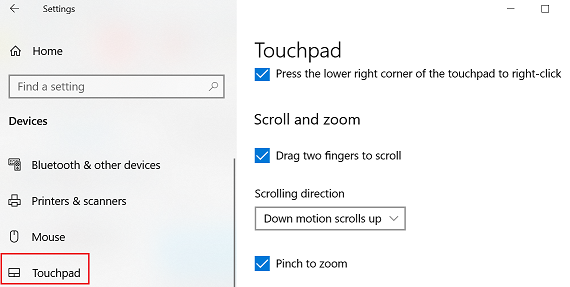
3. Choose Touchpad from the column on the left to access Touchpad settings.
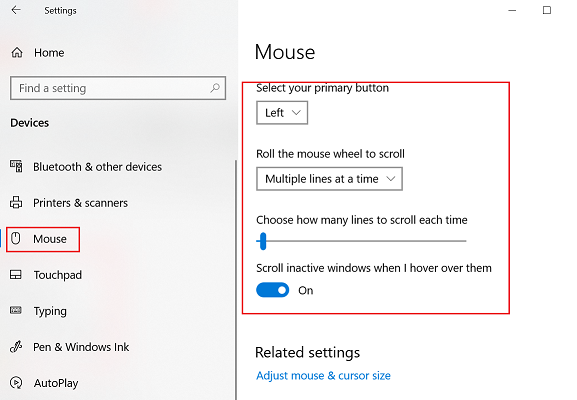
4. Choose Mouse from the column on the left, to access the mouse configuration settings. Use Select your primary button to choose between having the left or right mouse button set as primary. The default setting is left, but this can be changed to right if you are left-handed. Click to choose one of the available options: scroll Multiple lines at a time or scroll One screen at a time. The default setting is 3. Scroll inactive windows when I hover over them is set to On.
5. Click the Additional mouse options link in the Mouse settings window, under the Related settings section.
6. Click the Wheel tab at the top of the Mouse Properties window. Choose the number of lines at a time with the Vertical scrolling option. The default is 3.
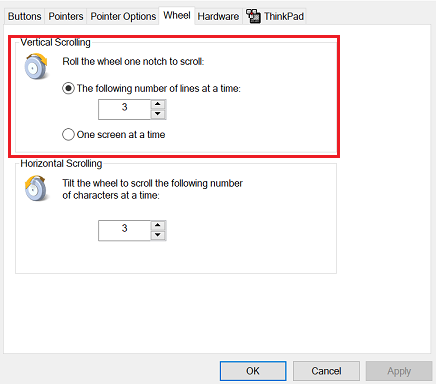
7. Click Apply and OK to confirm the settings.
Your feedback helps to improve the overall experience

