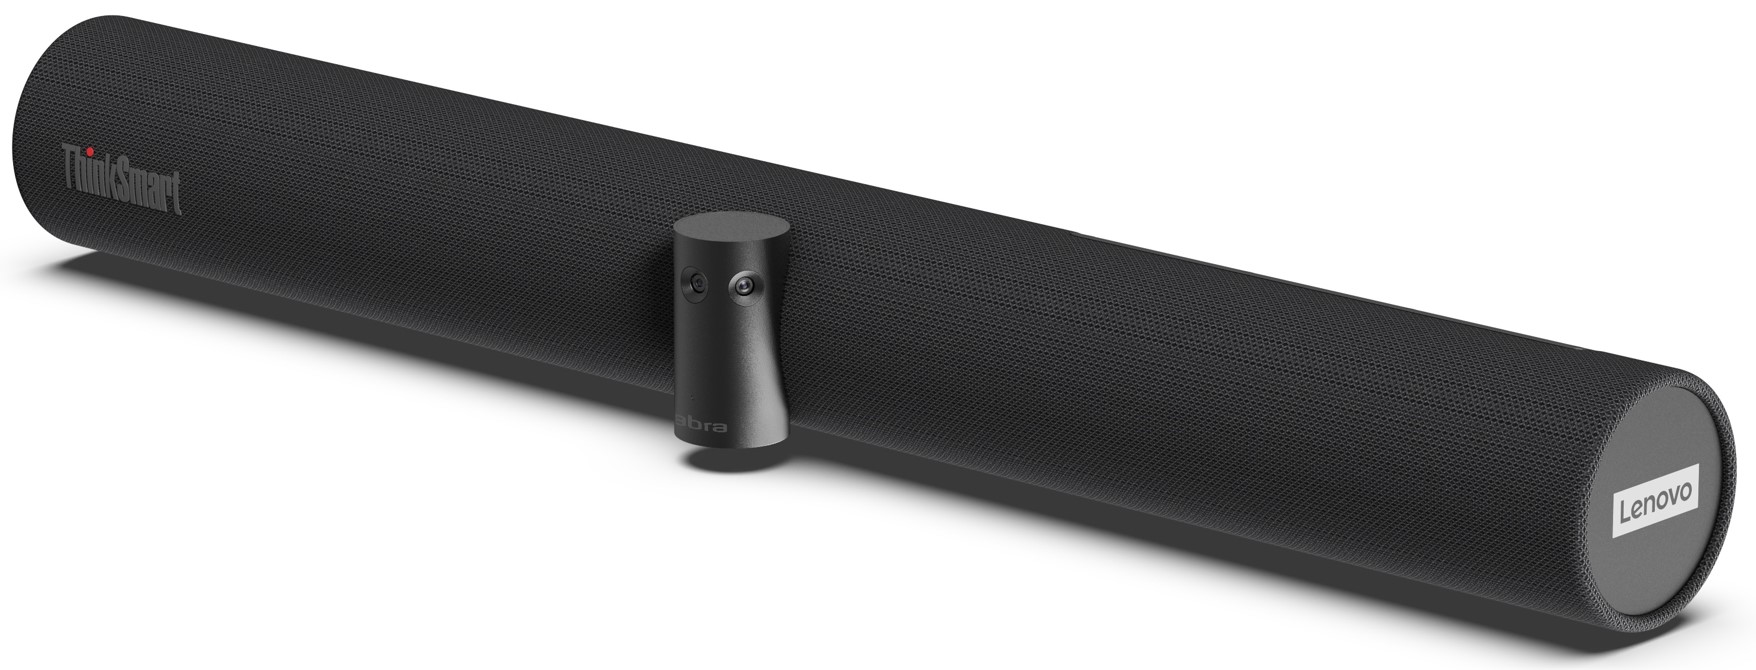
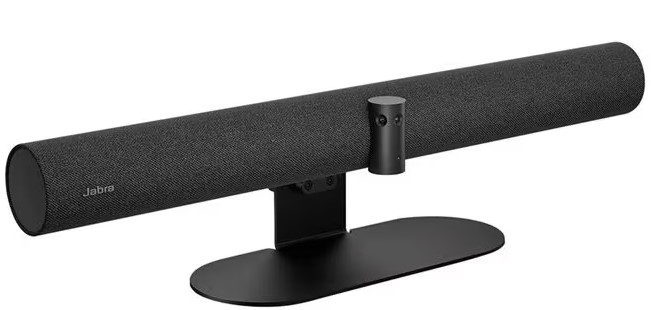
Whiteboard View Setup feature for the ThinkSmart Bar 180 and Jabra PanaCast 50 on the ThinkSmart Manager portal
Whiteboard View Setup for the ThinkSmart Bar 180 and Jabra PanaCast 50 on the ThinkSmart Manager portal
Whiteboard View Setup for the ThinkSmart Bar 180 and Jabra PanaCast 50 on the ThinkSmart Manager portal
Description
Describes Whiteboard View Setup feature within the ThinkSmart Manager portal for the ThinkSmart Bar 180 or Jabra PanaCast 50.
The Whiteboard View Setup feature allows to define a specific area of a whiteboard to be captured and shared during meetings. This ensures that participants can clearly see the content on the whiteboard, improving collaboration and communication.
For more information on ThinkSmart Manager portal, ThinkSmart Manager mobile app, and the ThinkSmart Manager Service (TSMS), visit: ThinkSmart Manager platform.
Applicable Systems
- ThinkSmart Bar 180 (12UE, 12UF) or a ThinkSmart Core Full Room Kits that include the ThinkSmart Bar 180
- Jabra PanaCast 50
Note: Some ThinkSmart Core Full Room Kits may include the ThinkSmart Bar 180. For more information, visit: ThinkSmart Core and ThinkSmart One Configurations
Prerequisites
Ensure the following settings are configured on the device before starting:
| Setting | Configuration |
| Field of View (FOV) | Set to maximum |
| Intelligent Zoom | Turned "off" |
| Virtual Director | Turned "off" |
| Zoom Level | Set to "0" |
| Live Preview | Turned "on" |
Solution
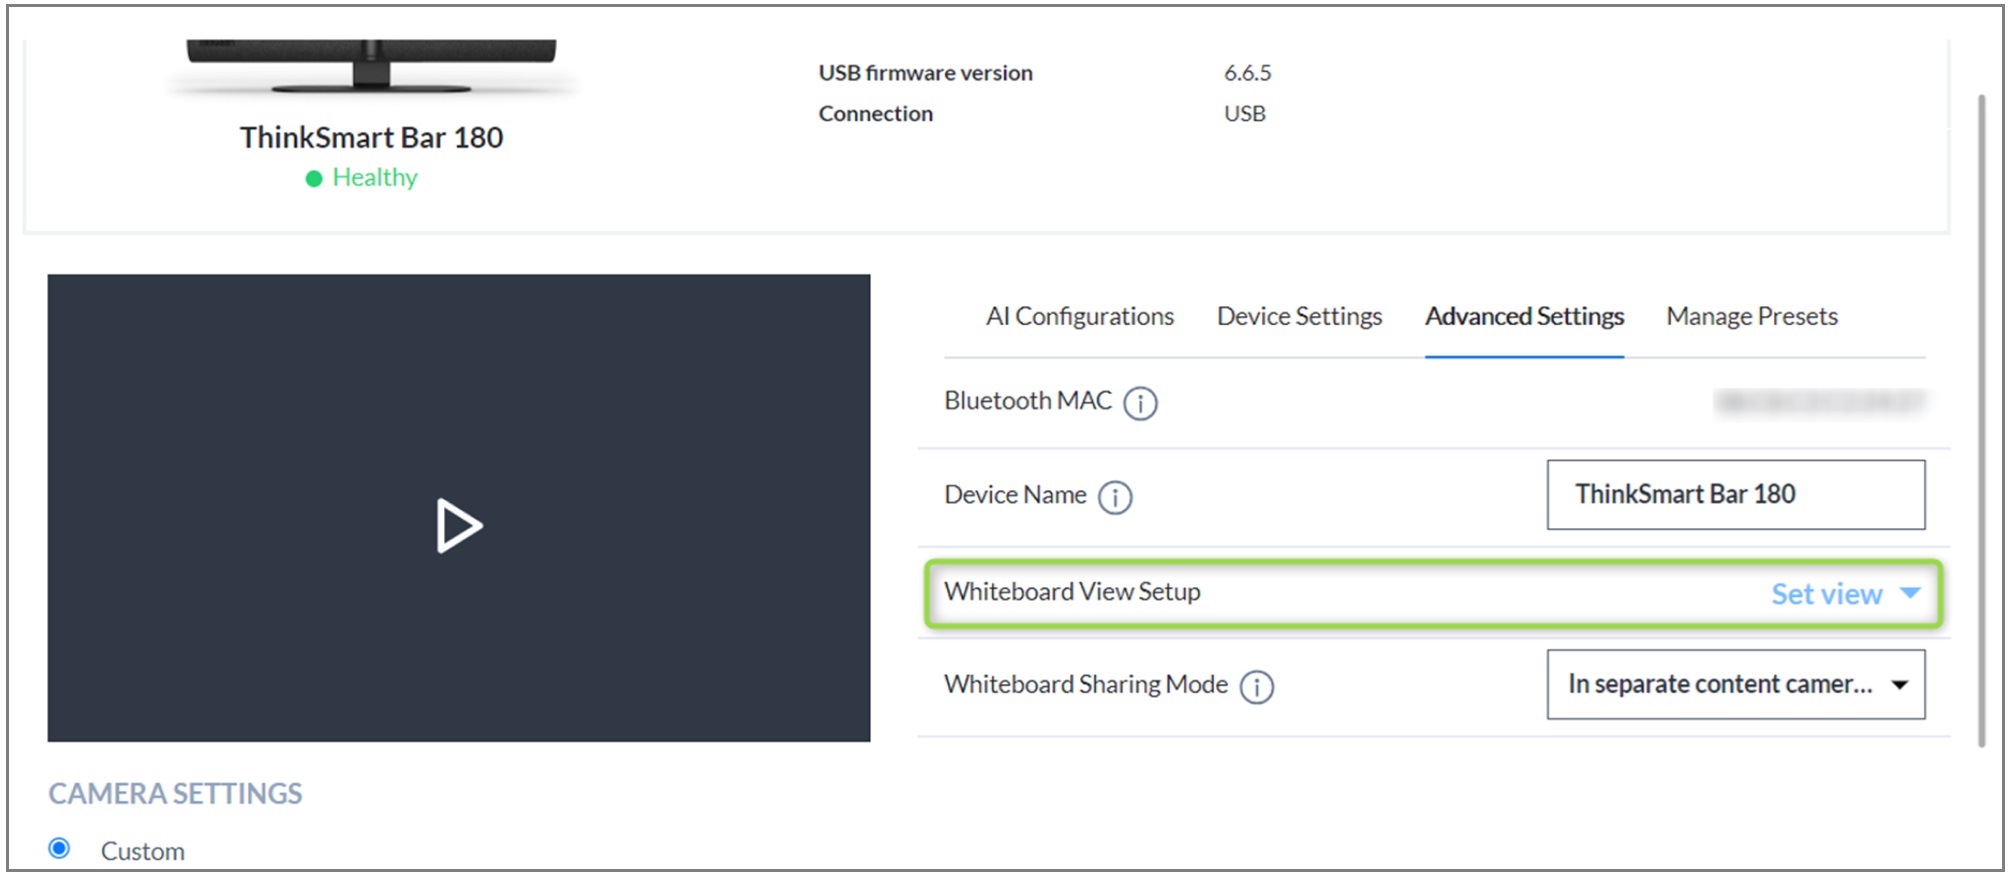
Accessing Whiteboard View Setup
- Open Advanced Settings.
- Navigate to the advanced setting of the device.
- Click the Set view button.
Initial Whiteboard View Setup
- Open Whiteboard View Setup.
- The live preview window expands.
- Other settings will be hidden
- A crop window appears in the center with default coordinates and size (150x100 pixels).
- Adjust the Crop Window.
- Select the coordinates within the center zone to define the whiteboard area.
- Only rectangular areas are allowed.
- Coordinate Fields:
- The coordinates are displayed in read-only mode.
- Ensure coordinates are valid.
- All coordinates must be within the same zone for the Save button to be enabled.
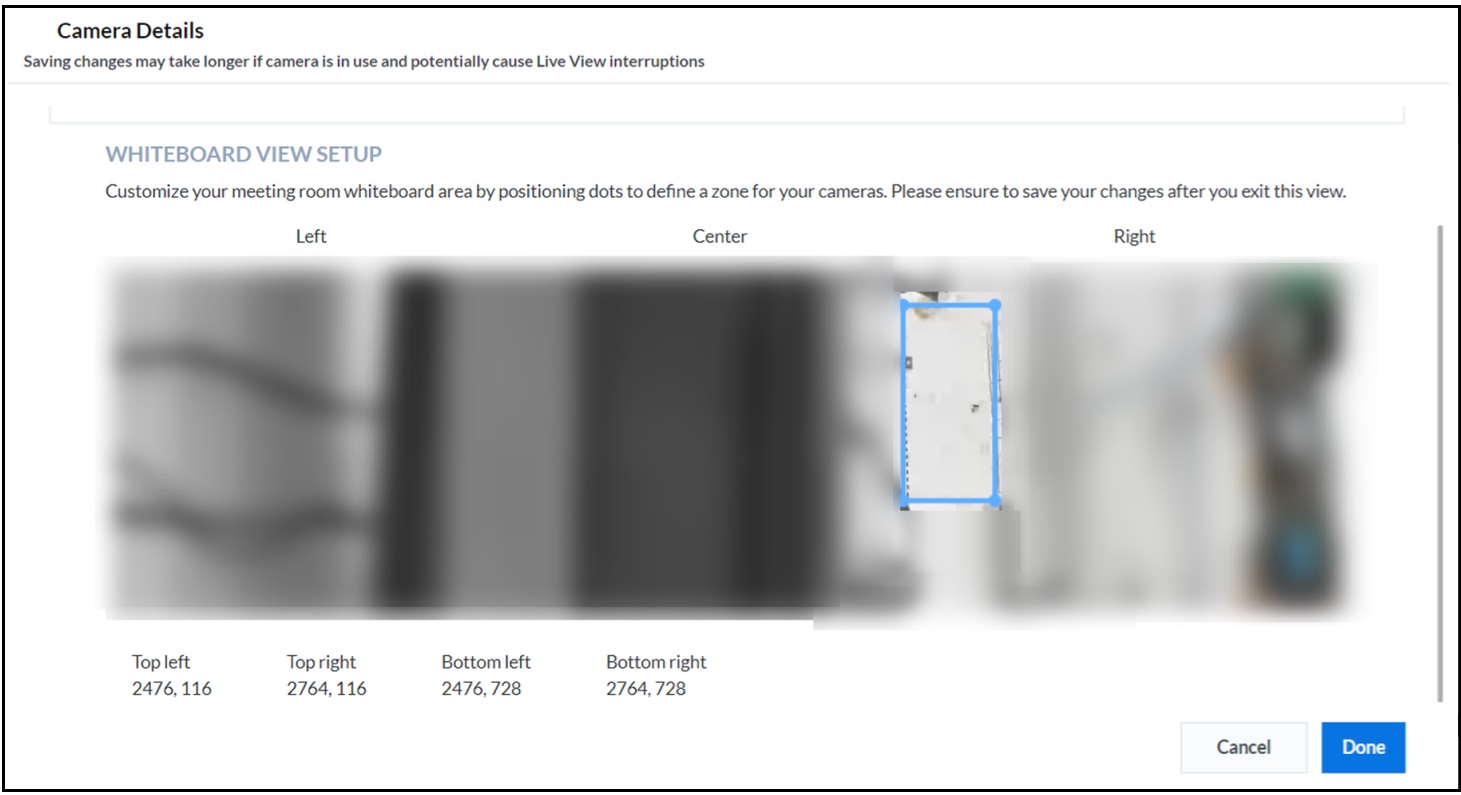
- All coordinates must be within the same zone for the Save button to be enabled.
Saving the Whiteboard Setup
- Save in Whiteboard Setup View:
- Click the Save button to fold the live preview and return to Advanced Settings.
- Final Save in Advanced Settings:
- Click the Save button in Advanced Settings to apply changes.
Note: If you only save within the Whiteboard Setup, the values are preserved but not applied.
- Click the Save button in Advanced Settings to apply changes.
Resetting the Whiteboard Setup
- Select Reset All.
- Click the Reset All button to clear whiteboard settings.
- The default view appears the next time Whiteboard Setup is opened.
Selecting Sharing Mode
- Select In main camera view.
Note: You will not be able to share the whiteboard area during the meeting, only full-screen view will be available
- Select In separate content camera view.
- Select either one of the following that you want to share:
- Only whiteboard area.
- Full screen camera view when clicking on Share option in Microsoft Teams Rooms (MTR) app.
- Select either one of the following that you want to share:
Note: If the whiteboard was not previously set up, the Sharing Mode dropdown is not displayed in the Advanced Settings tab.
Was this information helpful?
Your feedback helps to improve the overall experience
Document ID:HT512940
Original Publish Date:10/04/2021
Last Modified Date:02/25/2025

