How to downgrade from Windows 11 to Windows 10
Steps and instructions to downgrade from Windows 11 to Windows 10
Steps and instructions to downgrade from Windows 11 to Windows 10
There is a 10-day period where you can move back to Windows 10 while keeping files and data. After the 10 days, back up your data and do a clean install to move back to Windows 10.
Note: This information only applies to systems preloaded with Windows 10.
Create a backup
See Backup and Restore in Windows for more information.
Downgrade within 10 days
- Open Start and Settings.
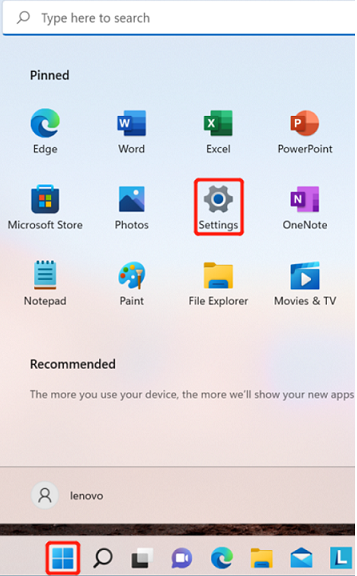
- Select System.
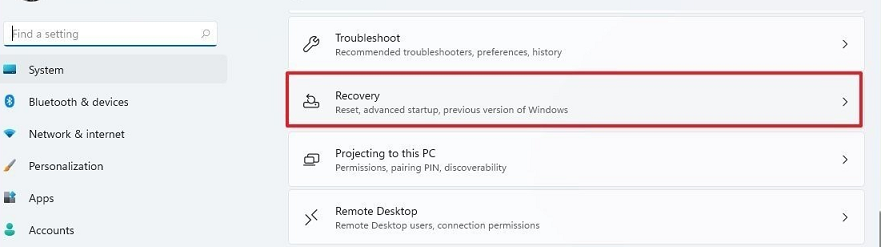
- Select the Recovery page on the right side.
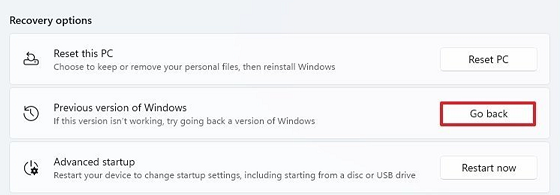
- Under the Recovery options section, in the Previous version of Windows settings, select the Go back button.
- Select an available reason.
- Select the Next button.
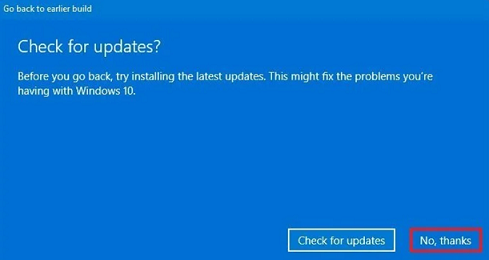
- Select the No, thanks button.
- Select the Next button.
- Select the Next button again.
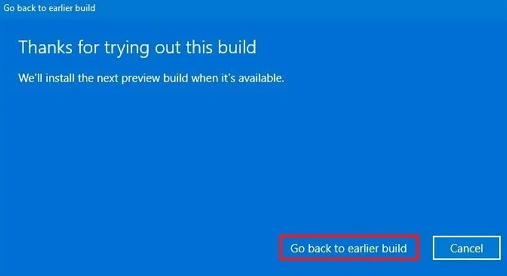
- Select the Go back to earlier build button.
- After the steps are complete, the setup process will revert the system back to the previous version of the operating system.
Downgrade after 10 days
To downgrade to Windows 10 use the following steps:
- Open the Windows 10 download page. Download Windows 10.
- Select the Download tool now button under the Create Windows 10 install media section.
- Double-click the MediaCreationTool21H1.exe file to run the setup.
- Select the Accept button.
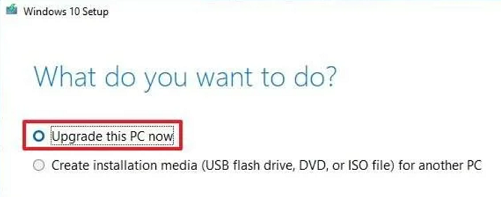
- Select the Upgrade this PC now option.
- Select the Next button.
- Select the Accept button.
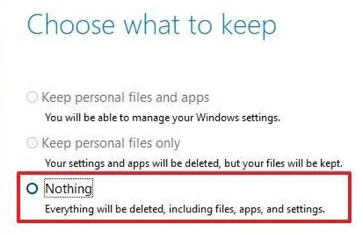
- Select the Nothing option for a clean reinstallation.
- Select the Next button.
- Select the Install button.
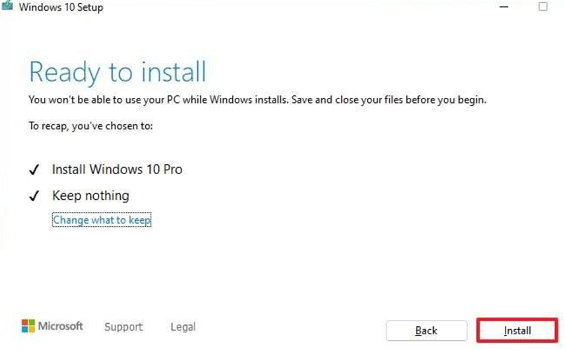
- After the process is complete, Windows 10 will be restored as a clean installation. Go through the out-of-box experience (OOBE) to create a new user account and configure preferences. Restore any personal files from a previous backup.
Another option is to reinstall from USB media. See How to restore factory settings - idea laptops/desktops/tablets for more information.
Related Articles
此信息是否对您有帮助?
您的反馈有助于改善整体体验
文件ID:HT512969
初始发布日期:10/12/2021
最近修改日期:12/17/2024

