Freezing or slow performance issues - Windows 10, 11
Steps and instructions to resolve freezing or slow performance issues - Windows 10, 11
Steps and instructions to resolve freezing or slow performance issues - Windows 10, 11
Symptom
A frozen or slow computer can happen for a number of reasons.
- The system may be slow or freeze if the temp directory has too many files.
- If multiple programs are running in the background, chances are your computer doesn't have enough memory or computing power to support all of them.
- If your computer crashes a lot, you may be running out of memory.
- Computer viruses can also be a cause of computer crashes.
- Software errors may also cause the computer to crash. It is recommended that you download software from the official website and keep them up to date.
- You will notice a slowdown and eventually a crash if your computer is operating at a high temperature.
- A slow or faulty computer may also be caused by an old system.
To learn more about fixing a computer that freezes, crashes, or operates slowly, please refer to Advanced troubleshooting for Windows freezes for additional solutions.
Solution
End some programs
If you run too many programs at once, your computer will be slower.
- Search to open Task Manager.

- Click the Memory column header. This will re-sort the list and display the programs that are using the most RAM.
- Select the program that you are not using and that uses a lot of memory and click End Task. Note: Ending a program may cause unexpected issues.
Free up Disk Space on C Drive
Windows will continue to freeze if your C drive is full because that is where the system files are kept.
Method 1: Uninstall desktop apps you no longer need
- Open Programs and Features by clicking the Start button, clicking Control Panel, clicking Programs, and then clicking Programs and Features.
- Select a program, and then click Uninstall.
Method 2: Use Disk Cleanup
- Open Disk Cleanup by clicking the Start button . In the search box, type Disk Cleanup, and then, in the list of results, select Disk Cleanup.
- If prompted, select the drive that you want to clean up, and then select OK.
- In the Disk Cleanup dialog box in the Description section, select Clean up system files.
- If prompted, select the drive that you want to clean up, and then select OK.
- In the Disk Cleanup dialog box, on the Disk Cleanup tab, select the check boxes for the file types that you want to delete, and then select OK. To remove data from a previous installation of Windows, select the Previous Windows installation(s) check box.
- In the message that appears, select Delete files.
- Go back to Computer in File Explorer, select the drive you cleaned up, and then select Refresh. If you need to free more space (the drive is still marked red), go to the next tip.
- For more information, please refer toTips to free up drive space
Clean the Temp Folder
Use the following steps to clear the temp folder:
Note: Make sure all applications are closed before using these steps.
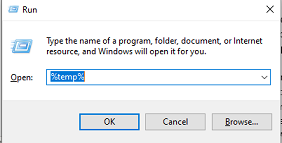
- Press keys Win + R, type %temp% and click OK.
- Inside the temp folder, click on the first file, keep the SHIFT key pressed, click on the last file, then press the DELETE key to delete everything (or use Ctrl + A to select all the files). Note: Some files will not be deleted and an error will appear stating that they cannot be deleted. If this happens, just ignore these files.
Close extra browser tabs
Close extra browser tabs. Having too many browser tabs can slow down your system.
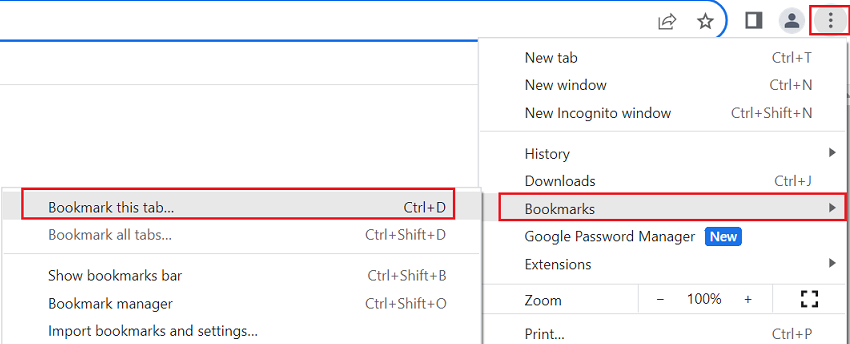
Create a bookmark if you want to save a page location, then close the browser tab. In Google Chrome, select the settings icon, Bookmarks, and Bookmark this tab. For more information about creating bookmarks, see How to create bookmarks in a browser.
Check for Malware
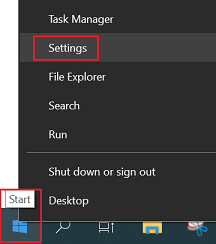
- Search to open Settings.
- Windows 10: Go to Update & security > Windows Security. Windows 11: Privacy & security > Windows Security.

- Click Virus & threat protection and turn on the protection.
Update Drivers to the latest version
Use any of the following Lenovo tools to update your drivers to the latest version may help resolve this issue:
Lenovo Vantage


- Lenovo Vantage: Using your PC just got easier.
Update drivers and software with Lenovo Vantage by choosing -> Dashboard -> System Update -> Check for System Updates. - [Video] How to get the latest drivers and BIOS with Lenovo Vantage
Lenovo System Update

- Lenovo System Update supports ThinkPad, ThinkCentre, ThinkStation and Lenovo V, B, K, E Series laptops and is used to install and update Lenovo drivers, BIOS and applications.
Update Through Website
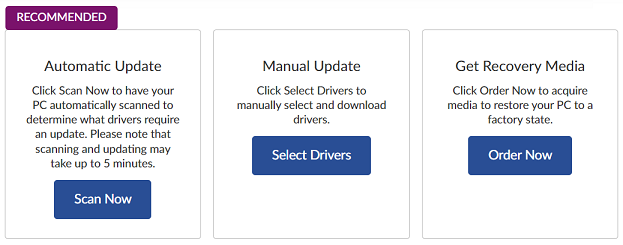
- Visit our support home page Lenovo Support Site. Select your product, click Drivers & Software, then select Scan Now under Automatic Update.

- Note: Lenovo recommends running Windows Update: FAQ before using Lenovo System Update.
Perform Windows Update
- Go to the Start menu (Windows icon) and Settings.
- Select Update and Security -> Windows Update -> Check for updates. Click this option and install any updates that are found.

Perform System Restore (when a computer does not turn on or work properly)
System Restore is a feature that allows you to revert your computer’s state to a previous point in time. If an install failure or data corruption occurs, System Restore can help you return a system to working condition without having to reinstall the operating system. Follow the guidelines below to perform System Restore.
Prior to making any changes, see First steps for solving computer problems for additional solutions.
For guidance on restoring/to re-install your operating system, please refer to How to restore the system to a system restore point
If your computer does not turn on or work properly, you may perform a System Restore using the NOVO button. Note: Only certain systems have a Novo button. Check the User Manual for details.
The Novo button is either a small button or pinhole with a backwards arrow icon. This button comes with Lenovo Onekey recovery software and it allows you to quickly restore the operating system. (Note: The Novo button may be located at different places on different models. If you cannot find it, see the User Guide for a detailed reference. Please go to Lenovo official support website, and search to find your model's user guide.) In the Novo button menu, click System Recovery > Troubleshoot > Reset this PC > Keep my files, then follow the on-screen guide to reset or restore the system. (Note: Please make sure your device is connected to the charger as it may take up to a few hours to complete and your device needs to have power the entire time.)
If your device does not have a Novo Button, hold down the power button for 10 seconds to turn it off. Press the power button again to turn it on. On the first sign that Windows has started hold down the power button for 10 seconds to turn off your device again. Repeat this step and after two consecutive failed boot attempts, the Windows recovery environment starts automatically. Choose Troubleshoot > Reset this PC > Keep my files, then follow the on-screen guide to reset or restore the system.
Related Articles
Tilbakemeldingen din bidrar til å forbedre den generelle opplevelsen

