How to upgrade a Lenovo switch running ENOS using the Web GUI
How to upgrade a Lenovo switch running ENOS using the Web GUI
How to upgrade a Lenovo switch running ENOS using the Web GUI
Description
This article introduces the procedure used to upgrade a Lenovo switch running ENOS using the Web GUI.
Solution
- Log in to the switch.
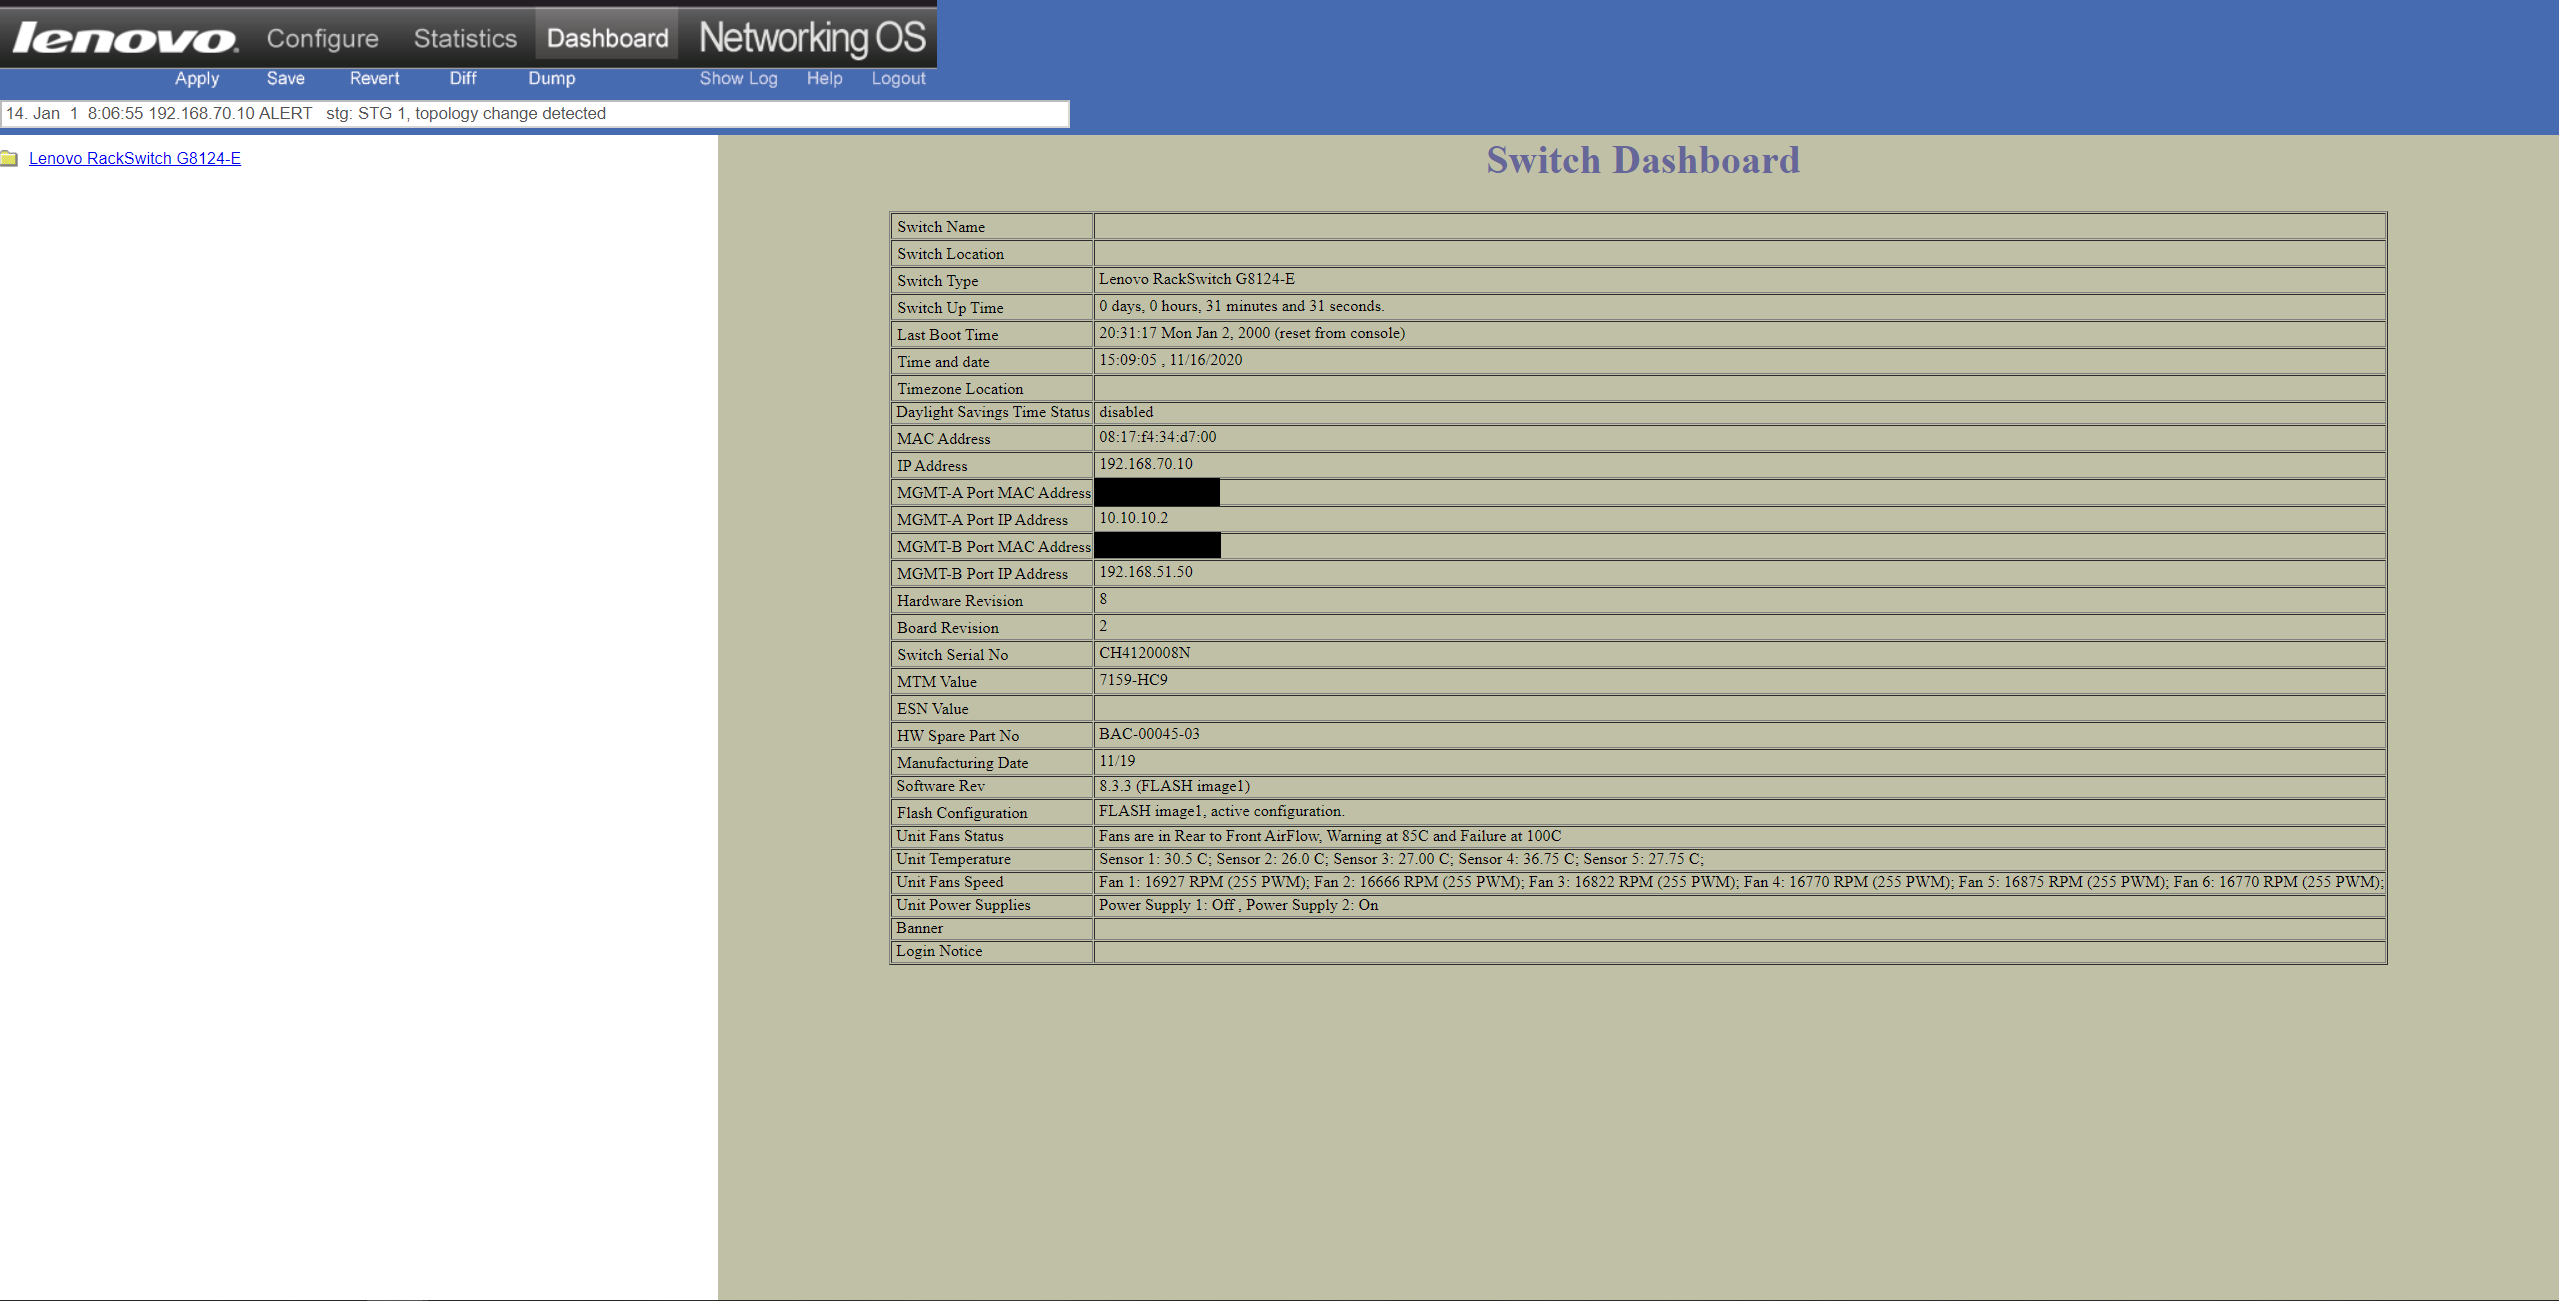
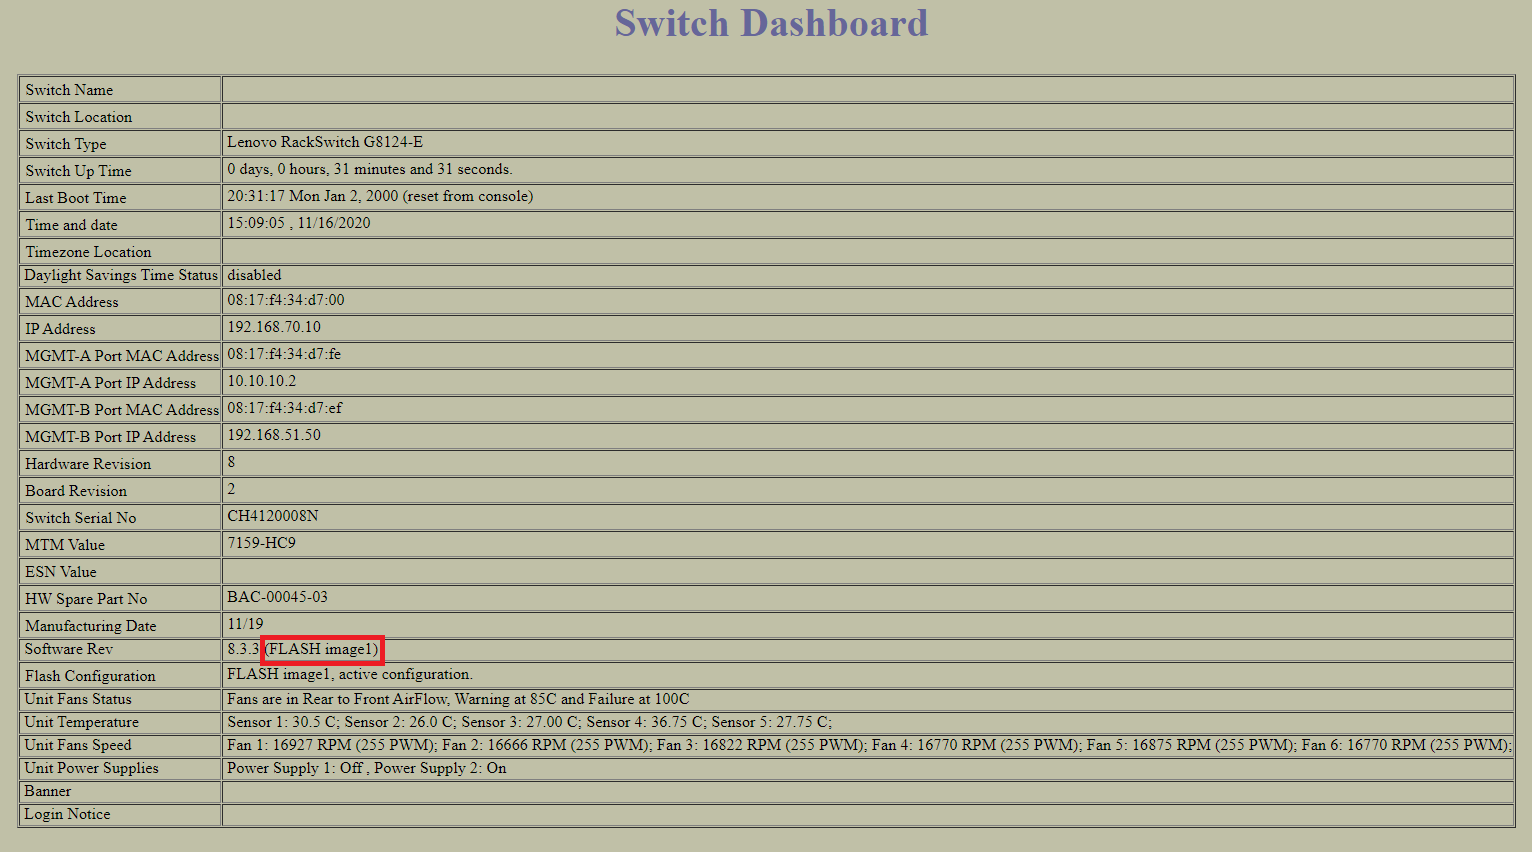
- On the Switch Dashboard page, determine what image the software is currently running on.
Note: The boot image is image 1.
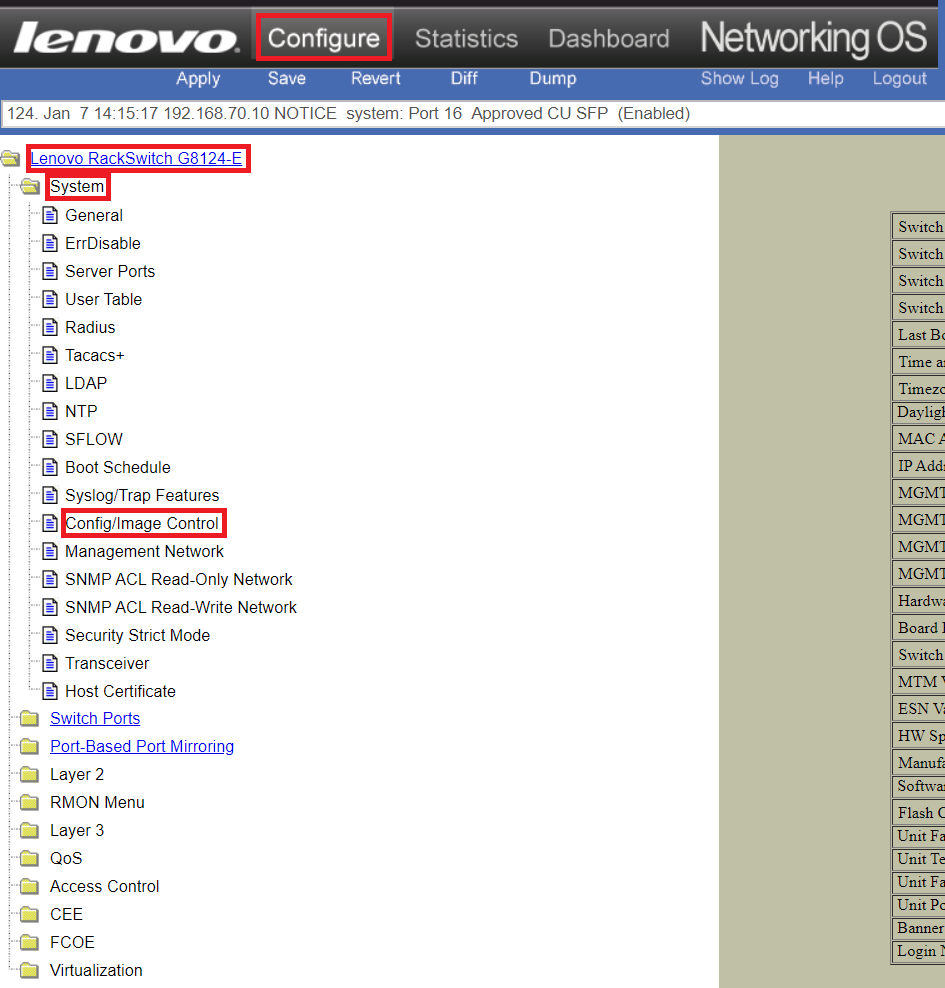
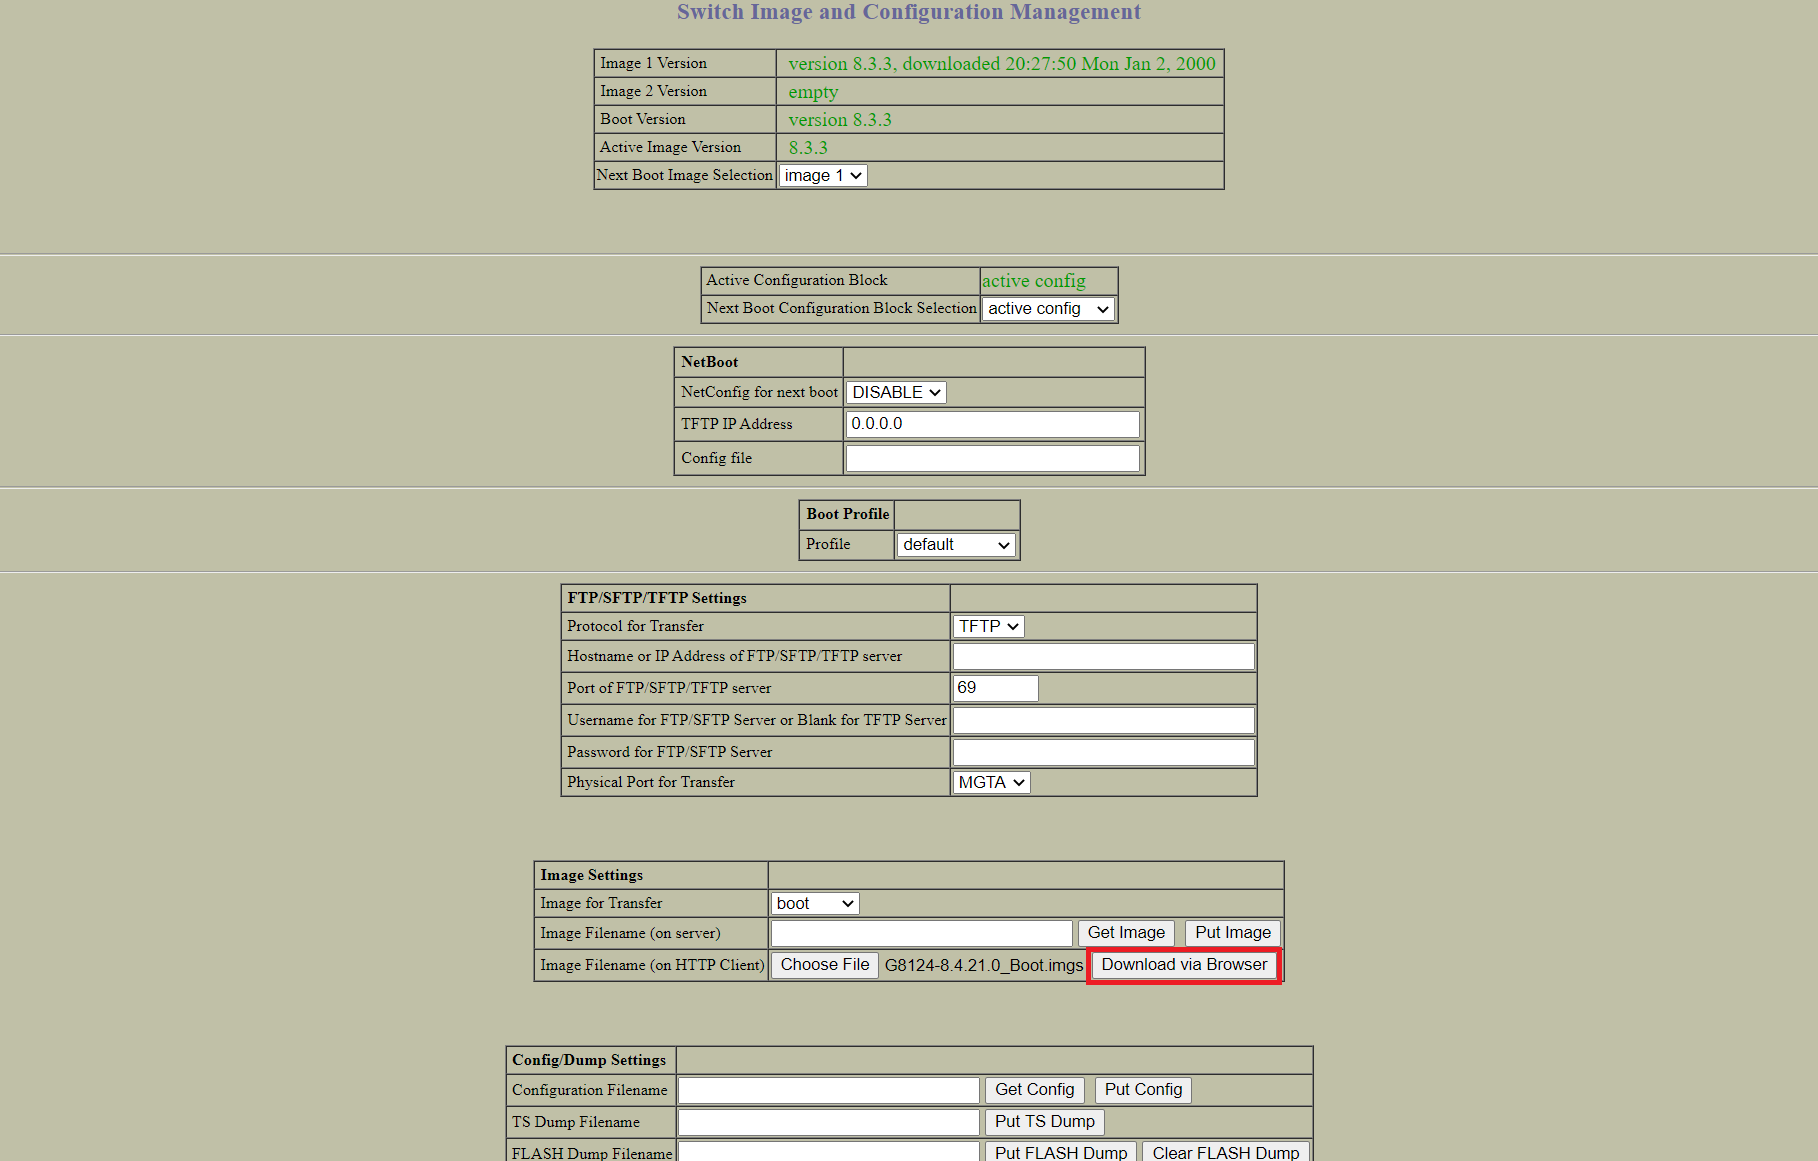
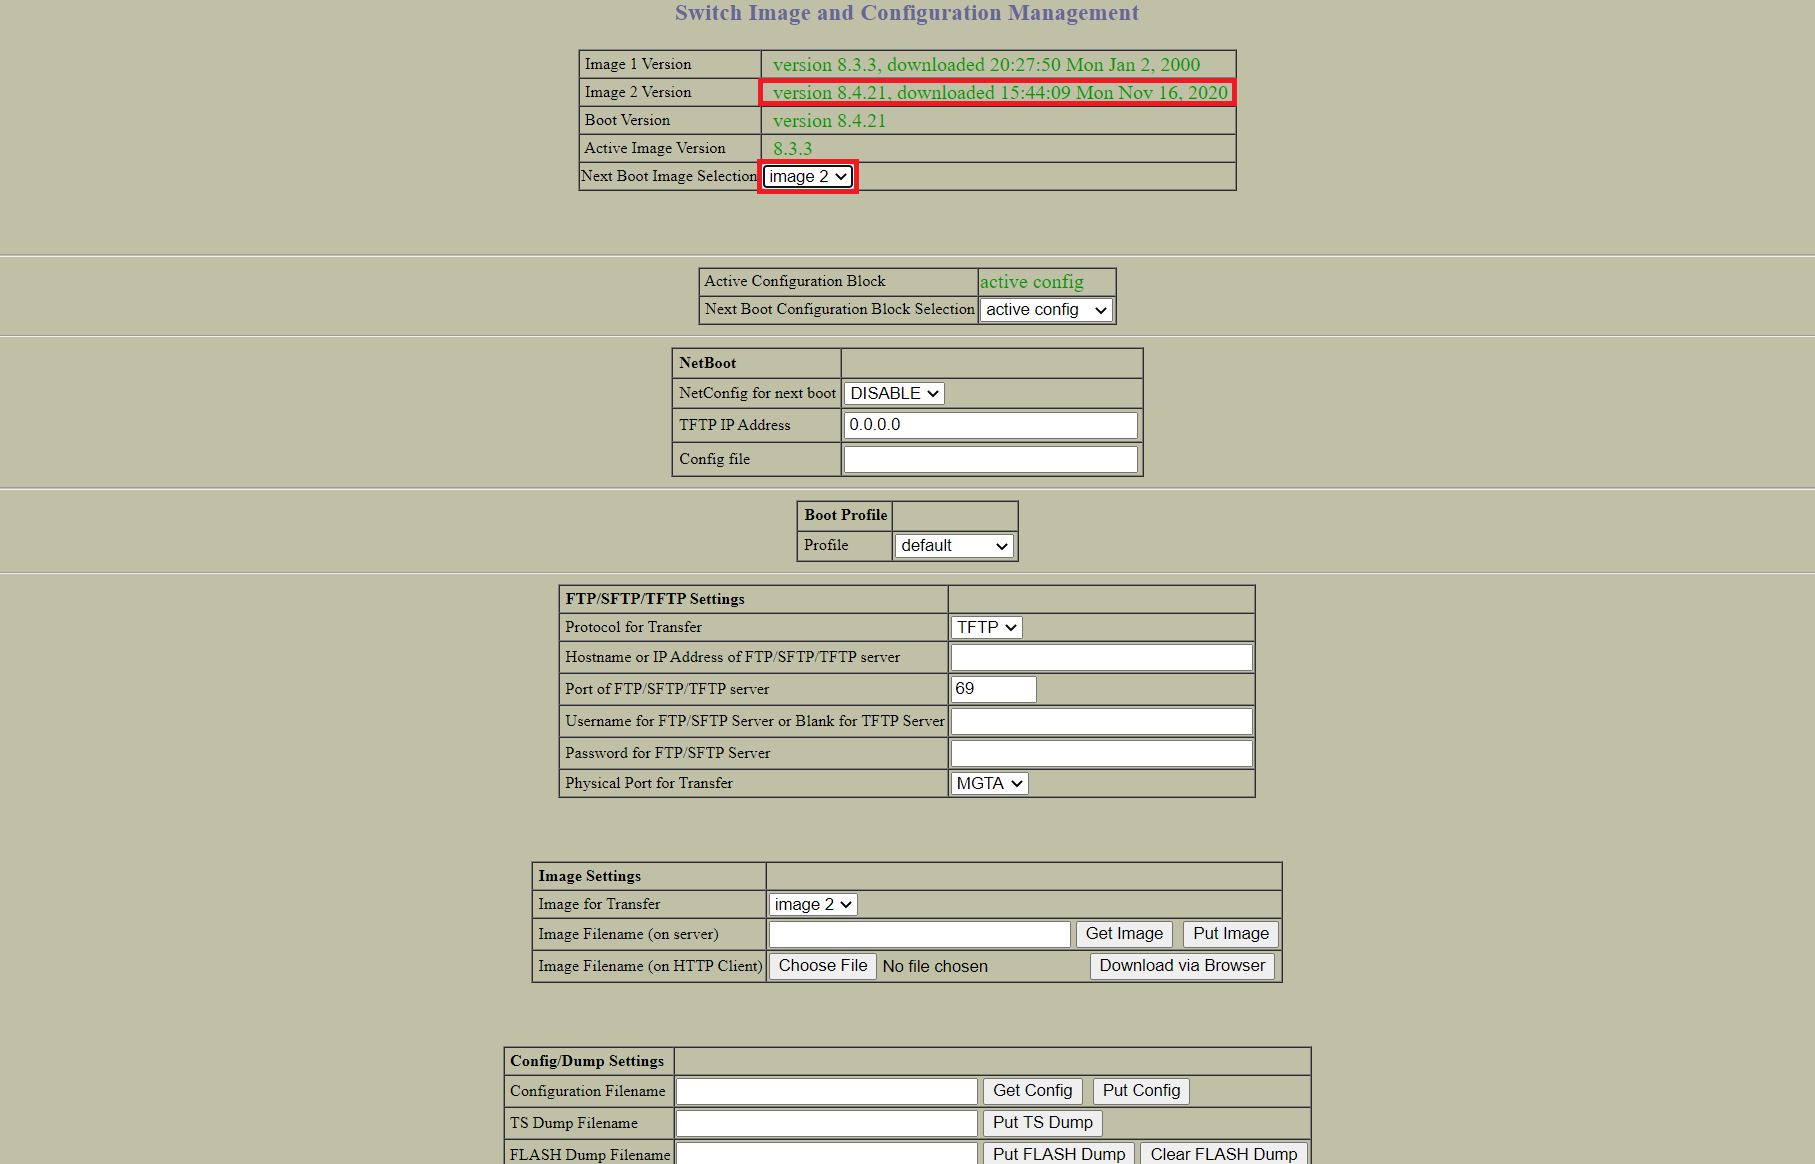
- Select Configure from the top menu panel. Click the folder link and select the System folder. Click Config/Image Control.
- In the Image Settings field, change the Image for Transfer to boot. Click Choose File.

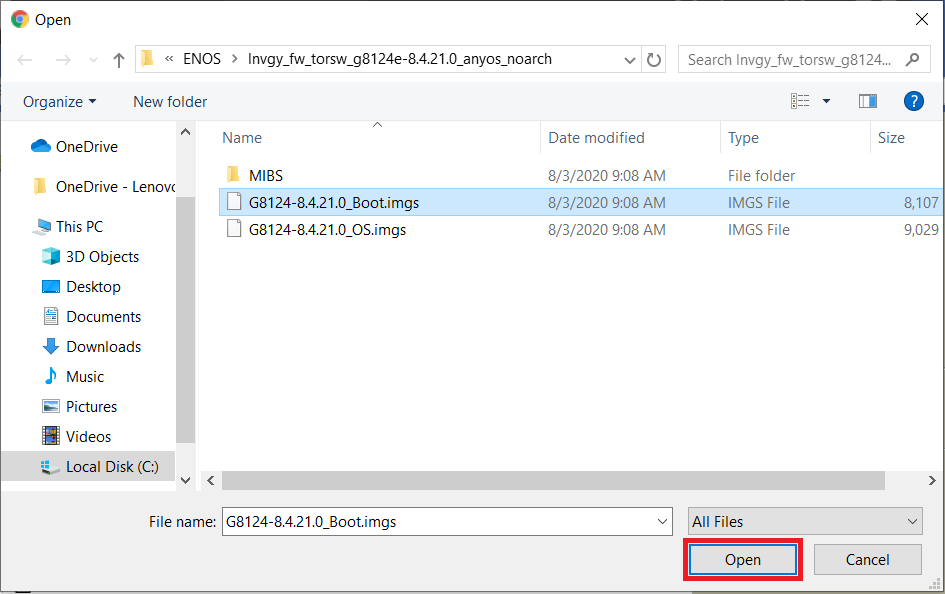
- Select the BOOT IMGS upgrade file and click Open.
- Click Download via Browser.
- When the transfer is complete, the screen will reset and the new boot image will be displayed.
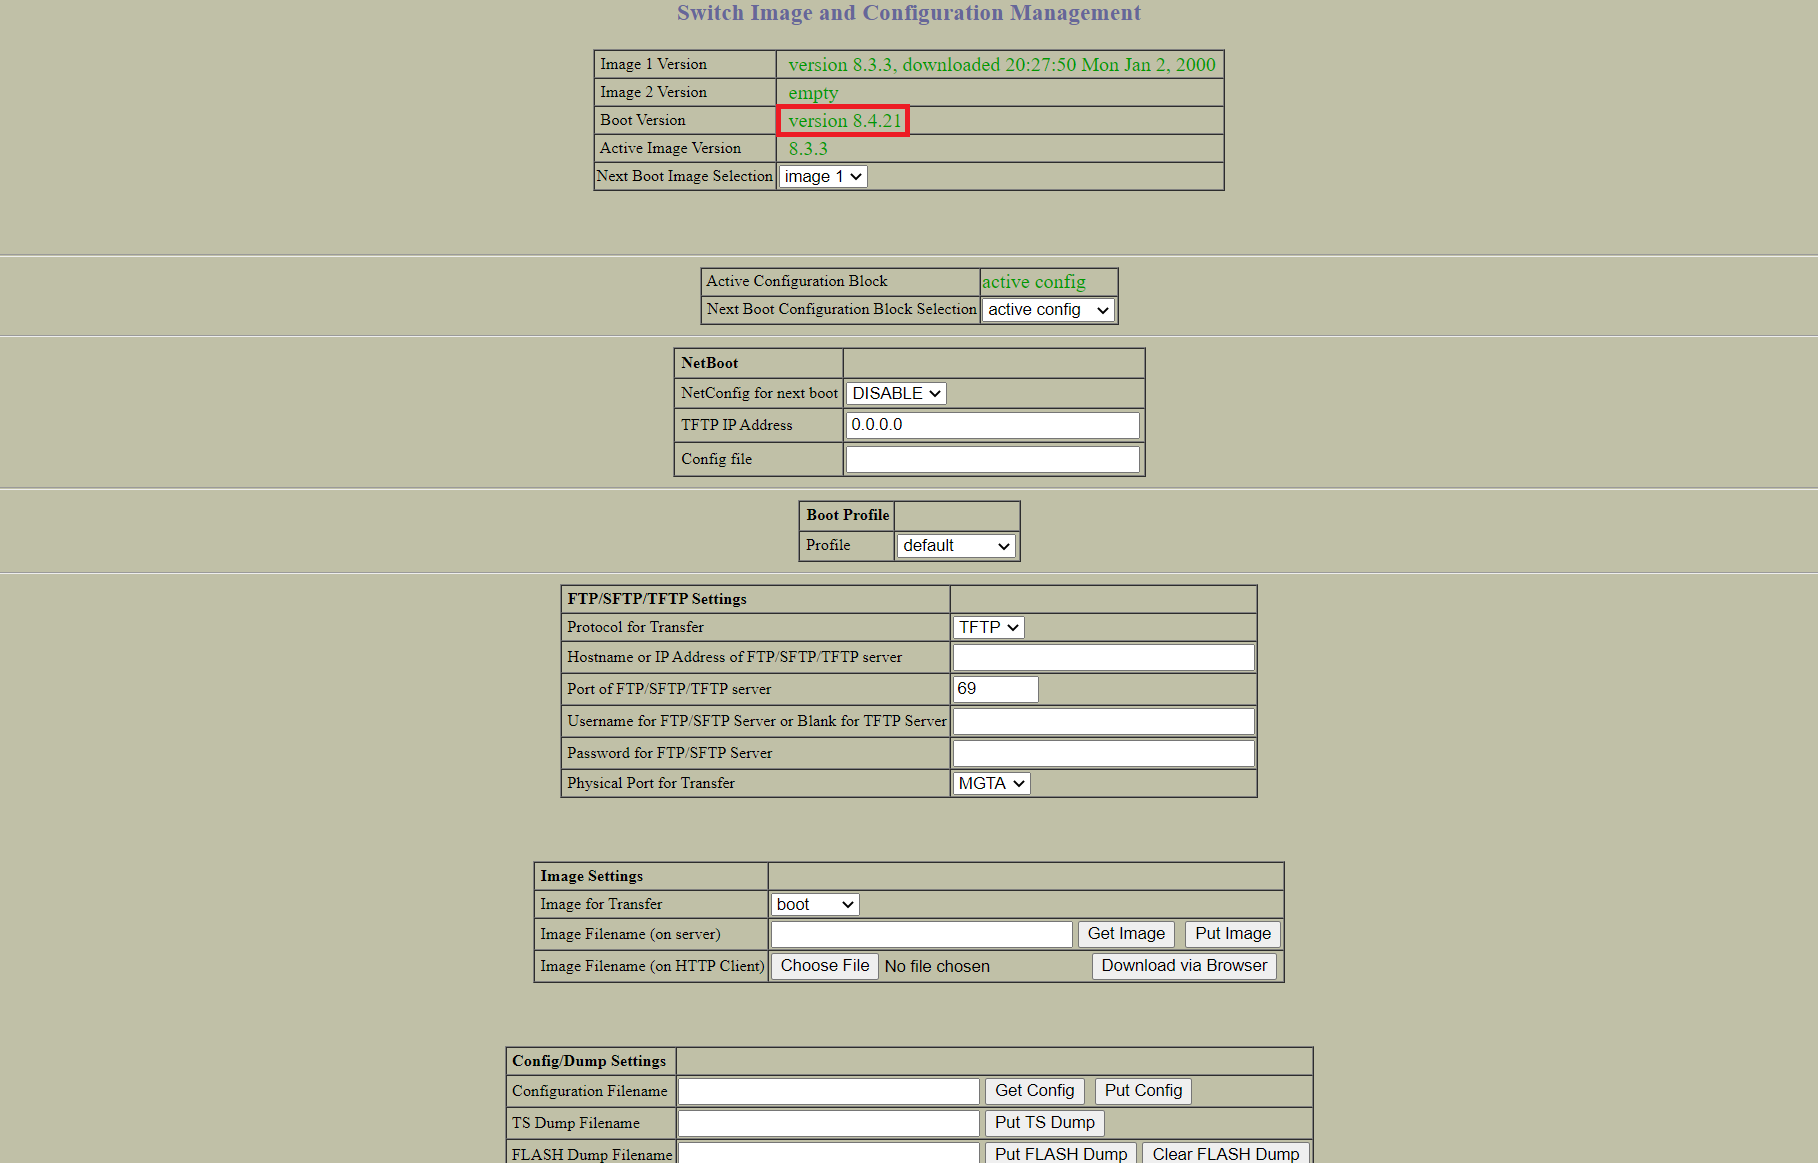
- In the Image Settings field, select the Image for Transfer option that is not currently running. Click Choose File.
Note: The boot image is Image 1, so Image2 should be selected.
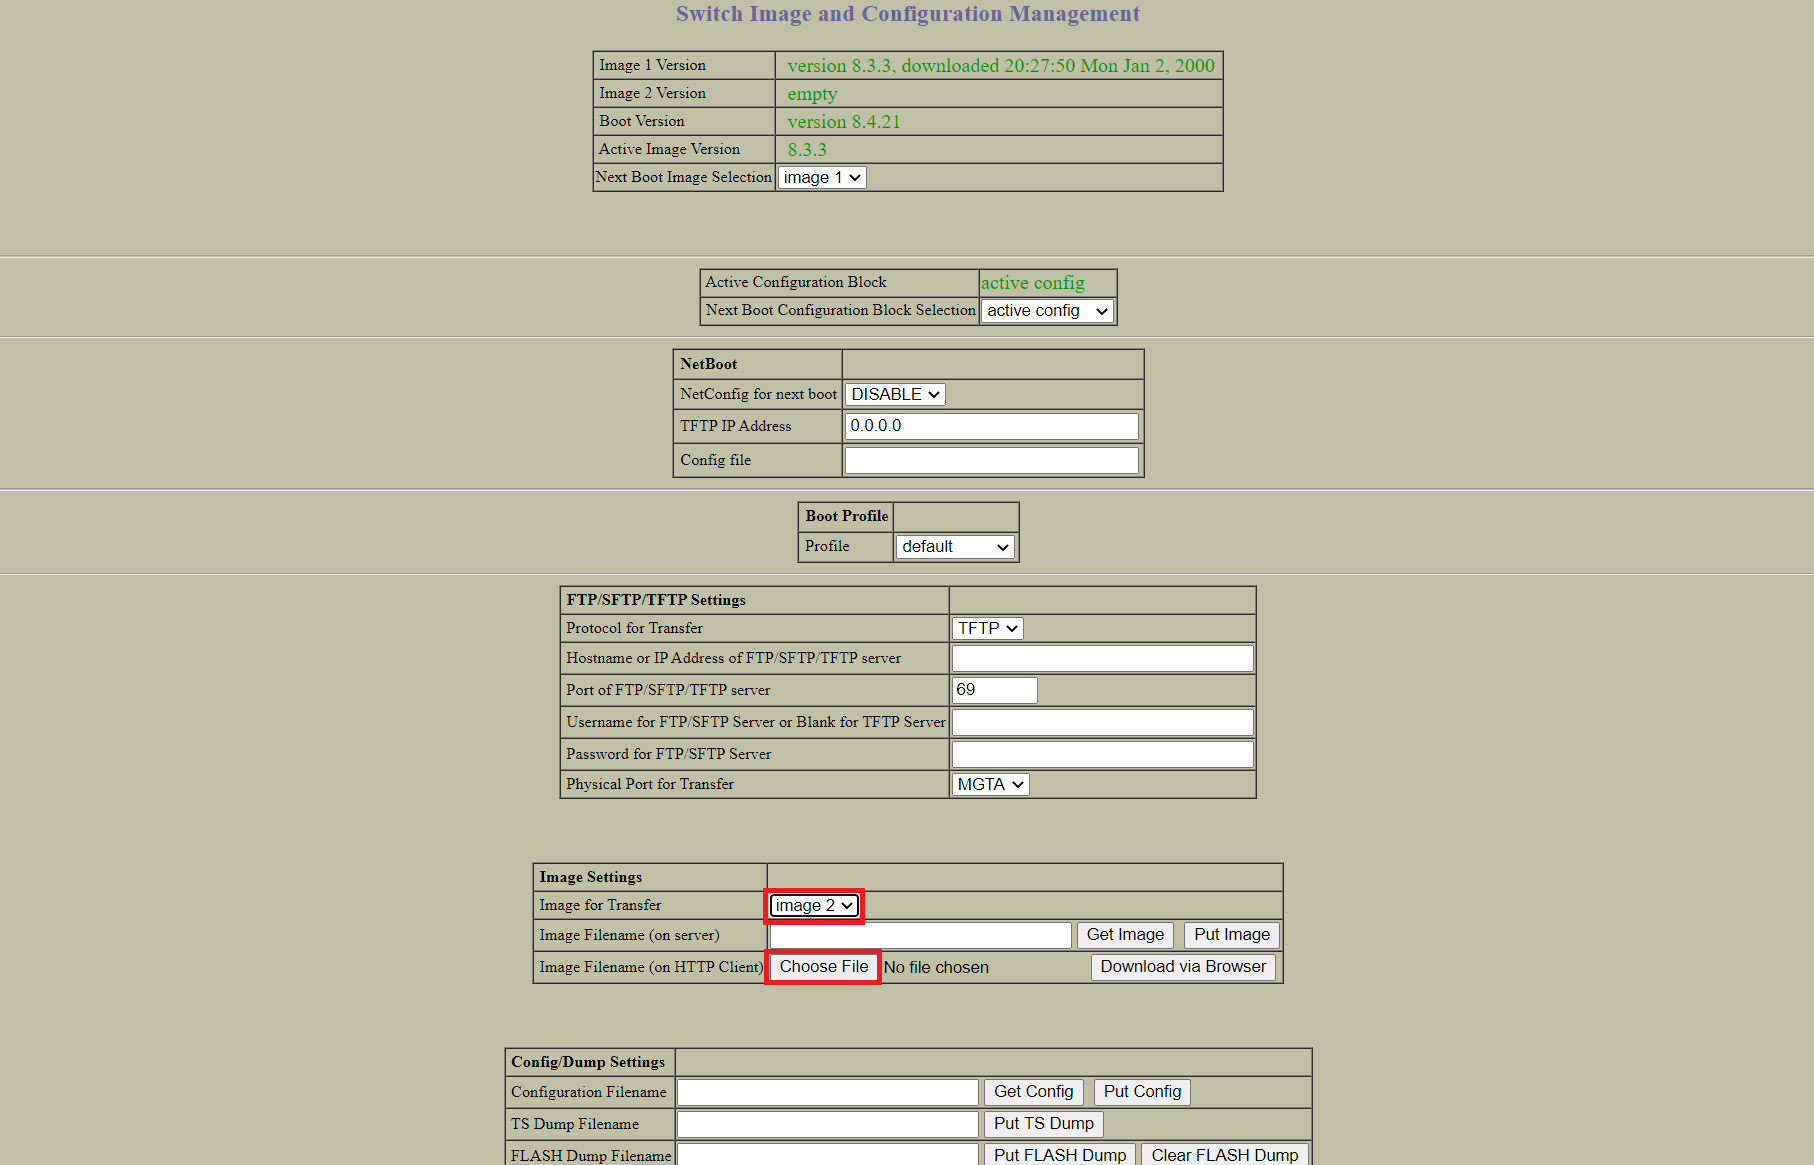
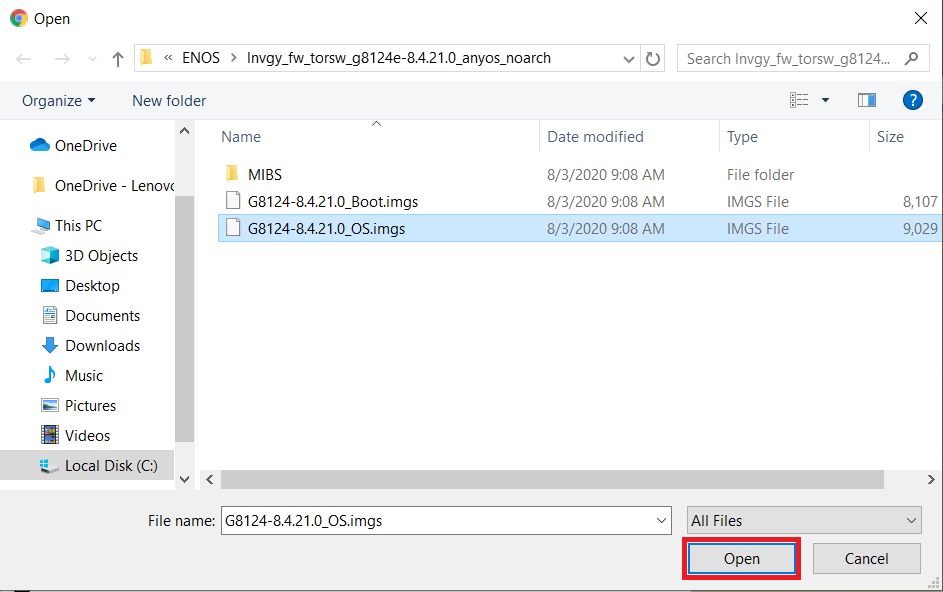
- Select the OS IMGS upgrade file and click Open.
- Click Download via Browser.

- When the transfer is complete, the screen will reset and the OS image will be displayed with a timestamp. Change the Next Boot Image Selection to the new Image#.
Note: Image2 should be selected.
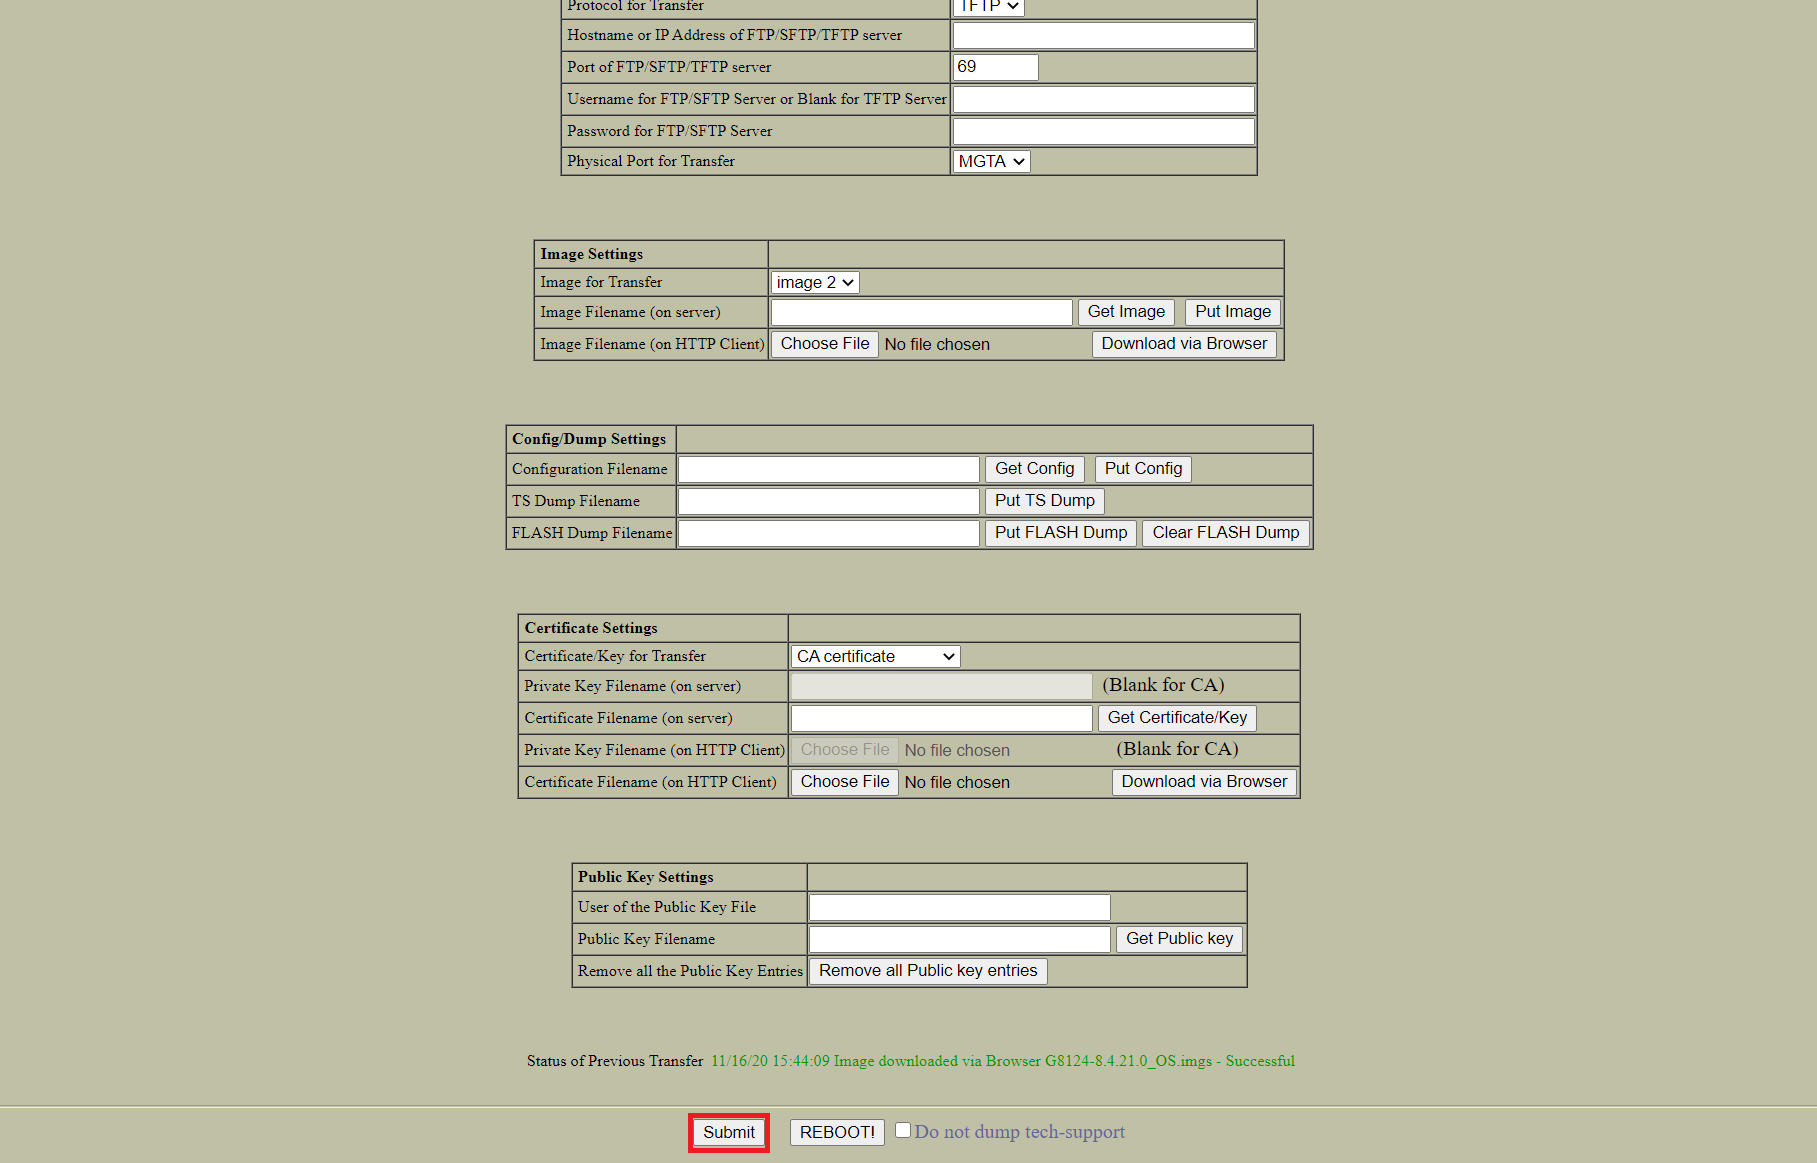
- Scroll to the bottom, and then click Submit.
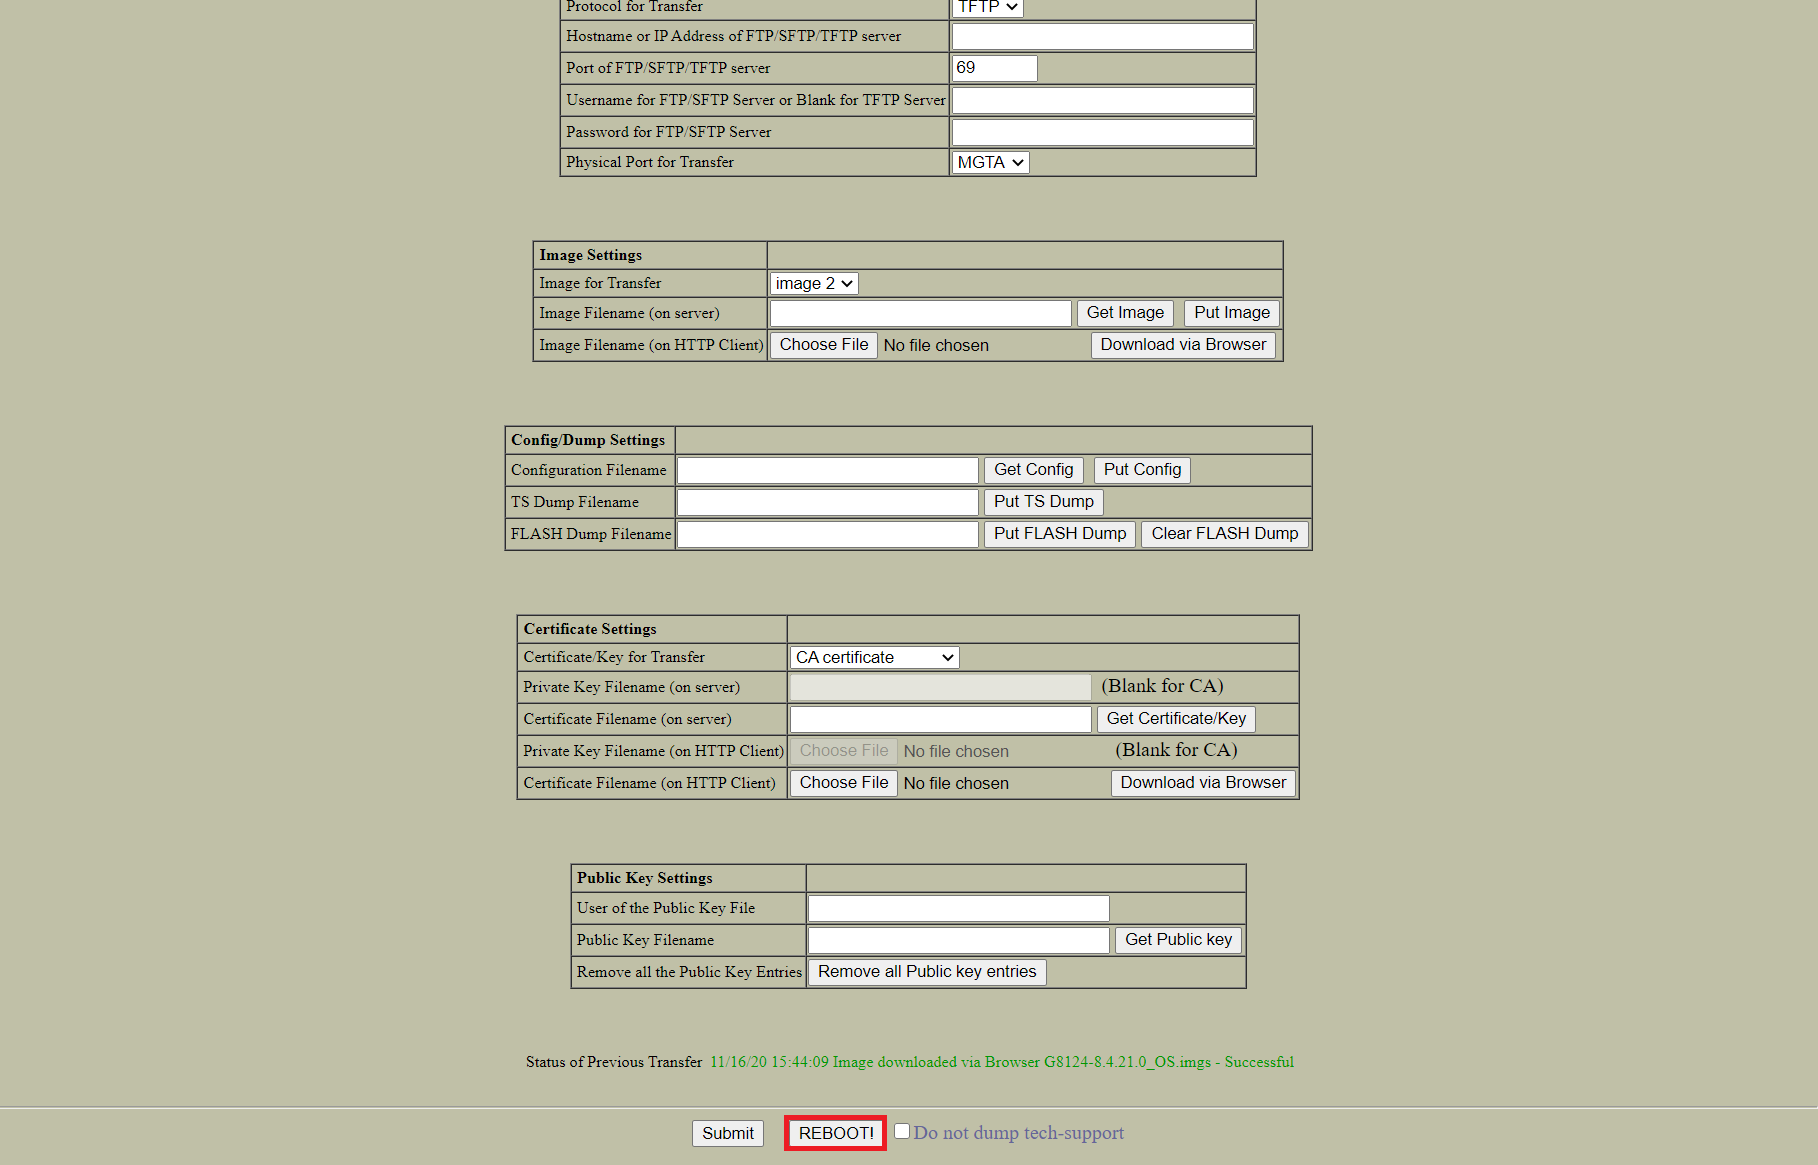
- Scroll to the bottom, and then click REBOOT!.
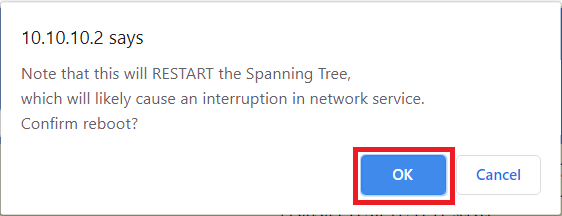
- A pop-up window with a warning about a possible network interruption will be displayed. Click OK.
- A new window with another warning about a possible network interruption will be displayed. Click Yes.

Additional Resources
מזהה מסמך:HT511479
תאריך פרסום מקורי:11/18/2020
תאריך עדכון אחרון:09/16/2024

