Troubleshooting No Power Issues
Steps and instructions for troubleshooting No Power Issues: Laptop Won't Turn On
Steps and instructions for troubleshooting No Power Issues: Laptop Won't Turn On
Symptom
This document provides tips for troubleshooting power issues when the system fails to power on. If the system makes a sound (such as a spinning fan), the issue may be display related.
Applicable Brands
- ThinkPad
- ideapad
Solution
Use the following steps to troubleshoot this issue:
How To - Laptop Doesn’t Power On
Step 1: Try recharging the battery
Plug the power cable directly in to the wall outlet. If the system does not power on, allow it to charge for at least 5 to 10 minutes. Some batteries are designed to operate when charged to a certain level (10% or more).
- When recharging the battery, do not connect to the power source via power strips, surge protectors, or docking stations. Make sure the wall outlet you are using works normally with other devices.
- Connect the power cord directly to a wall outlet.
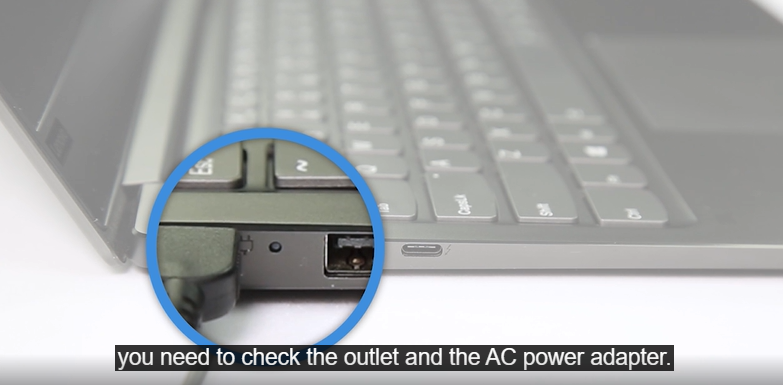
Step 2: Check the power source, power adapter, and power cable
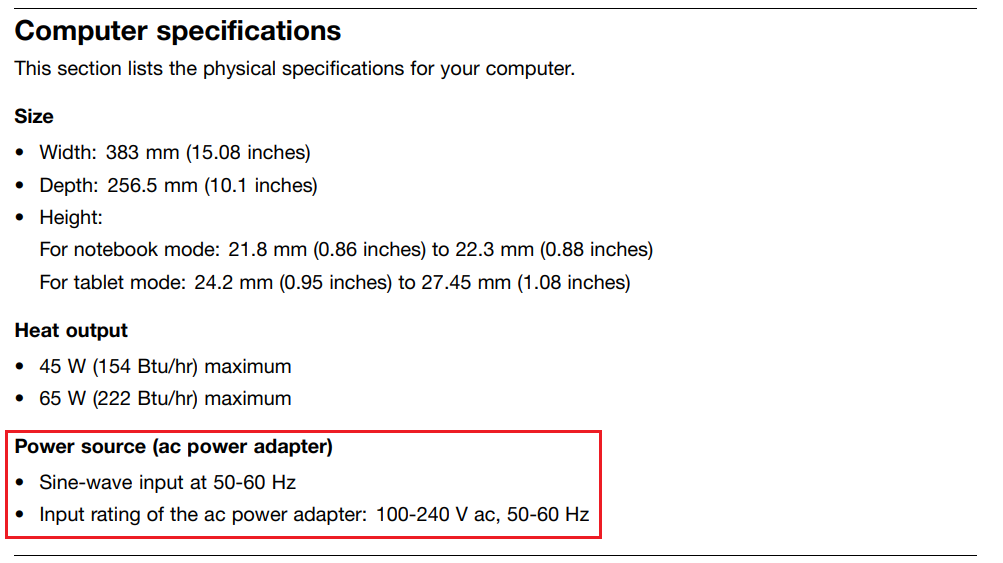
- Check the labels on the AC power adapter and make sure the correct adapter for this model is used. Go to Lenovo PC support website to download the user guide and search supported parts for your system. Refer to Additional Information below for more details.
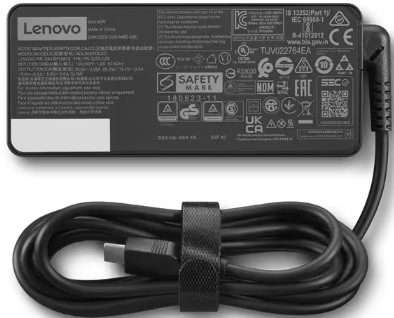
- Plug the AC adapter into the computer and a power outlet. If the computer has a power indicator light, check if the light comes on. If the charging light does not come on, try another Lenovo Approved AC adapter.
- Do not use a power bar.
- Make sure the cable is securely plugged in.
- Try a different cable.
- Try a different outlet.
- Does the system make any sound (for example, fan noise)? If so, check the light settings and increase the brightness level. If not, proceed to the next step.
Step 3: If the PC does not power on, perform a power drain
- Unplug the power and disconnect external devices.
- Remove the battery if the battery is removable.
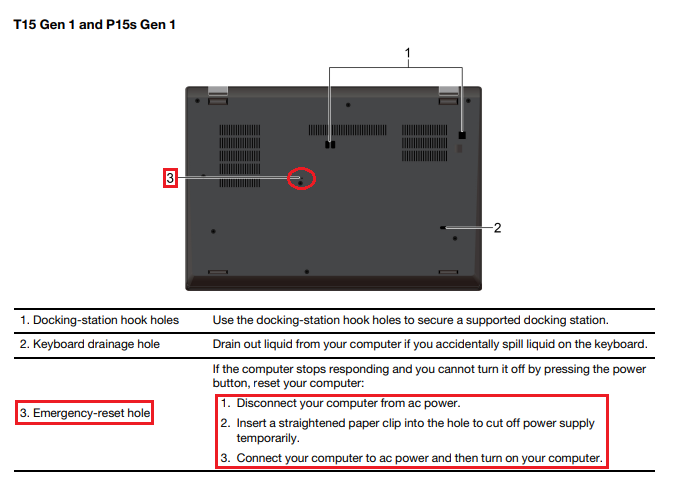
- For laptops with an internal battery (not removable), use the Emergency-reset hole (disconnect the system from power, use a straightened paper clip in the reset hole to reset the system, connect the system to power, and power on). Refer to the page that shows the bottom view in Product Overview section in the User Guide.
- Some ideapads have a Novo button that can be used to get to the BIOS or recovery mode.
- Introduction to NOVO button - ideapad
- Where can I find the OneKey Recovery (Novo) button on ideapad laptops
- If the reset works, then there may be an issue with the power button. Contact Support.
- On other systems (without a pin hole reset or Novo button), press and hold the power button for at least 10 seconds.
- After the power drain, reattach power cables, and power on the computer.
Step 4: If the system still does not power on, try wake it up from sleep or hibernate mode
Normally to wake up a computer from sleep (Suspend-to-RAM), standby (Suspend-to-Disk), or hibernate, just move the mouse or press any key on the keyboard. If this does not work, press the power button to wake up the computer.
Note:
- For detailed explanation about the sleep states, refer to this articles Shut down, sleep, or hibernate your PC for more information.
- If ACPI mode on a system is configured to respond only to a specific key to wake up from sleep states, the screen will remain black when moving the mouse or pressing any key on the keyboard. Look for the sleep-specific key on your keyboard.
- For example: T14s Gen 3 and X13 Gen 3, page 11.

Step 5: If screen is too dark, the computer may appear to be powered down
If the brightness level is too low, the system may appear to have no power. Try increasing the brightness level.
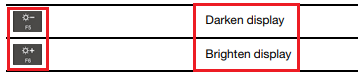
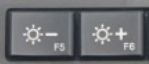
For example: T14s Gen 3 and X13 Gen 3, page 10.Press Fn + Home (increase brightness)/End (decrease brightness) or press F6 (increase brightness)/F5 (decrease brightness).
For example: T480s User Guide, page 20.

For example: ideapad 3.

Note: Some ThinkPad LCDs will automatically dim when the AC Power is unplugged. This is to save battery power and is normal.
Step 6: Remove the PC from any docking stations
If the system is connected to a dock, try removing the PC from the dock. Note: Check the docking station instructions for the proper removal (Popular Topics: Docks, Docking Stations).
Step 7: Check the monitor
If the system uses an external monitor or supports an external monitor, try using a different monitor. For more information, see How to connect to an external monitor - ThinkPad - Windows 10.
Step 8: Try Safe Mode
- If the issue started after a Windows update, see if the system can get into Safe Mode. For more information, see Start your PC in safe mode in Windows.
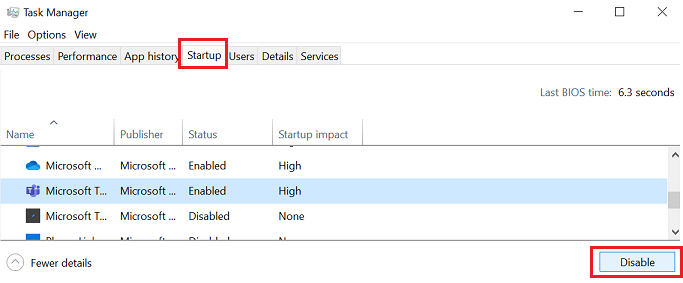
- If the issue started after installing a third-party app and the system is fine in Safe Mode, try disabling the app from Startup in Task Manager (search for and open Task Manager, select the Startup tab, select the third-party app, and select Disable). Note: Be careful when ending a process. If you close a program, you will lose unsaved data. If you end a system service, some part of the system might not function properly.
- If the previous suggestions do not help, contact support https://support.lenovo.com/contactnow.
Additional Information
How to find the User Guide and parts for a product?
- Visit Lenovo PC support website or How to find and view manuals for Lenovo products - ThinkPad, ThinkCentre, ideapad, ideacentre
- Enter the product model or serial number of the device you want to find and click on your product from the drop-down menu.
_20230414033818559.png)
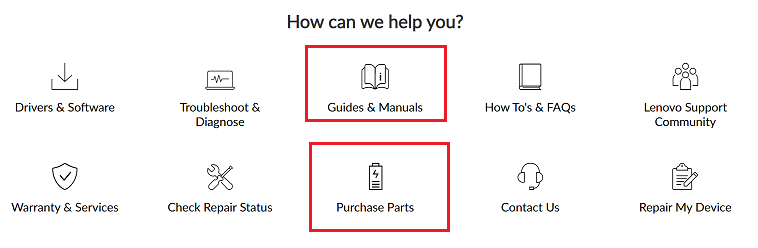
- Select Guides & Manuals or Purchase Parts.
- For user guides, click Guides & Manuals and select User Guide from the page. Selet a format to view: HTML or PDF.
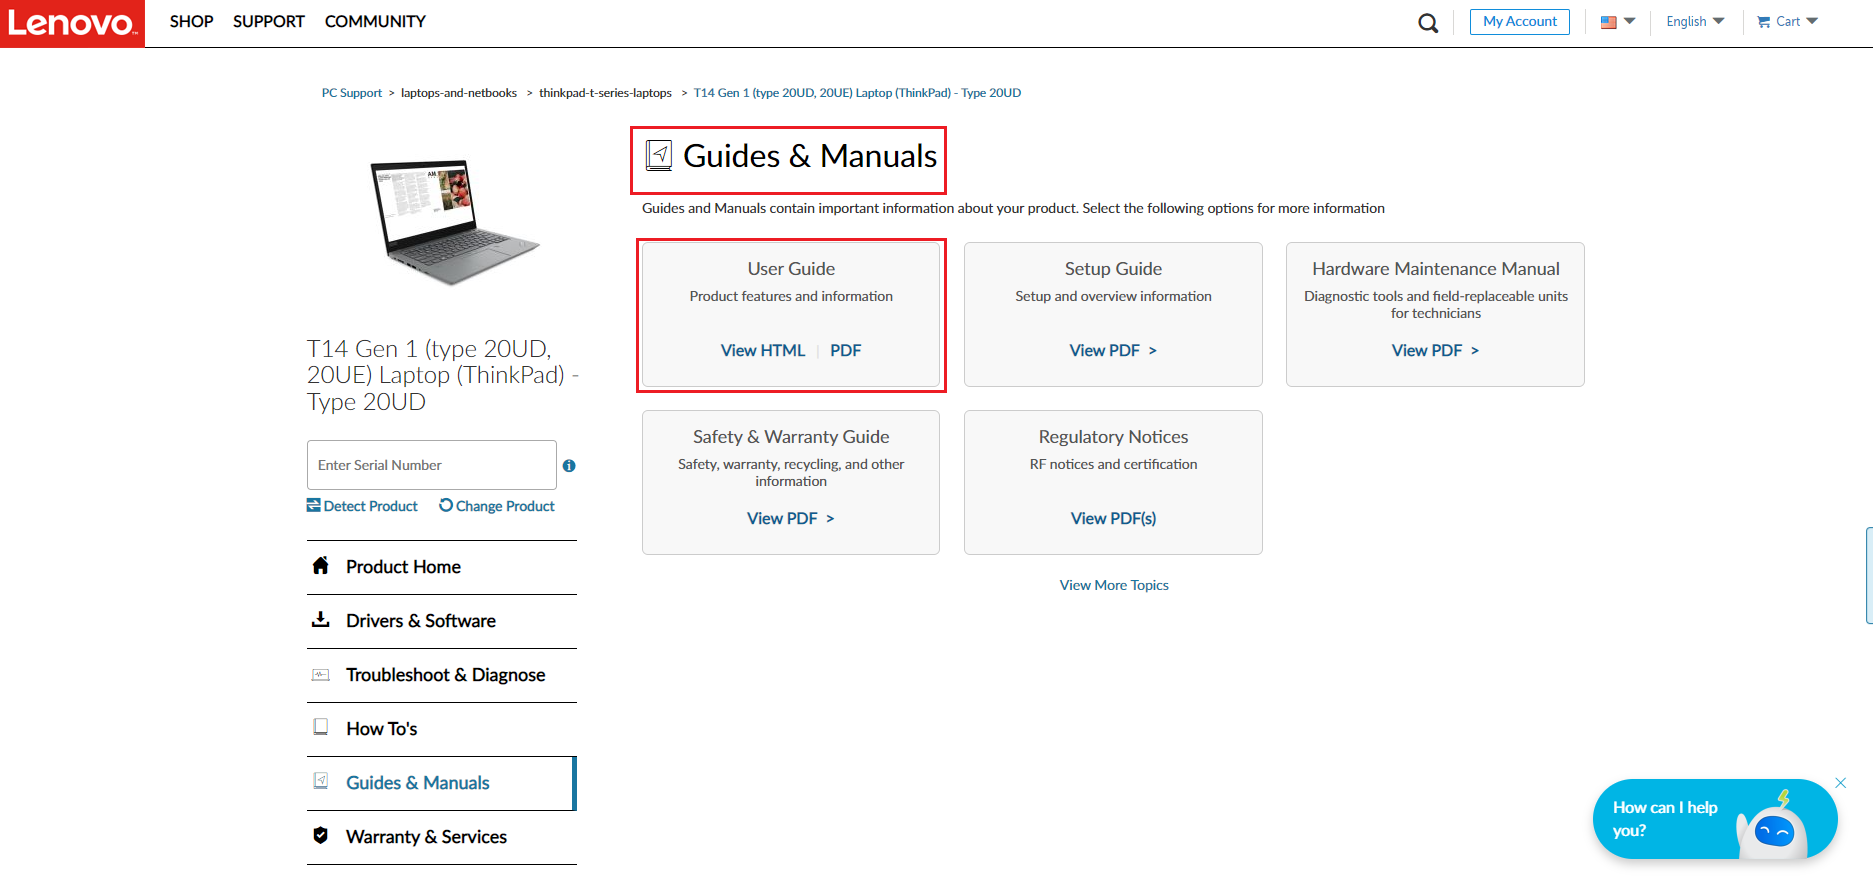
- The User Guide is found. To check the correct adapter type, check under product specifications.
Related Articles
Vaša spätná väzba pomáha zlepšiť celkovú používateľskú skúsenosť

