How to take a screenshot using the Snipping Tool in Windows 10
Steps and instructions to take a screenshot on a Lenovo computer using the Snipping Tool in Windows 10
Steps and instructions to take a screenshot on a Lenovo computer using the Snipping Tool in Windows 10
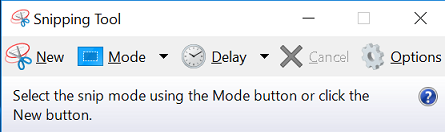
The Snipping Tool can take screenshots of an open window, a rectangular area, a free-form area, or the entire screen.
For information on how to use the Snipping Tool, see the Microsoft link: Open Snipping Tool and take a screenshot.

How to take a screenshot with the Snipping Tool
Use the following steps to take a screenshot with the Snipping Tool:
- Left-click the Snipping Tool in the Taskbar, or select the Snipping Tool program under Start and Windows Accessories.
Icon in taskbar
Snipping tool program

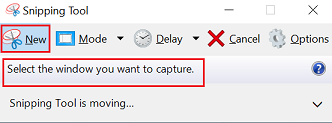
- Select New. Note: The screen may be gray until you select a window.
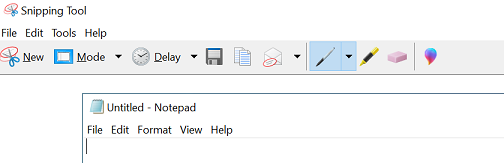
- Select the window using the mouse (move the mouse pointer to the window and left-click). The selected window should have a red border.
- The Snipping Tool loads the image. Save (under File) or edit the image.
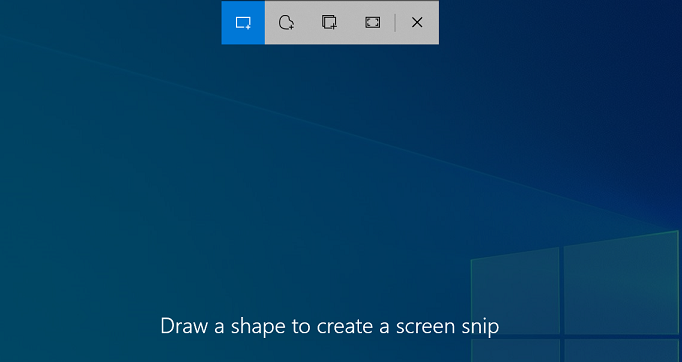
How to take a screenshot with the Snipping Tool using shortcut keys
Press Windows Key + Shift + S to use the Snipping Tool and create a screen snip.
How to take a screenshot using the Print Screen key
Use the following steps to take a screenshot using the Print Screen key:
You can also get a screenshot using the Print Screen key on the keyboard. Normally the Print Screen key is PrtSc or Print Scrn. Check the User Guide to determine the correct key, How to find and view manuals for Lenovo products - ThinkPad, ThinkCentre, ideapad, ideacentre.
- Load a Paint program such as Microsoft Paint or Paint 3D.
- Press the Print Screen key.
- Select the Paint program and press Ctrl + V to paste the screenshot.
Or
- Press the Windows logo key and the Print Screen key to take a screenshot.
- Paste the image into a Paint program or check the Pictures folder C:\Users\username\Pictures\Screenshots.
Note: Some systems may require pressing the Fn key before pressing the Print Screen key.
Related Articles
Tilbakemeldingen din bidrar til å forbedre den generelle opplevelsen

