How to take a screenshot - Chromebook
Steps and instructions to take a screenshot - Chromebook
Steps and instructions to take a screenshot - Chromebook
Description
This topic describes how to take screenshots on a Chromebook.
To learn how to take screenshots in Windows, click here.
Applicable Brands
Lenovo
Applicable Systems
100e Chromebook
Operating System
Chrome OS
Solution
To take a screenshot of the entire screen:
Press Ctrl  and the Show Windows key
  . The key is usually located on the top row. For more details about key locations, see How to take full screenshots on a Chromebook.
To take a screenshot of a portion of the screen:
Press Ctrl  and Shift
  and the Show Windows key
  .
.
- Press the keys to take the screenshot.
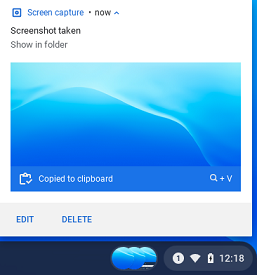
- When the screenshot is successful, a pop-up message will appear above the status area in the lower right taskbar that displays Screenshot taken. After a few seconds, the message will time out and close.

- Click the pop-up message to immediately view the screenshot, or copy the screenshot to the clipboard to be pasted into another document.
- Screenshots are saved to a folder called Files. Files can be accessed by clicking the Launcher icon in the lower left of the taskbar.


Related Articles
Your feedback helps to improve the overall experience

