ThinkEdge SE70: Preload OS Recovery Image, and Restore to Factory Reset process
Steps and instructions to recover or to restore to factory reset for ThinkEdge SE70
Steps and instructions to recover or to restore to factory reset for ThinkEdge SE70
Describes the following ThinkEdge SE70 processes:
- Preload OS Recovery Image
- Restore to Factory Reset
Applicable Systems
| ThinkEdge SE70 System | Machine Types | Preload OS Recovery Process | Restoring to Factory Reset Process |
| ThinkEdge SE70 Generic | 12A6, 12A7, 12A8, 12A9, 12AA, 12AB | Supported | Supported |
| ThinkEdge SE70 Powered by AWS Panorama | 12AE, 12AF | Not Applicable | Supported |
Preload OS Recovery Process
To recover the ThinkEdge SE70, follow the steps listed below.
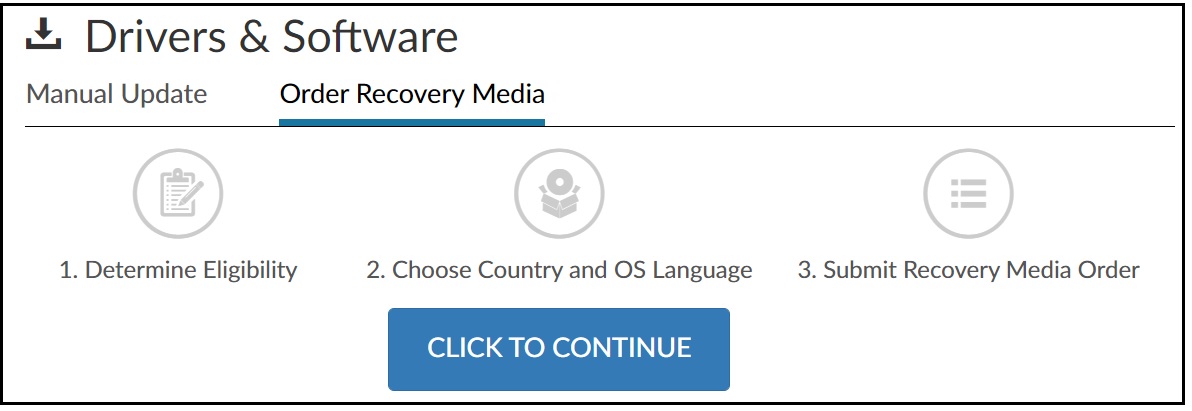
Get the ThinkEdge SE70 recovery media using Lenovo Digital Download Recovery Service (DDRS)
- At Lenovo Technical Support (support.lenovo.com), enter the ThinkEdge SE70 Serial Number.
- Select Drivers & Software, then select Select Order Recovery Media.
For more information, visit:
- Lenovo Digital Download Recovery Service (DDRS): Download the files needed to create a Lenovo USB Recovery key
- [Video] How to create a Recovery USB Key with Lenovo Digital Download Recovery Service
Re-flash the system to factory default using the image download
The download image should be named as: se70_generic_preload_tarball
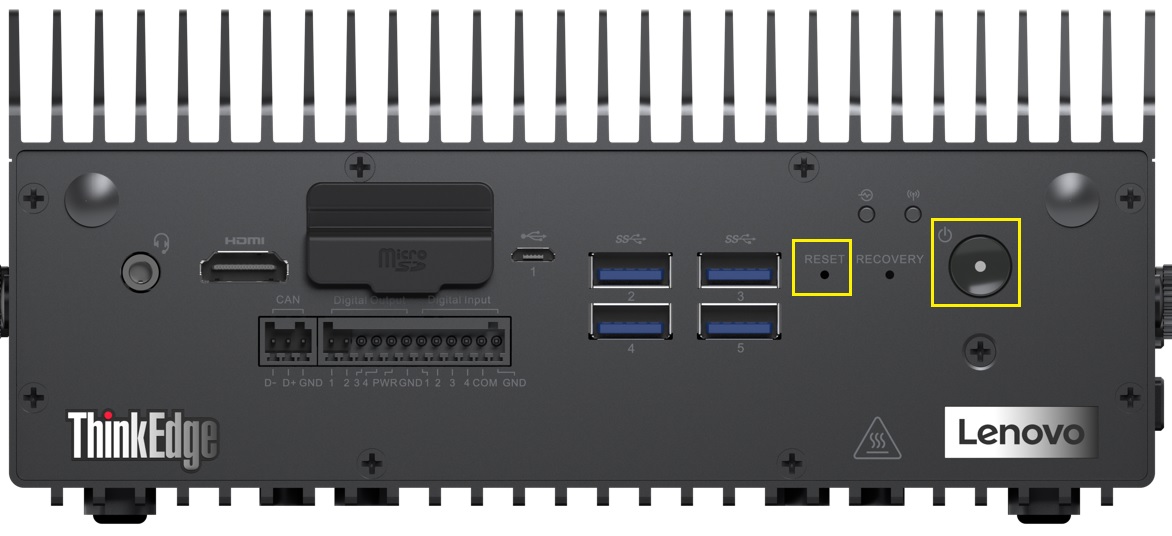
- Put the SE70 into Force Recovery Mode by following these steps:
- Ensure that SE70 is powered off, and the power adapter is connected.
- Press and hold the RECOVERY button usinge a pointed object, such as pen tip, needle, or toothpick.
- Press the POWER button to power on.
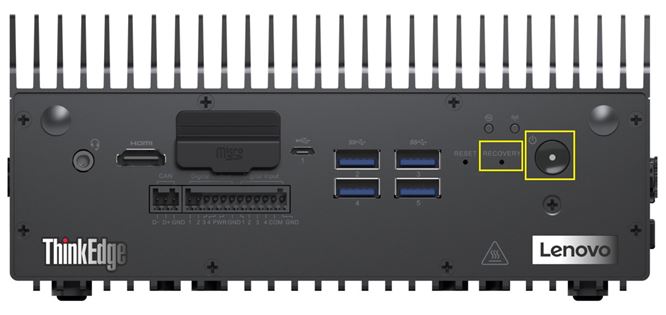
- Then release the RECOVERY and POWER buttons.
- After Recovery Mode has been entered, the LED light, under the Wi-Fi icon turns red.

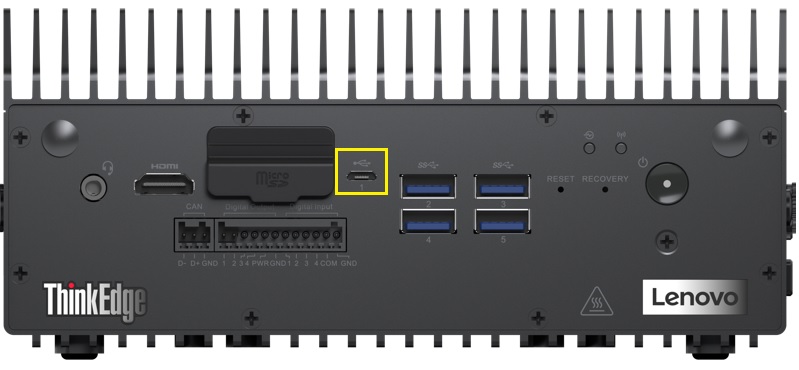
- Connect the SE70 with an Ubuntu host system:
- Prepare and log in to a Ubuntu host system which has Ubuntu 18.04 LTS or Ubuntu 16.04 LTS.
- Connect the SE70 to the Ubuntu host system using a Micro-USB port.
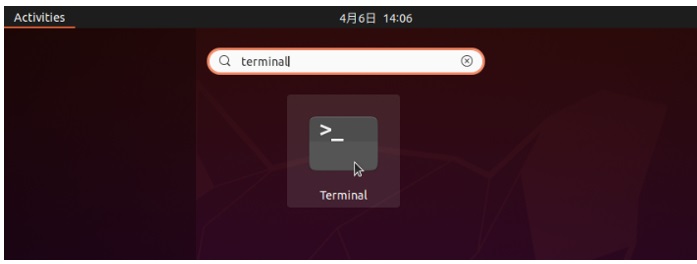
- Open terminal window on the Unbuntu host system by typing keyword terminal on the Activities top bar or by using the Ctrl+Alt+T keyboard shortcut.
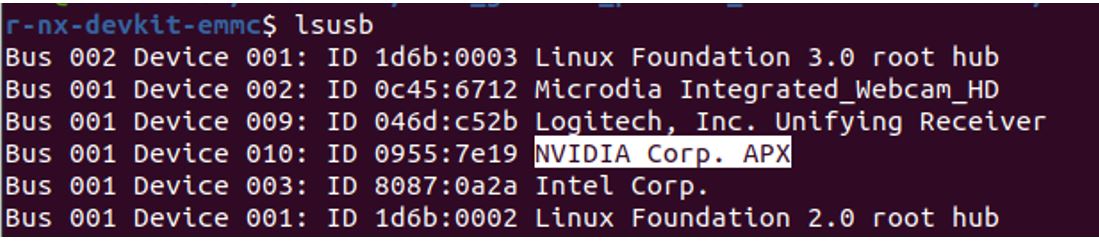
- Enter lsusb command to confirm if the SE70 is detected by the Unbuntu host system. If the SE70 is detected, NVIDIA Corp appears in the listing results.
- Flash the system using download image.
- Log in to the Unbuntu host system. Copy and Paste the recovery image file to a directory.

- Enter the directory where you put the image file (*.tgz). Extract the tar ball by right-clicking and choosing Extract Here.
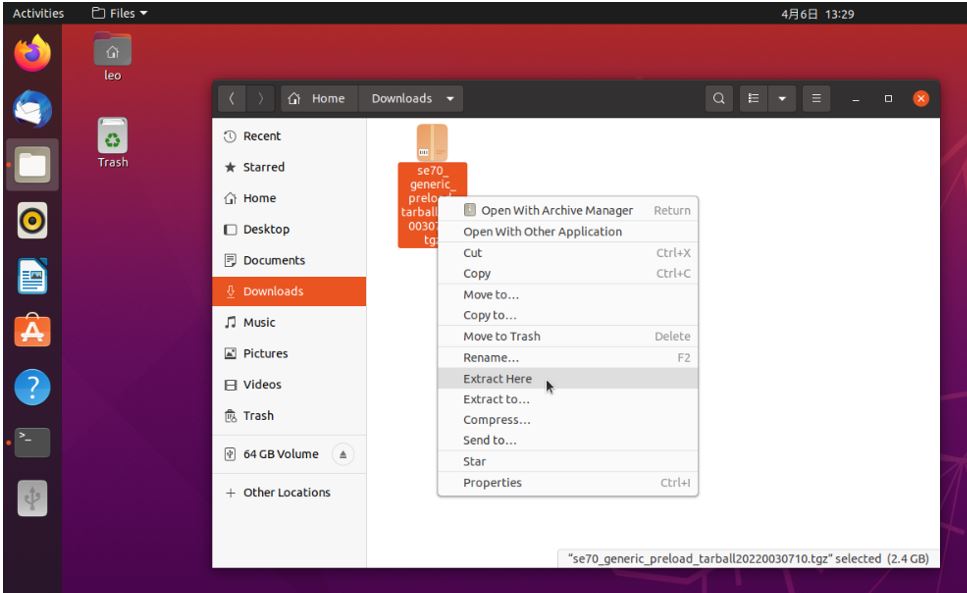
- Inside the extracted folder, enter into the subfolder se70_generic_preload_tarball2022030710/se70_preload_tarball/. Right-click the mfi_jetson-xavier-nx-devkit-emmc.tbz2 and choose to Extract Here.

- Open terminal window on Ubuntu host machine by typing keyword ‘terminal’ on the Activities top bar or by using Ctr+Alt+T keyboard combination shortcut.

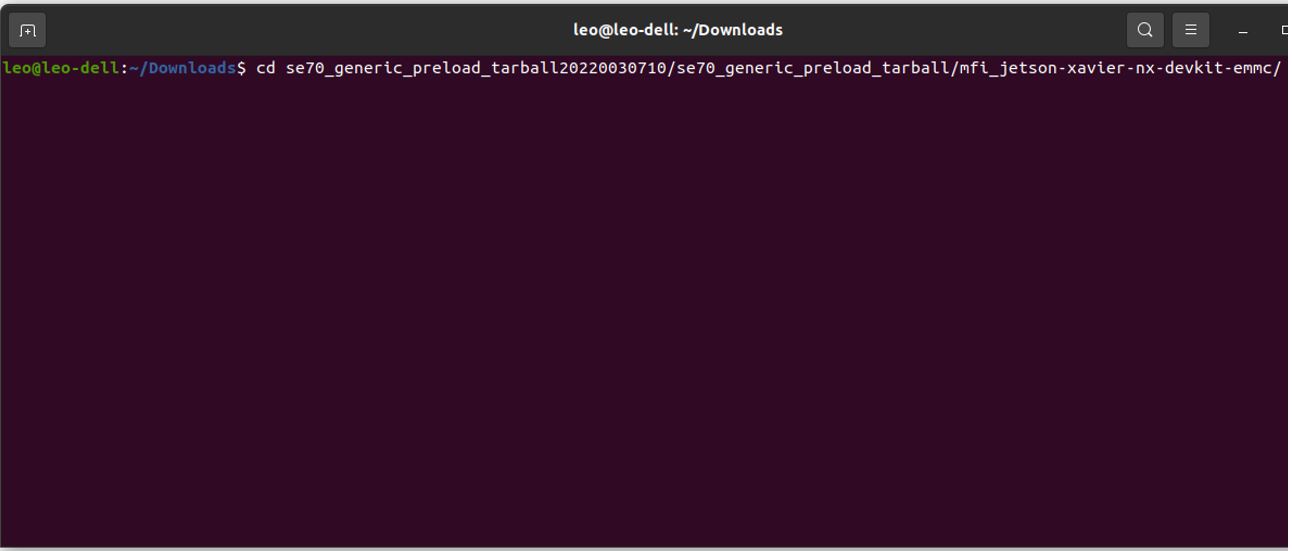
- On the the terminal opened, type command in sequence and press Enter: cd /home/Downloads/se70_generic_preload_tarball20220030710/ cd se70_generic_preload_tarball/ cd mif_jetson-xavier-nx-devkit-emmc/ Note: As illustrated, this is using /home/Downloads/ directory for storing the pasted image file. Your directory path may vary depending on where you copied/pasted the image file.
- Execute Burning script with sudo superuser privileges sudo ./nvmflash.sh
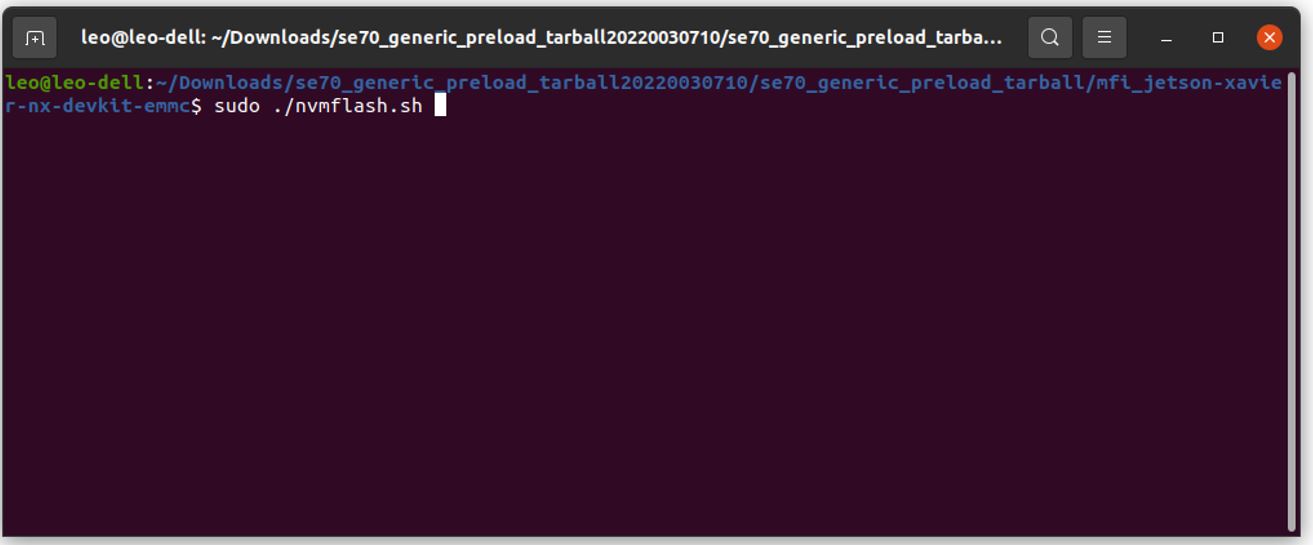
When prompted for the password, type the super user (root) password and press enter. Note there will be no input character displaying when entering password in. Note: please make sure to use SuperUser privilege (root) to launch and execute the scripts. - Flashing will be started with “Starting flashing device:…”
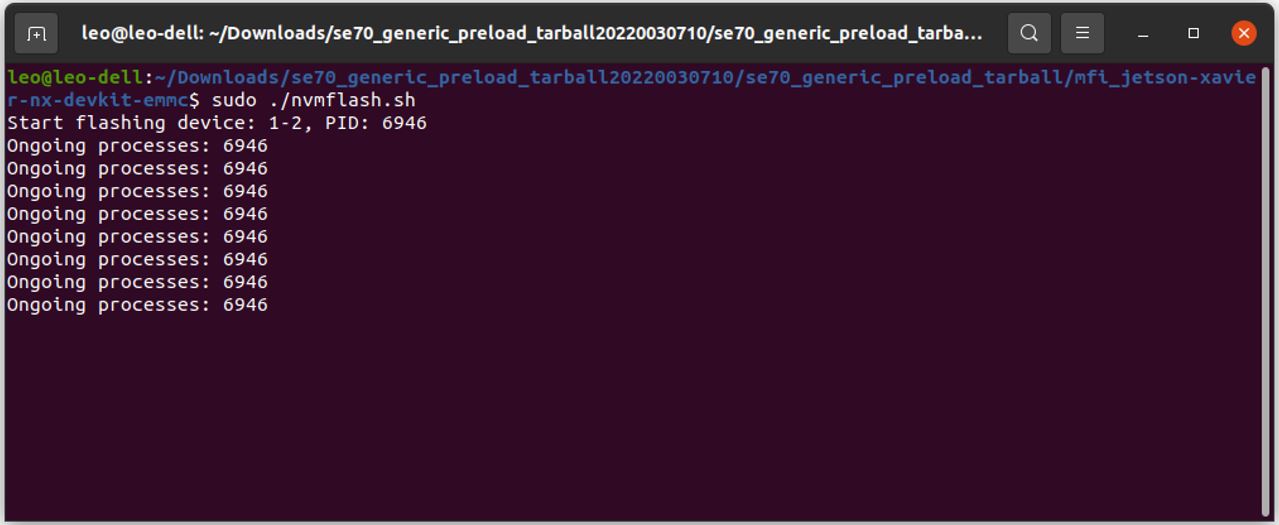
- The whole flashing process will take a few minutes, during which you will see “Ongoing processes: “information continuously appearing on the screen.
- Flash should complete with “Flash complete (SUCCESS) message in the end of the line. On SE70, system will reboot.
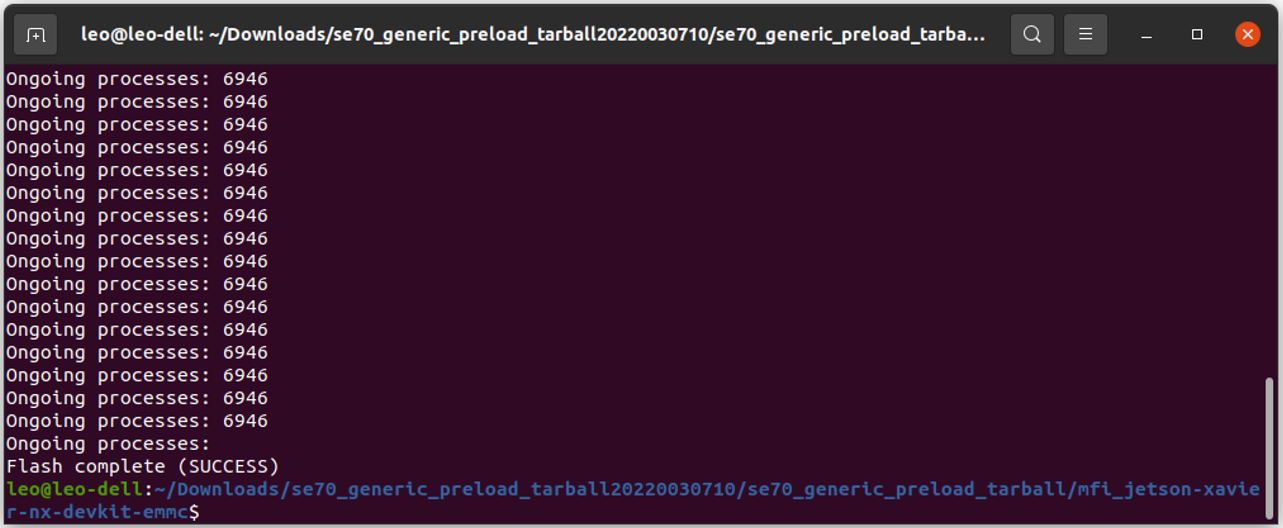
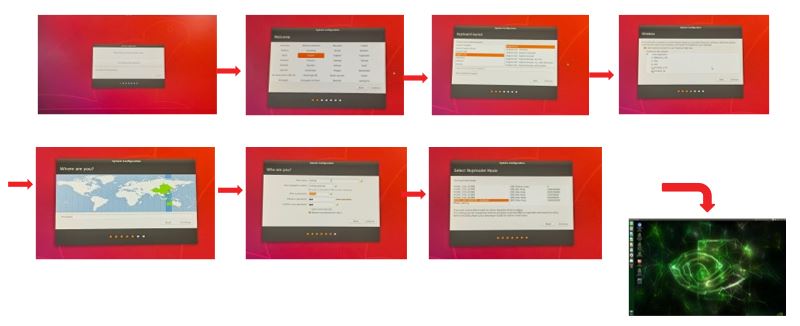
- On SE70 after reboot with monitor connected, it will show the initial GUI desktop setup. Follow the onscreen steps to configure and complete Ubuntu initial setup.
- Log in to the Unbuntu host system. Copy and Paste the recovery image file to a directory.
Troubleshooting during "Flash the system using the download image":
- Scenario A: If this fails with the following, you are not in RCM mode. Please set RCM mode again following RCM mode setting.

- Scenario B: If this fails with the following, it is most likely that the setting of the burning host environment is incomplete. Suggest that you try to use a different ubuntu host machine.

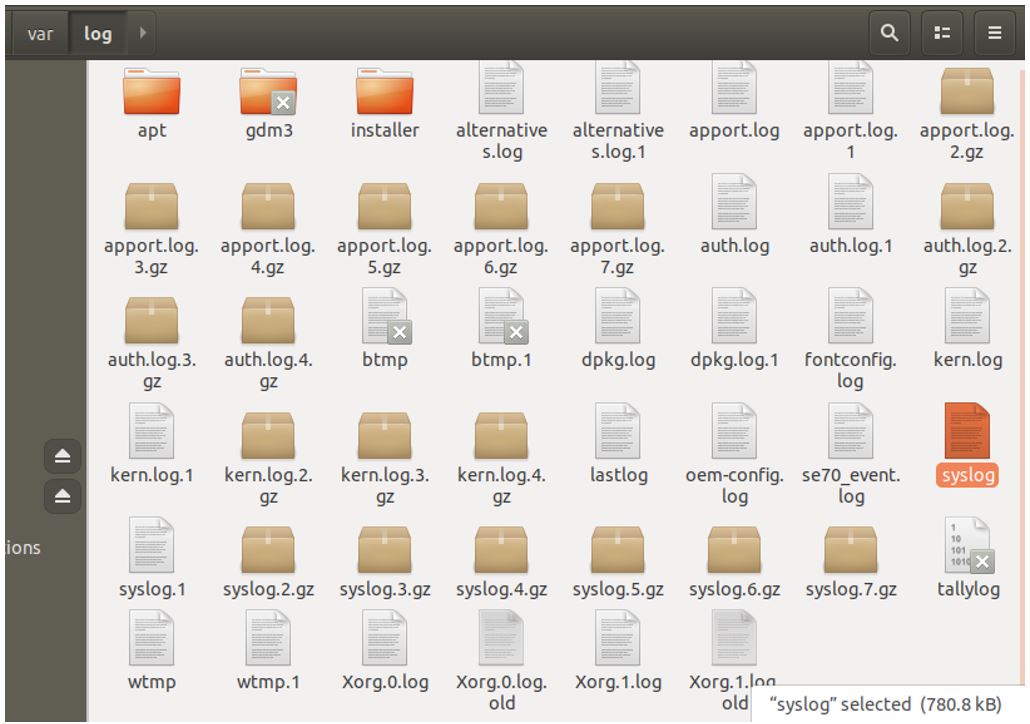
If recovery issue persists, collect the various system logs, and contact a Lenovo Service Representative.
- Collect System LOG
- log saved directory sample:
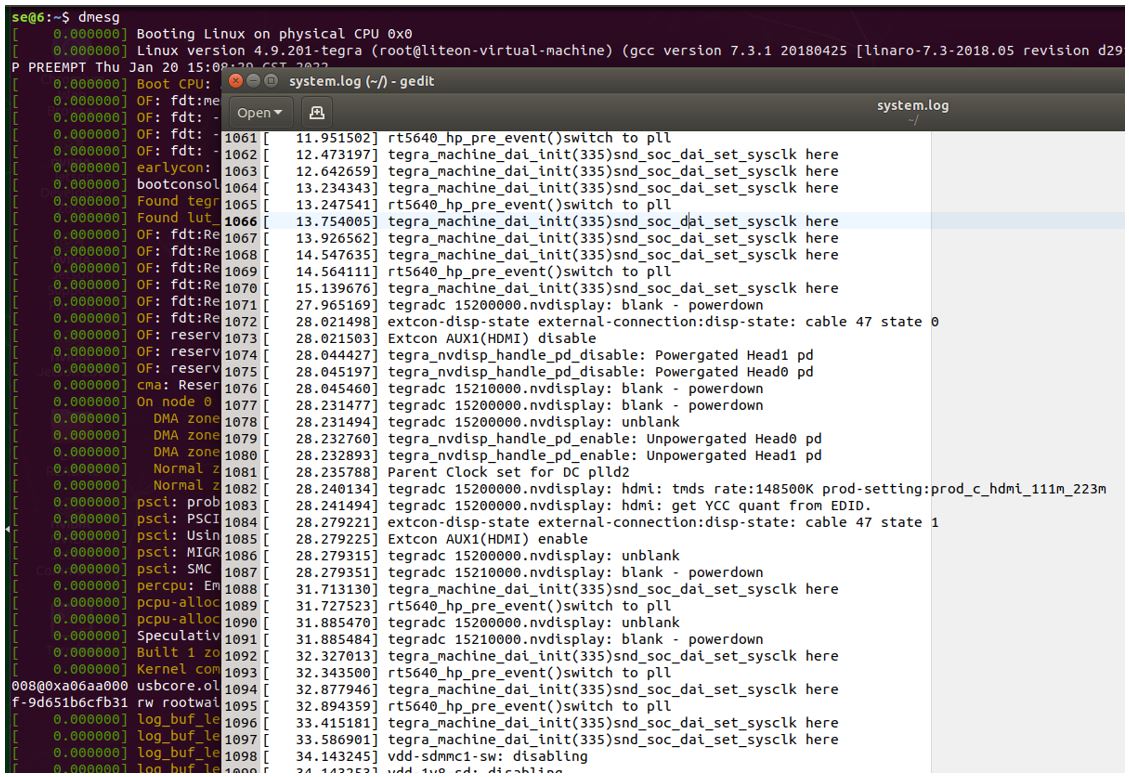
- dmesg log sample
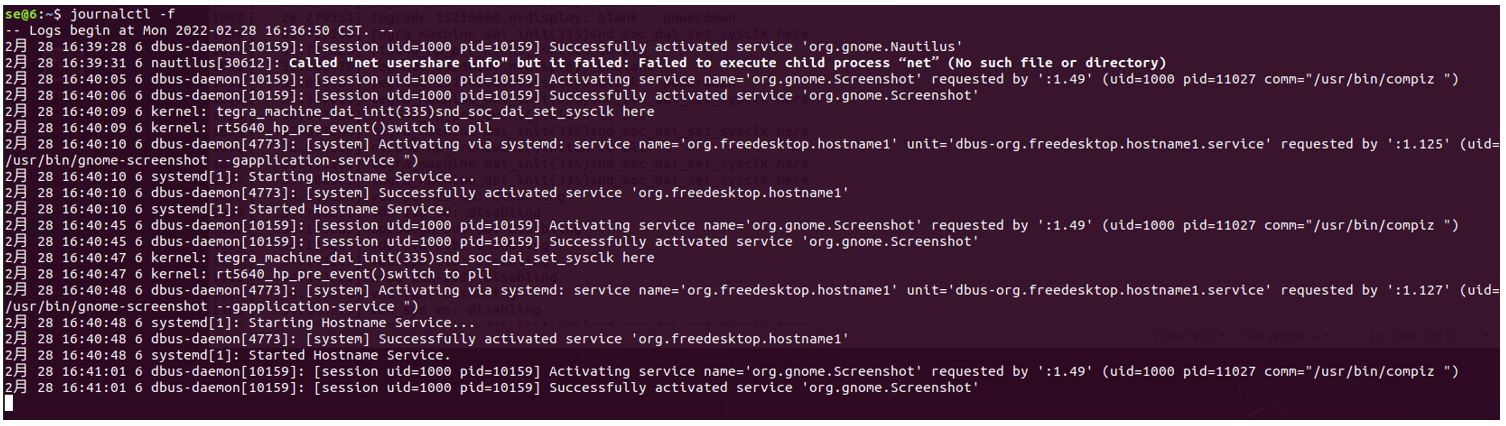
- journalctl log sample
- log saved directory sample:
Restoring to Factory Reset Process
Restoring to Factory Reset clears all user data, configurations, and allows restoring the system to the initial Out-of-Box Experience (OOBE) status.
Restoring to Factory Reset applies to all ThinkSmart SE70.
To restore to factory reset, following these steps:
- Simultaneously press and hold, for 5 seconds, and simultaneously release the following:
- RESET button using a pointed object, such as pen tip, needle, or toothpick.
- POWER button key
- The ThinkEdge SE70 enters Factory Reset Mode.
- System status indicator LED will fast blink orange during this period.
- After system status indicator LED stops blinking, and turns white, the system reboots, and enters Ubuntu OOBE mode.
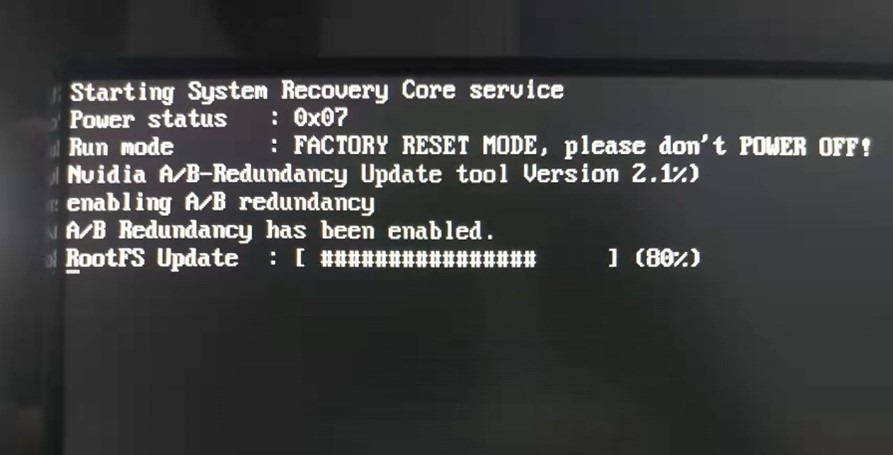
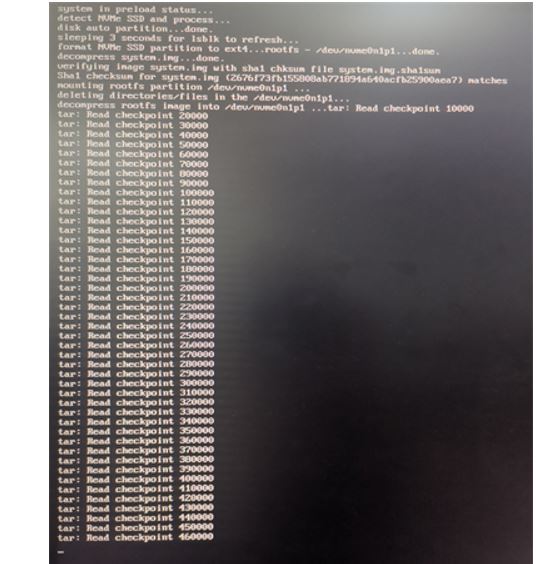
- If connecting monitor by HDMI port during this period, system procedure, and log is displayed.
- Based on the SE70 model:
- SE70 Generic: Once complete, the system boots to the Ubuntu Desktop initial setup screen. Follow the on-screen steps to complete the desktop initial setup process.

- SE70 Powered by AWS Panorama: Only a command line is displayed.
- SE70 Generic: Once complete, the system boots to the Ubuntu Desktop initial setup screen. Follow the on-screen steps to complete the desktop initial setup process.
Related Articles
Was this information helpful?
Your feedback helps to improve the overall experience
Document ID:HT513731
Original Publish Date:04/26/2022
Last Modified Date:02/24/2025

