Factory Reset, Hardware Diagnostics, Manual Claiming application - ThinkSmart View Plus
Factory Reset, Hardware Diagnostics, Manual Claiming - ThinkSmart View Plus
Factory Reset, Hardware Diagnostics, Manual Claiming - ThinkSmart View Plus
Description
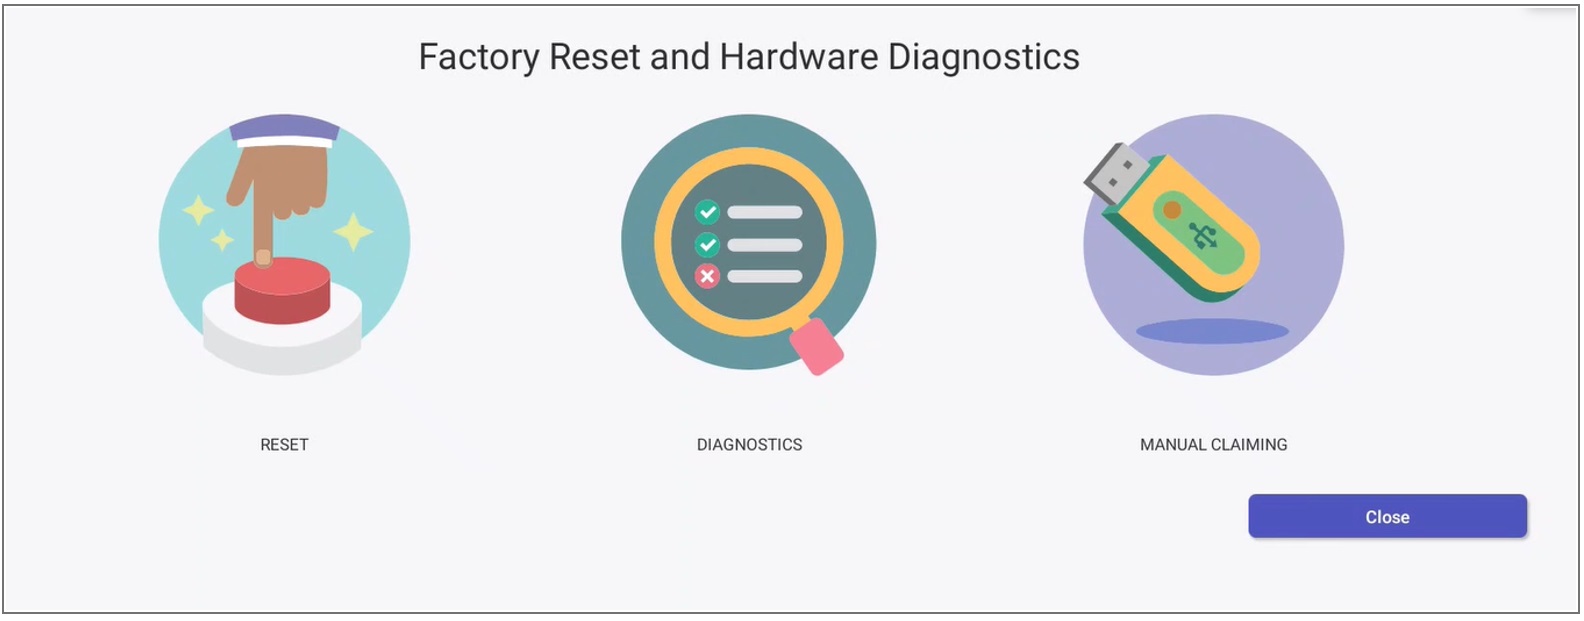
Describes the Factory Reset, Hardware Diagnostics, Manual Claiming application for the ThinkSmart View Plus. This application is pre-loaded on the ThinkSmart View Plus.
| Application Feature | Description | Perform when: |
| Reset | Erases all data on the device and restores the device to factory default settings. The Android OS is reset to Android 10. It also removes all Over-The-Air (OTA) updates from the Microsoft Teams admin center. For OTA updates information, click: How to update ThinkSmart View Plus software using Over-The-Air (OTA) from Microsoft Teams admin center |
|
| Diagnostics | Tests and can help diagnose individual hardware components that include: Device Information, Speaker, Microphone, Camera, Display, Touch Screen, WLAN (Wi-Fi), Multi-touch, Bluetooth, Backlight, System Pen, USB, Sensors, RJ45 (Ethernet), LED | Test and diagnose a specific hardware component. |
| Manual Claiming | Helps to add the ThinkSmart View Plus to the ThinkSmart Manager portal (portal.thinksmart.lenovo.com) if using the ThinkSmart Manager portal. Adding a device is also know as device claiming. For more information, click: ThinkSmart Manager. |
For details, review the information below. |
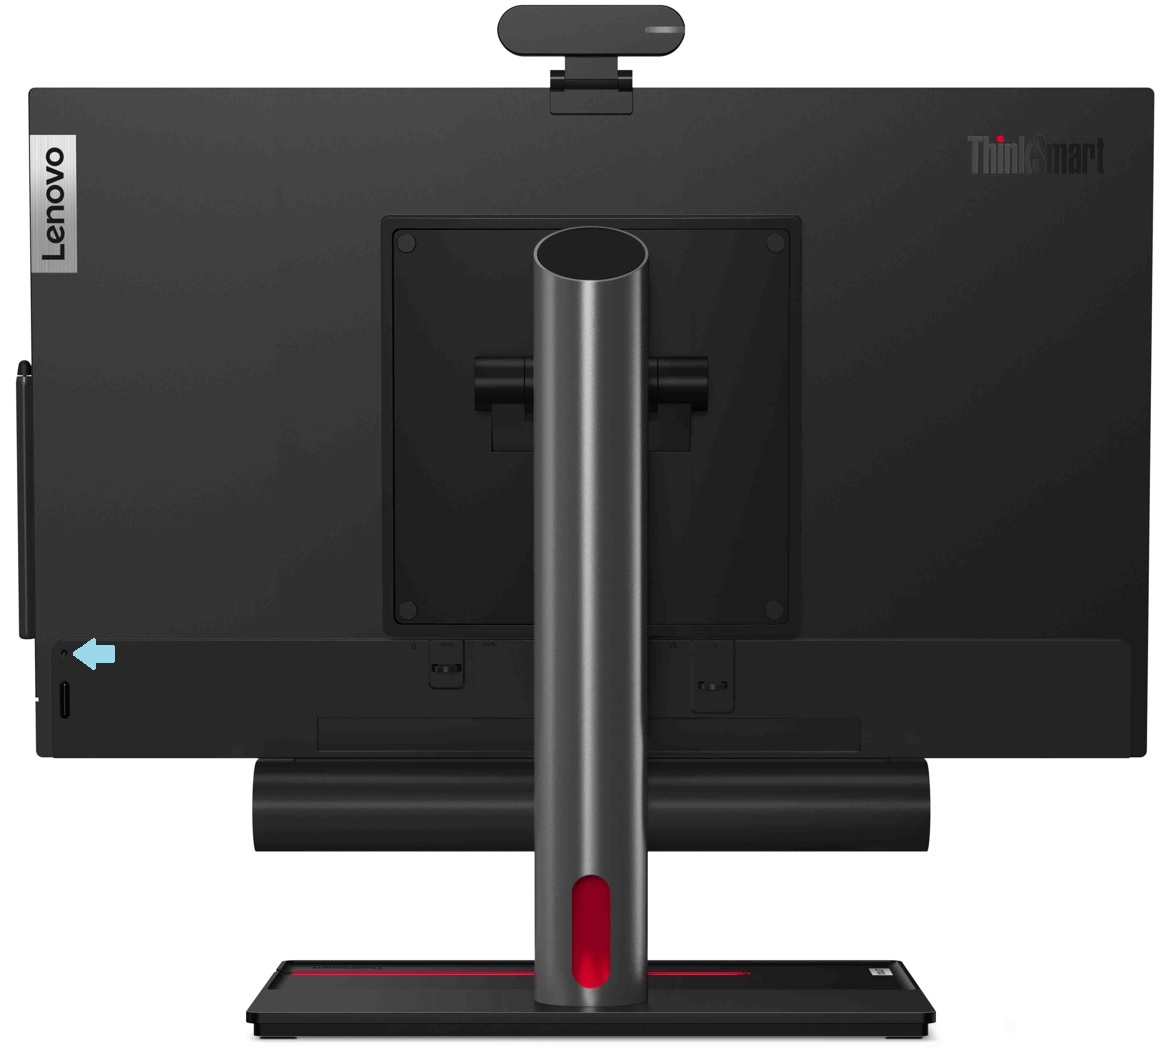
To access the application, press and hold the Recovery button, for 8 seconds, while the ThinkView Plus is powered on. The Recovery button is located on the rear, lower left, of the ThinkView Plus.
Applicable Systems
ThinkSmart View Plus
Operating Systems
Android
Solution
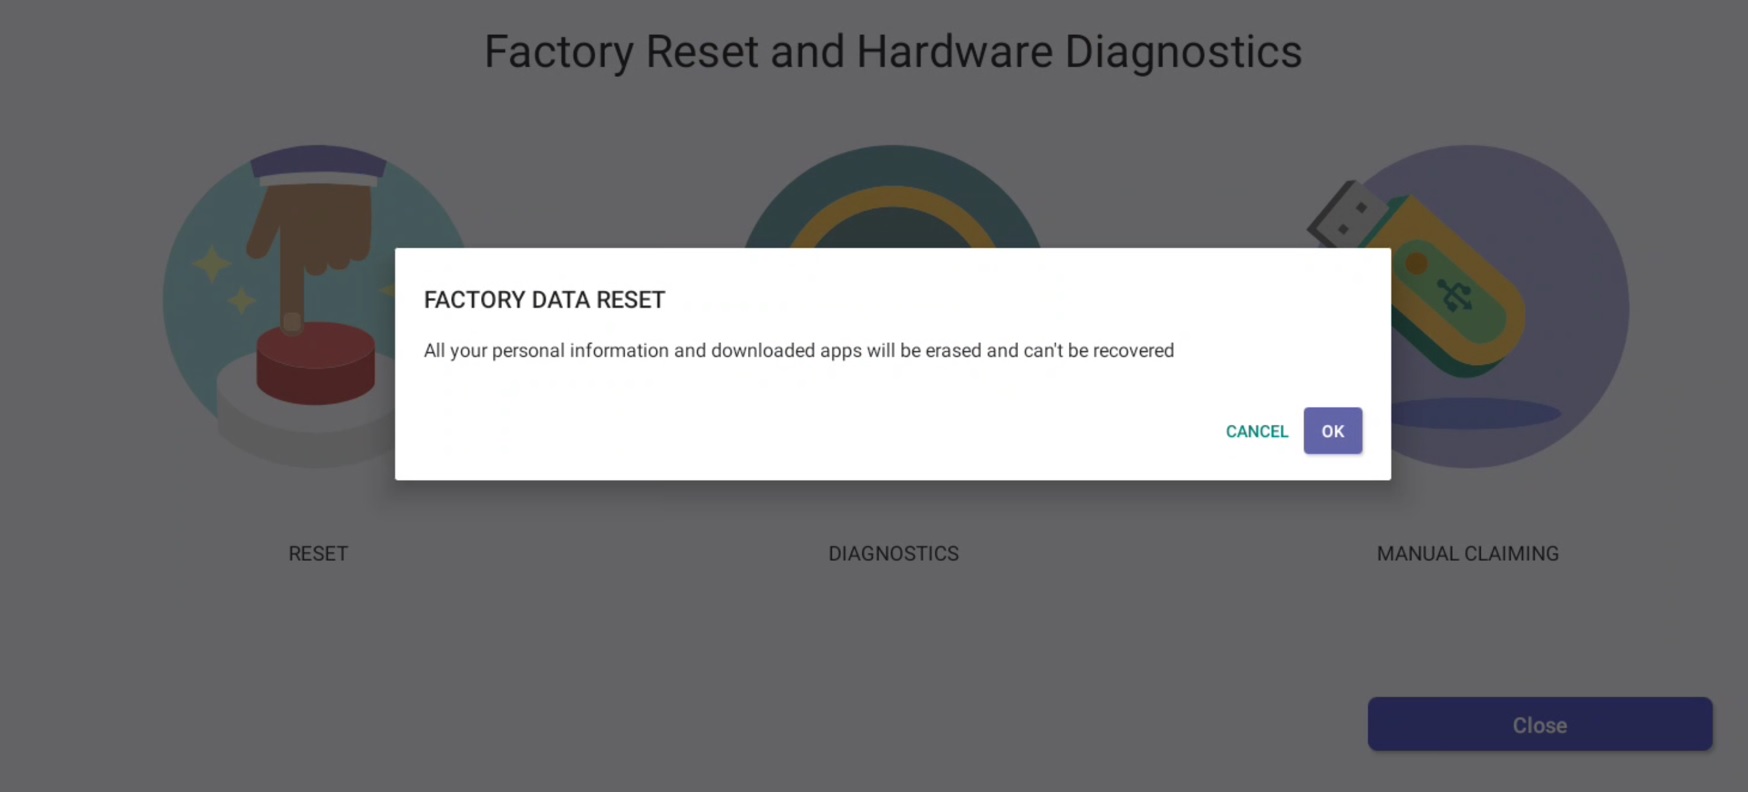
Factory Reset
The following FACTORY DATA RESET message All your personal information and downloaded apps will be erased and cannot be recovered appears. To proceed, select OK or CANCEL to exit.
Hardware Diagnostics
The following hardware diagnostics choices appear.
![]()
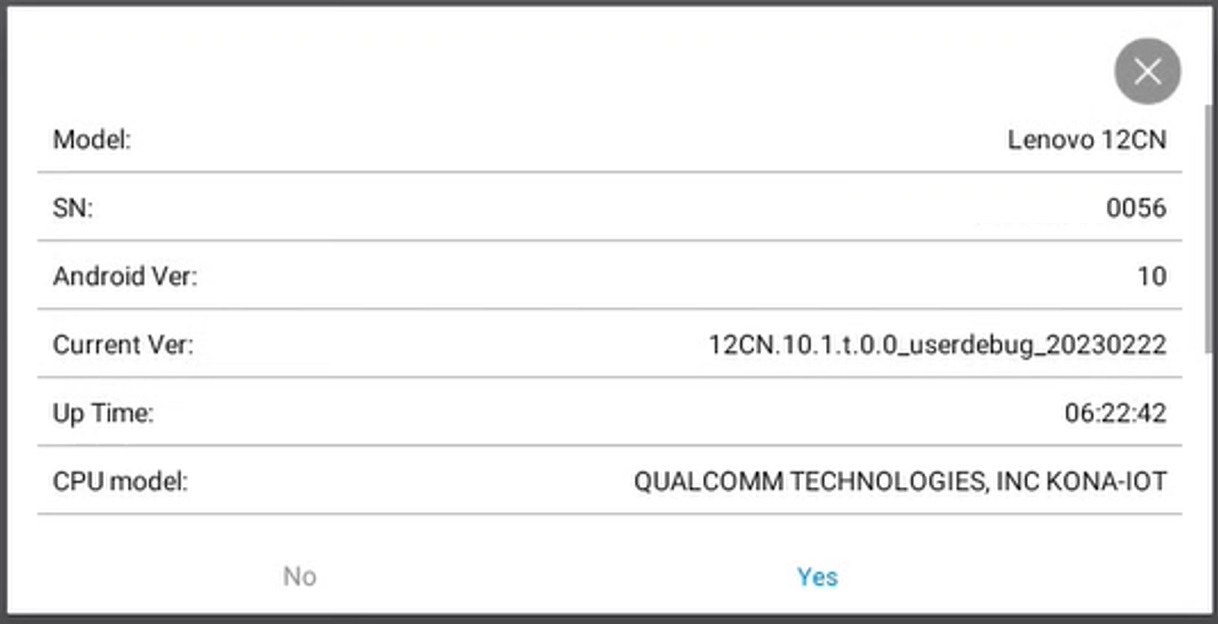
Device Information
Displays the following information: Model, Serial Number (SN), Android version, Firmware Version, Up Time, and CPU Model.
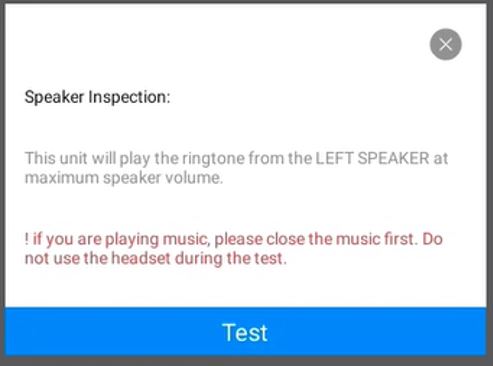
Speaker
Click Speaker menu item to test the speaker. The speaker test only tests the ThinkView Plus speaker. It does not test other speakers that are attached to the ThinkSmart View plus. The test plays a ringtound from the speaker at maximum speaker volume. Click Test to confirm for both speakers.
Microphone
Click Microphone to test the microphone. The test records any sound or voice for three seconds, then playback the recording to make sure that microphone works.
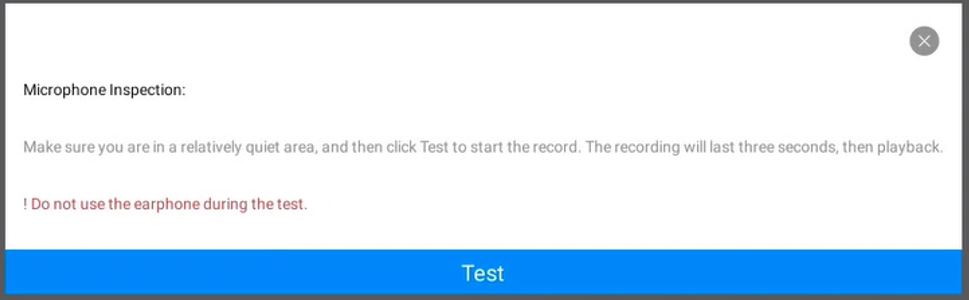
The following message appears to begin the recording.

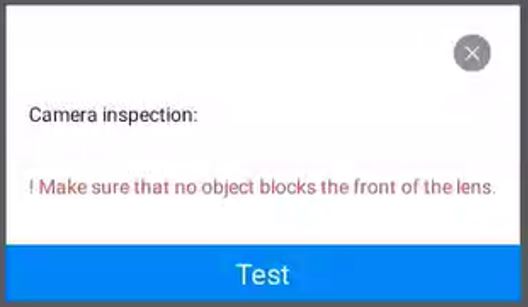
Camera
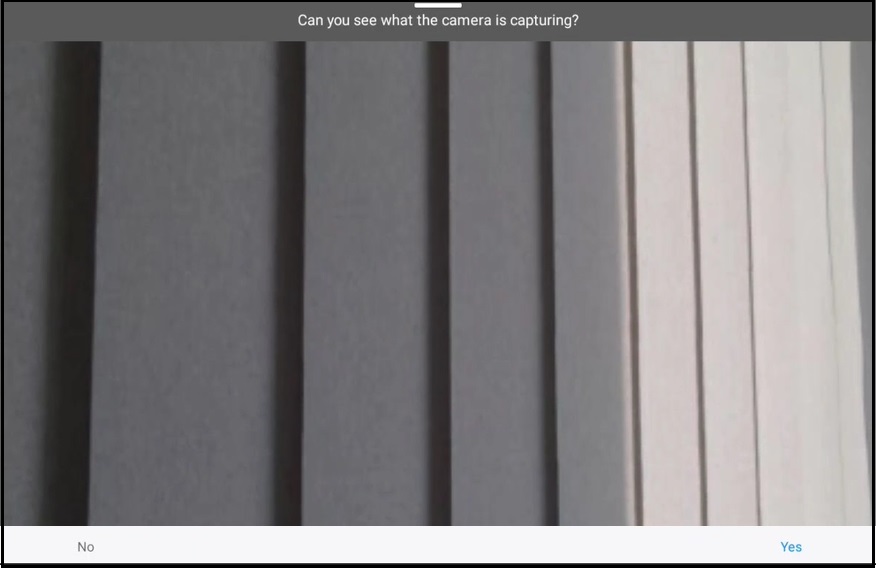
Click Camera to test the camera. Ensure that no object blocks the front of the lens, and start testing. You will need to confirm if you see what the camera is capturing.
The following is an example of what the camera captured.
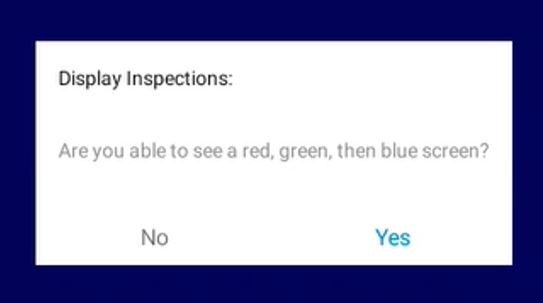
Display
Click Display to test the display. When the Test is selected, the screen displays red, green, and blue in sequence.
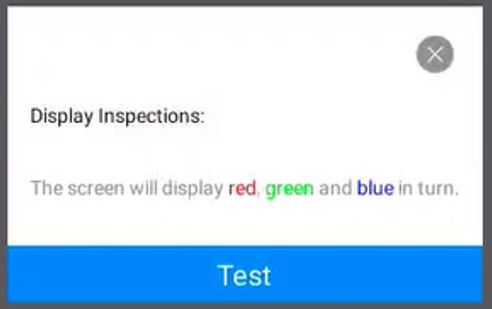
For each color, confirm the color was displayed.
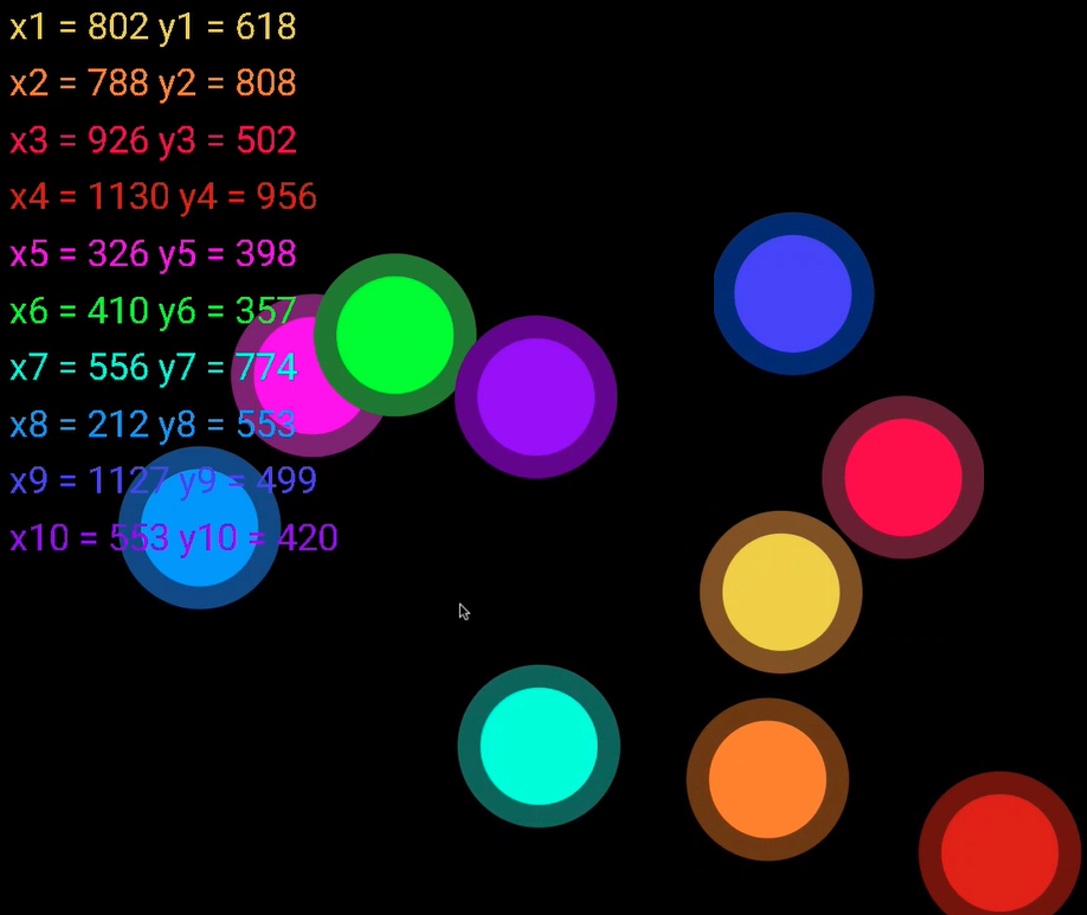
Touch Screen
Click Touch Screen to test the touchscreen.

Follow the start point circle and touch through highlighted area. Repeat for all circles.

WLAN (Wi-Fi)
Click WLAN to test WLAN (Wi-Fi) functionality. This test requires a wireless internet connection to a Wi-Fi router or access point that is powered on.
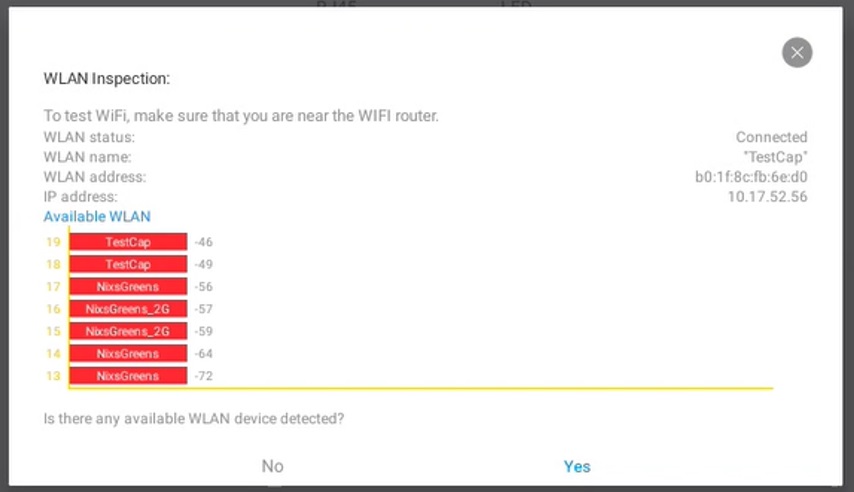
A list of available networks is displayed. If connected to a network, the network information appears.
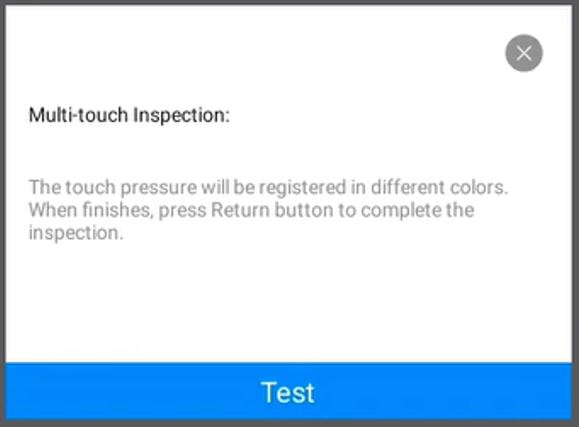
Multi-touch
Click Multi-touch to test the multi-touch screen. Touch the screen to begin the test. For every touch, the touch coordinates appears. When Back is selected you need to confirm that displayed information is correct or not to complete the test.
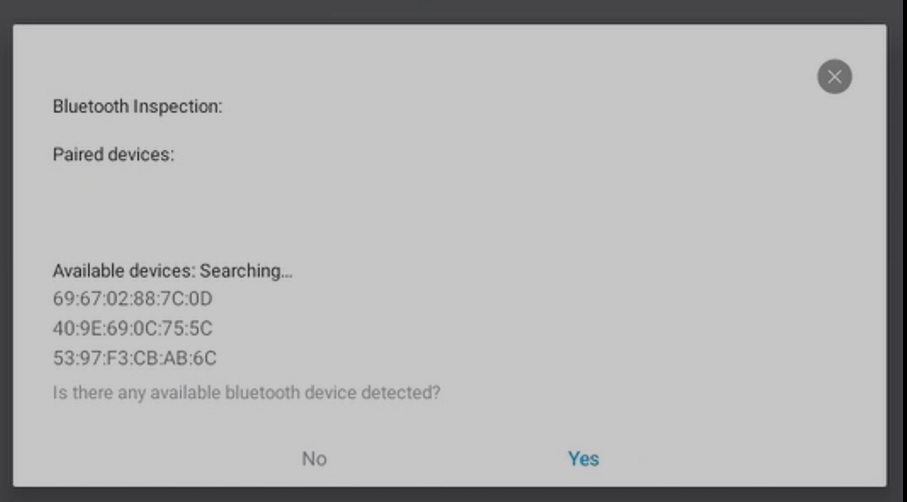
Bluetooth
Click Bluetooth to test the Bluetooth functionality. Bluetooth is automatically turned on to display the relevant information. This includes: a list of paired and available devices. Confirm that information is correct.
Backlight
Click Backlight to test the backlight functionality. This tests the brightness of display from high to low and return. This test helps to identify blacklight bleeding or other imperfections.
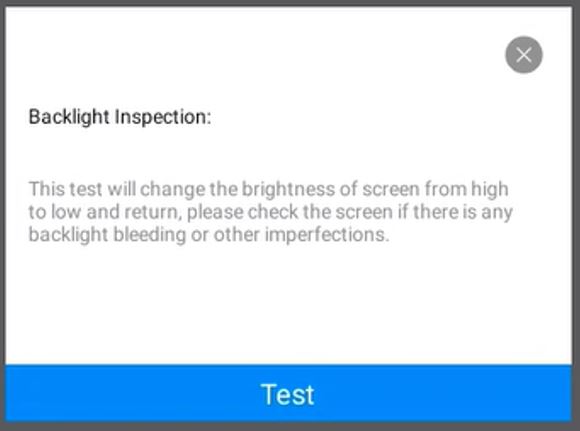
To complete the test, confirm if the backlight behavior was OK.
 y:
y:
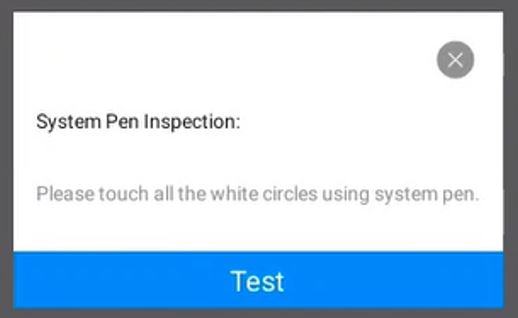
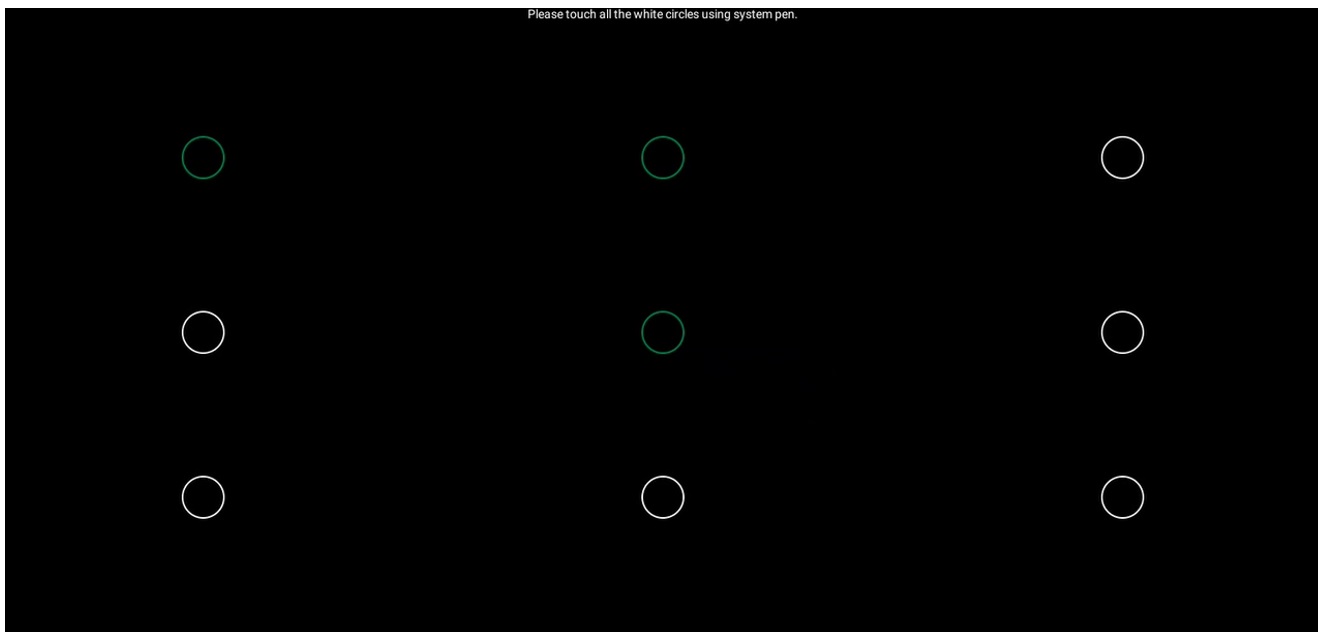
System Pen
Click System Pen for the system pen. Touch all the white circles using the system pen.
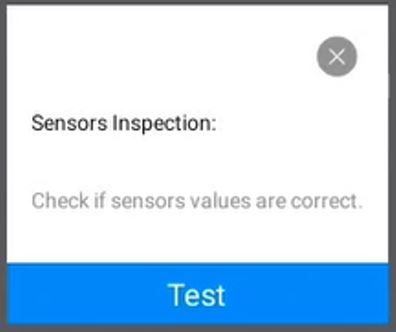
Sensors
Click Sensors to view the various sensor values and to determine if the sensor values are correct.
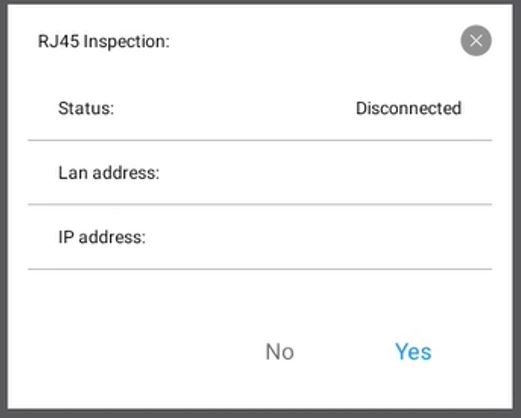
RJ45
Click RJ45 to test the Ethernet network connection. The network status information appears. This includes: Lan Address and IP address. If disconnected from the network, Disconnected status appaers.
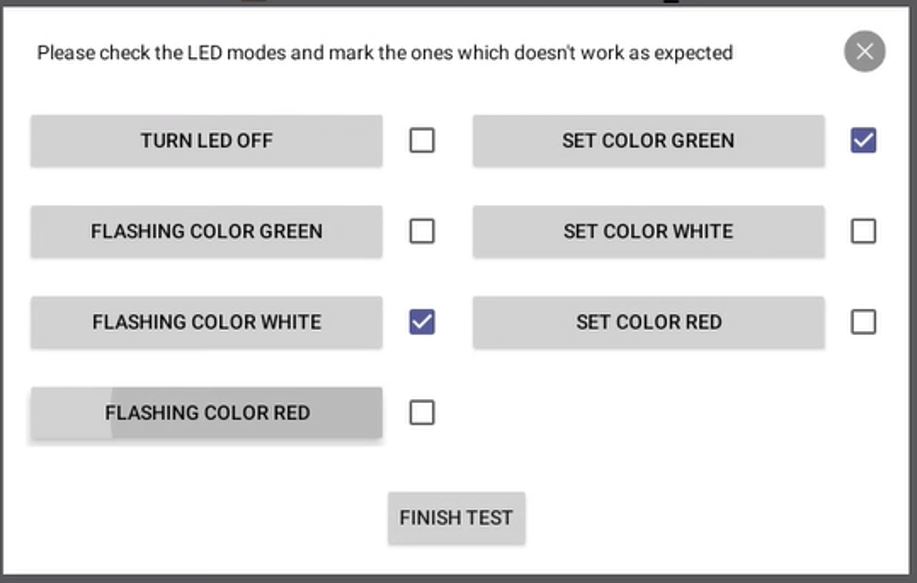
LED
Click LED to test the various LED's. Confirm the correct behavior for all the LED's for the following:
- TURN LED OFF
- FLASHING COLOR GREEN
- FLASHING COLOR WHITE
- FLASHING COLOR RED
- SET COLOR GREEN
- SET COLOR WHITE
- SET COLOR RED
Manual Claiming
Manual Claiming occurs when:
- The ThinkSmart View Plus is using the ThinkSmart Manager portal (https://portal.thinksmart.lenovo.com).
- Troubles, which include device is offline, when using the ThinkSmart Manager portal (https://portal.thinksmart.lenovo.com) based on the following conditions:
Condition Details Factory Reset or an image recovery has been performed. For Factory Reset refer the information above.
For image recovery information, visit: Recover ThinkSmart View Plus using Lenovo Rescue and Smart Assistant.
Based on the device Offline / Online status within the ThinkSmart Manager portal, follow the process that is described at: Manual Device Registration process during "Add Device" - ThinkSmart Manager Service (TSMS).After a system motherboard has been replaced during a service repair. Follow the process that is described at: After system board replacement adding device to ThinkSmart Manager portal - ThinkSmart View Plus. This process includes more details about Manual Claiming within this application.
Related Articles
Your feedback helps to improve the overall experience

