Create Bootable USB Flash Drive for Lenovo Diagnostics
How to create a bootable USB Flash Drive for Lenovo Diagnostics
How to create a bootable USB Flash Drive for Lenovo Diagnostics
You will need a USB flash drive larger than 2GB. Note: The content of the flash drive will be erased as part of this process.
Perform the following steps: (Be sure to remember the location where you saved the files on your system).
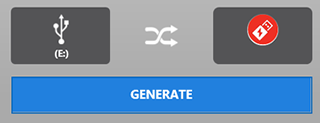
Run the Bootable Generator application
- Insert a flash drive.
- Download the desired bootable package onto your system, but do not extract any files.
- Linux - Lenovo Linux Diagnostics iso file
- UEFI (x64) - Lenovo Diagnostics UEFI (x64) zip file
- UEFI (ARM) - Lenovo Diagnostics UEFI (ARM) zip file
- Download the Bootable Generator file, and finish the installation step by step.
- Run BootableGenerator.exe from the desktop shortcut or startup menu.
- Select the flash drive that you would like the Lenovo Diagnostics Tool to be written to.
- Click or tap Search. Find and select the Lenovo Diagnostics Tool file that you downloaded.

- Click or tap Generate to start the process.
Run the Lenovo Diagnostics UEFI Bootable from a Bootable Flash Drive
- If Secure Boot is enabled in BIOS, disable it.
- BIOS->Security->Secure Boot->Secure Boot: Disabled.
- BIOS->Startup->UEFI/Legacy Boot: UEFI Only or UEFI Firstly.
- Insert the flash drive.
- Restart the machine, then immediately press F12.
- On the boot menu, select your USB flash drive, and press Enter.
- The diagnostics menu will display on your screen.
Related Articles
- Linux Discussion on Lenovo Community
- Linux Overview
- Linux for Personal Systems
- [Video] Lenovo Technical Support Diagnostics - Custom Troubleshooting
- [Video] Lenovo Technical Support Diagnostics - Easy Journey to Solution
- [Video] Scan Your Computer Hardware for Issues Using Lenovo Vantage
- Popular Topics: BIOS, UEFI
- [Video] Touring the Lenovo UEFI BIOS
- Popular Topics: Tips for PC's
- First steps for solving computer problems
- Lenovo ID: Access to everything Lenovo, across all Lenovo sites with one user name and password
- [Video] How to care for your Lenovo computer
- Windows Support Center
Var denne informasjonen nyttig?
Tilbakemeldingen din bidrar til å forbedre den generelle opplevelsen
Alias-ID:BOOTABLEUSB
Dokument-ID:HT508348
Opprinnelig publiseringsdato:04/23/2019
Siste endrede data:03/04/2025
