How to create a USB recovery drive and use the drive to recover Windows 10, 11
Steps and instructions to create a USB recovery drive and use drive to recover Windows 10, 11
Steps and instructions to create a USB recovery drive and use drive to recover Windows 10, 11
Description
This article is about how to create a USB recovery drive and how to use the drive to recover Windows 10 or 11.
Applicable Brands
- ThinkPad
- ThinkCentre
- ThinkStation
- ideapad
- ideacentre
Operating Systems
- Windows 10
- Windows 11
Solution
Watch our videos:
- [Video] How to create a USB Recovery Drive in Windows
- [Video] How to use a USB Recovery Drive to reset your PC in Windows
To create a USB recovery drive
- Prepare a flash drive that is at least 16 GB and plug the drive into the PC. Click the Windows key, tap Control Panel -> Recovery (Viewed by: Small icons)-> Create a recovery drive. See Where is Control Panel? for more information about Control Panel.
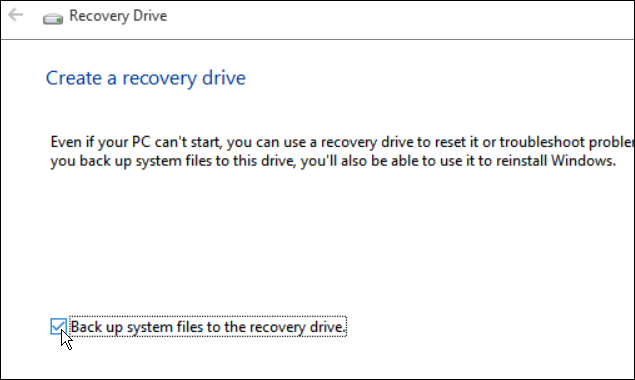
- That will launch the wizard to create a recovery drive. Make sure Back up system files to the recovery drive is checked and click Next.
 -
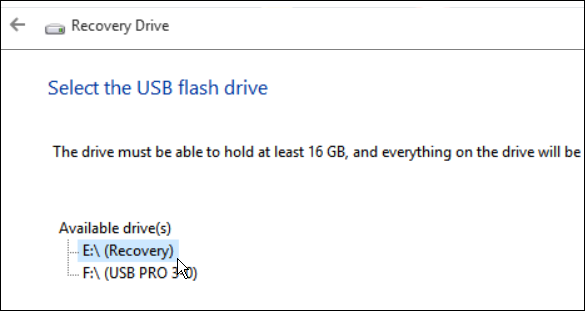
- - Now select the flash drive to use for recovery and click Next.
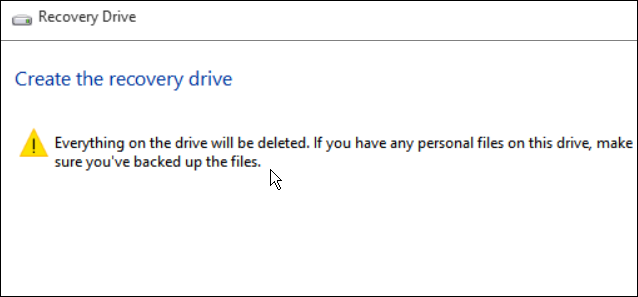
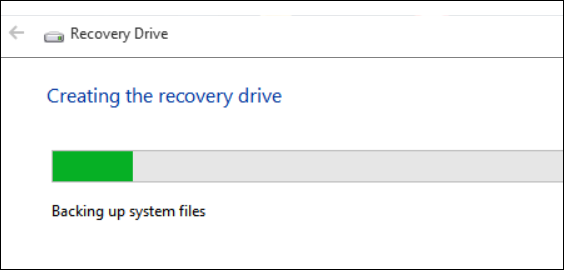
- On the next screen click Create to start the process of creating the recovery drive. This should just take a few minutes to complete. Remember that all of the data on the USB drive will be deleted.
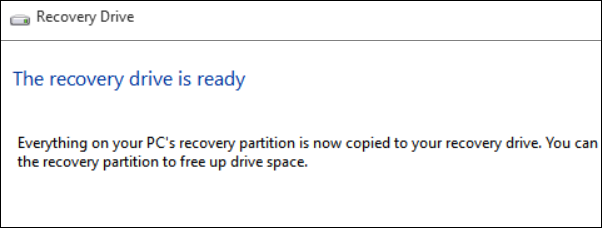
- Make sure to put the drive in a safe place so the drive is available in the future if needed.
Note:
1. If the PC does not have a recovery partition, then the Back up system files to the recovery drive check box will be greyed out and the recovery drive will include only the recovery tools and a bootable image, but not a recovery image to use for refreshing or resetting the PC.
2. Insert a USB flash drive into the PC that is at least as large as the size indicated on the screen.
When the process is done, do one of the following:
1. To keep the recovery partition on the PC, tap or click Finish.
2. To remove the recovery partition from the PC and free up disk space, tap or click Delete the recovery partition. Then tap or click Delete. This will free up the disk space used to store the recovery image. When the removal is done, tap or click Finish.
3. Remove the USB flash drive.
This is now the USB Windows 10/11 recovery drive. This drive will be needed for refreshing or resetting the PC. Keep the drive in a safe place and do not use it to store other files or data.
Using USB recovery drive to refresh or reset PC
It is strongly recommended to back up all data before refreshing or resetting your PC.
1. If the PC does not power on in Windows 10/11, keep the USB recovery drive inserted, then reboot the PC, while pressing F12 and hold. A boot menu will appear. Select boot device and a keyboard Windows layout will show.
Select Troubleshoot -> Refresh your PC or Reset your PC and then follow on-screen instructions.
2. For windows tablets without keyboards, such as Miix 2 8, keep the USB recovery drive inserted. Press Volume up + power, select boot menu, select UEFI device, and wait for the PC to boot from the recovery drive.
How to use Refresh your PC or Reset your PC in Windows 10 or 11
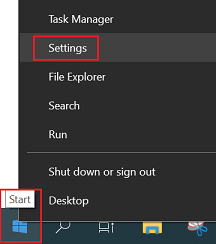
1. Right-click the Start menu (Windows key) and select Settings.
2. Select Update & Security. (In Settings, tap or click System for Windows 11.)
3. Tap or click Recovery.
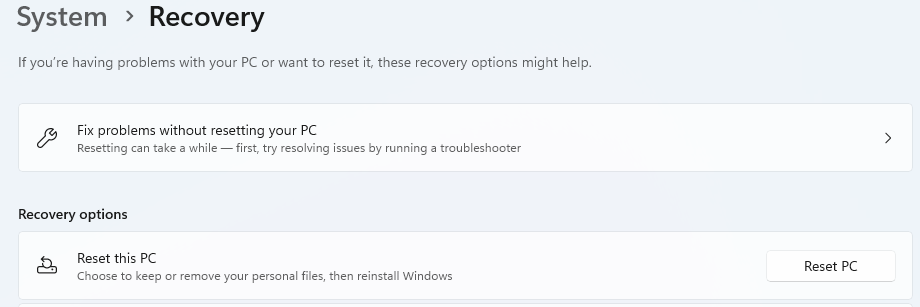
4. Continue to reset or refresh this PC.
Related Articles
- [Video] How to reset your PC to its original condition on Windows 10
- [Video] How to use System Restore Points in Windows 10
- [Video] How to restore your PC to a previously working state outside of Windows
- [Video] How to reset your PC to factory defaults using Lenovo OneKey Recovery (OKR)
- How can I create, or order Recovery Media from Lenovo
- Popular Topics: Lenovo OneKey Recovery (OKR)
- Popular Topics: Tips for PC's
- Lenovo Vantage: Using your PC just got easier
- Windows Support Center
Feedbackul dumneavoastră ajută la îmbunătățirea experienței generale

