How to activate controller software and firmware using the ThinkSystem System Manager for DE Series GUI
How to activate controller software and firmware using the ThinkSystem System Manager for DE Series GUI
How to activate controller software and firmware using the ThinkSystem System Manager for DE Series GUI
Description
This article introduces the optional procedure used to activate the controller software and firmware using the ThinkSystem System Manager (TSM) for DE Series GUI. Before proceeding, ensure that all the data has been backed up properly, that the storage array and all drives have an Optimal status, and that no configuration changes are running on the storage array. As part of the upgrade process, a health check will be performed to assess all storage array components to ensure the upgrade process can proceed. Checks include failed unassigned drives, drives with older versions of DACstore, and exclusive operations running. (A full list can be found in System Upgrade section of DE Series Hardware and Maintainance Guide.)
Applicable Systems
ThinkSystem DE Series Storage Arrays
About this task
You should only use the procedure set out in this article if you have been following How to update controller firmware using ThinkSystem Manager for DE Series GUI and you have chosen to download and transfer the software and firmware files without activating them.
You might choose to activate later for one of the following reasons:
Time of day – Activating the software and firmware can take a long time, so you might want to wait until I/O loads are lighter. The controllers fail over during activation so performance might be lower than usual until the upgrade completes.
Type of package – You might want to test the new software and firmware on one storage array before upgrading the files on other storage arrays.
Installation Procedure
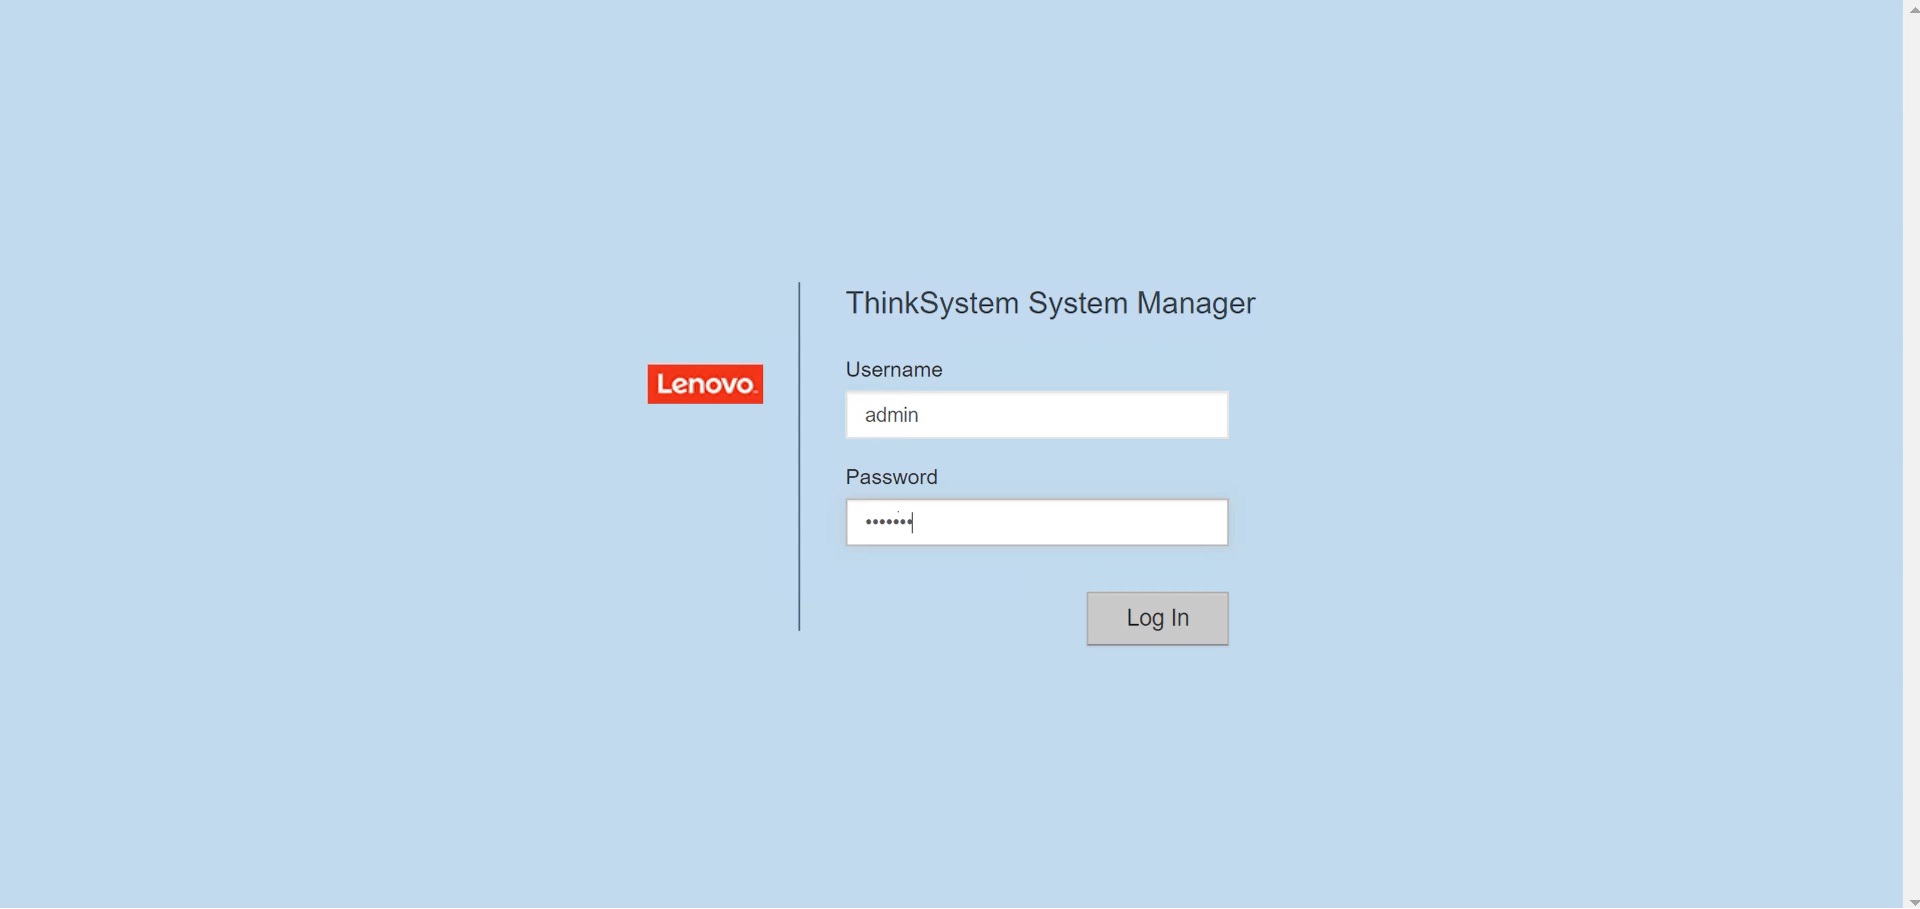
- Use a Web browser to log in to the TSM GUI with the admin account and password.
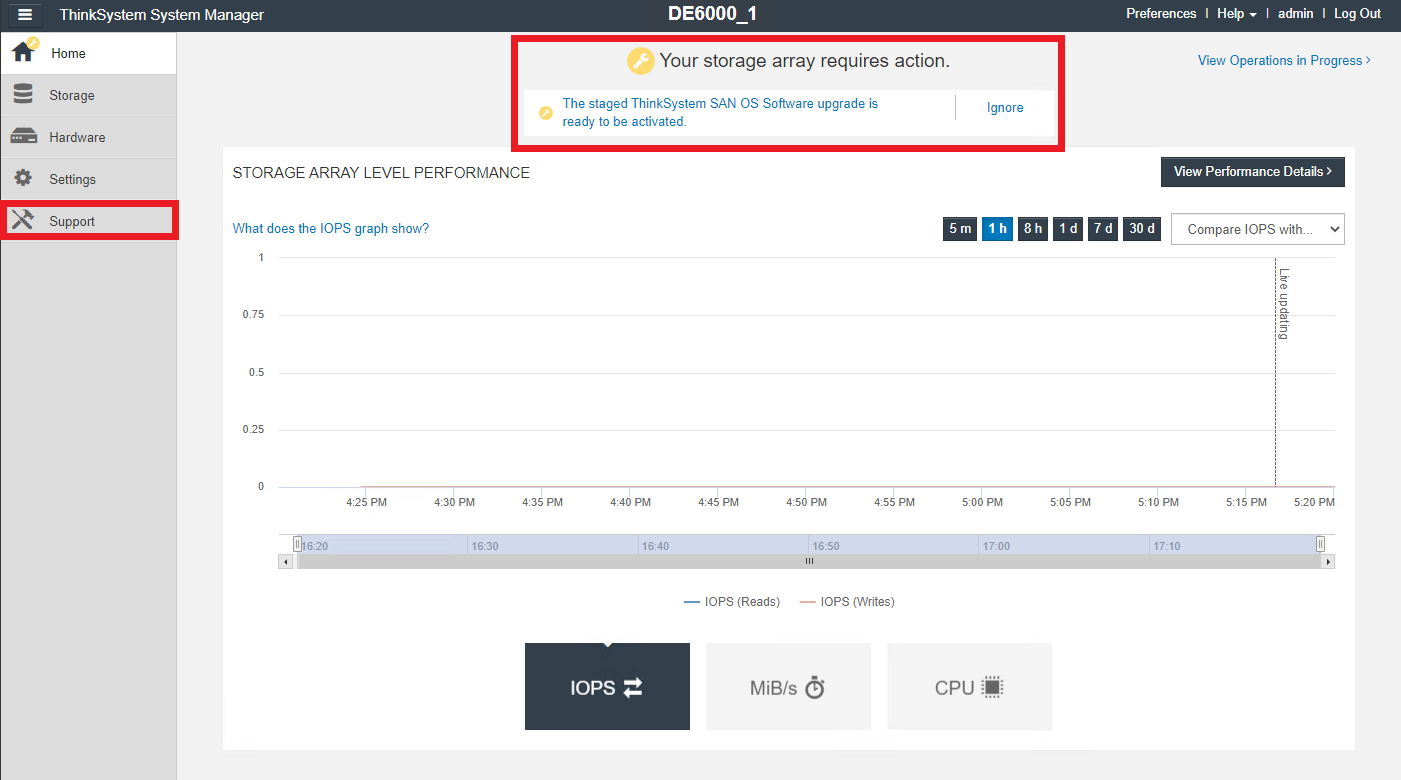
Note: When you have software or firmware that has been transferred but not activated, you will see a notification in the Notifications area of the TSM Home page, and also on the Upgrade Center page. - Select Support.
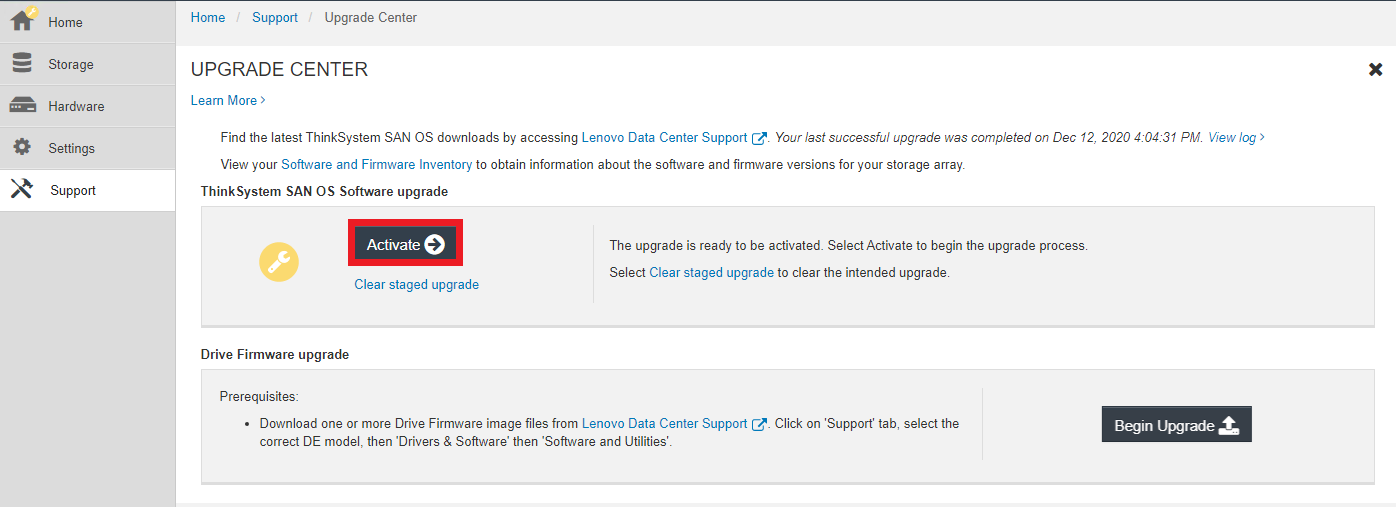
- Select UPGRADE CENTER.

- In the area labeled ThinkSystem SAN OS Software upgrade, click Activate.
- A dialogue box will display the components that will be activated.
- Verify that the displayed information is correct.
- If everything is correct, confirm the Activation by typing ACTIVATE in the text box, and then selecting the ACTIVATE button.
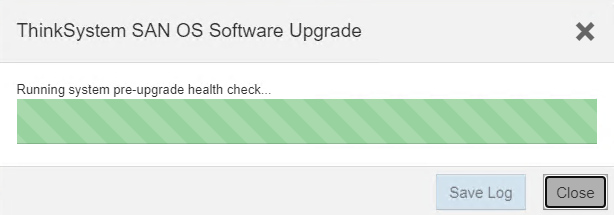
Note: Upgrading one or more components will cause a temporary connection loss to the System Manager Web application. If you do not have a multi-path driver installed, please verify that you have stopped all I/O to the storage array. - The pre-upgrade health check will begin. If the pre-upgrade health check passes, the upgrade process will proceed to activate the files. If the pre-upgrade health check fails, use the Recovery Guru or contact technical support to resolve the problem. The time the process takes to activate depends on your storage array configuration and the components that you are activating.
Verification Procedure
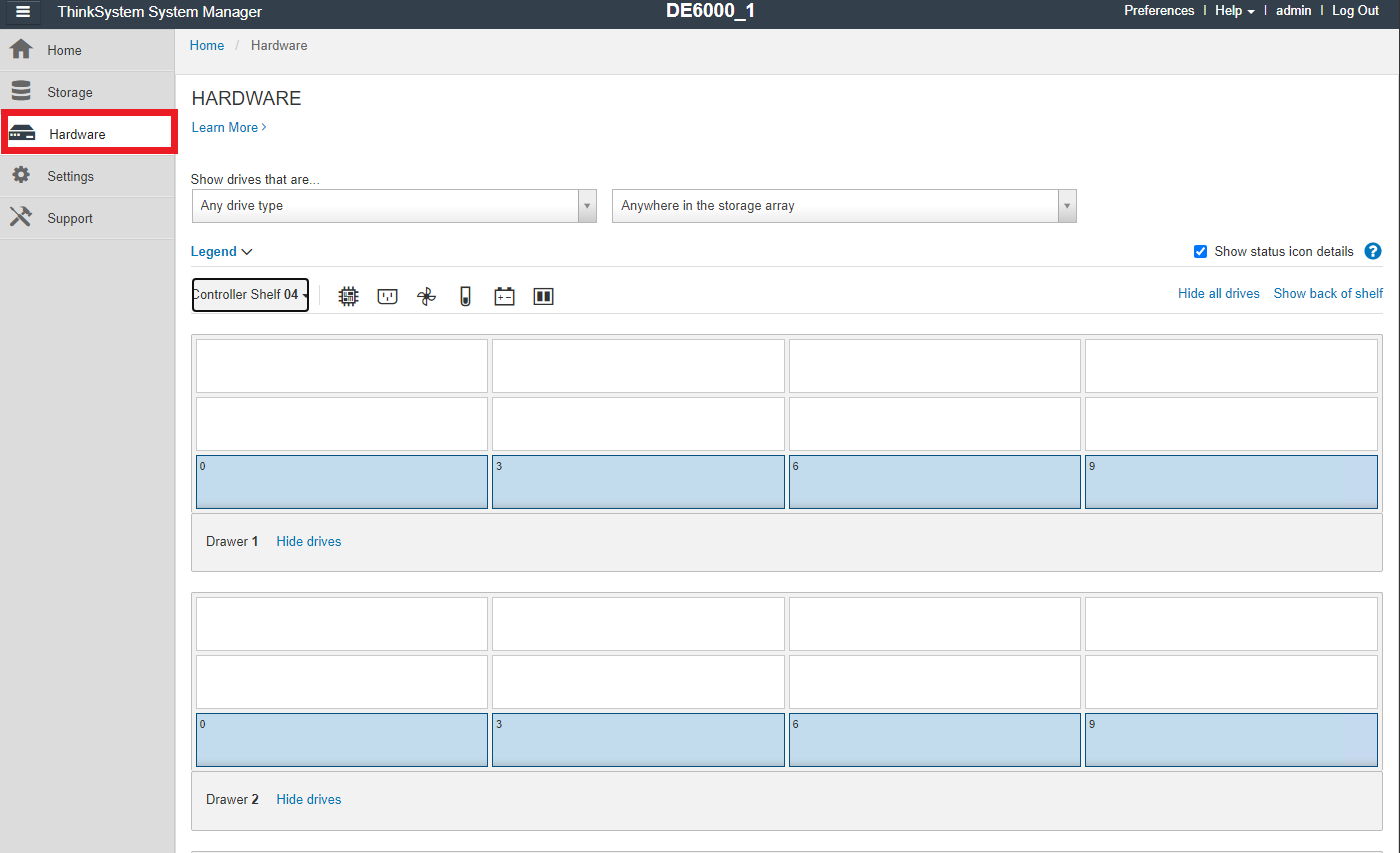
- When the installation is complete, navigate to the Hardware page to verify that all components appear correctly.
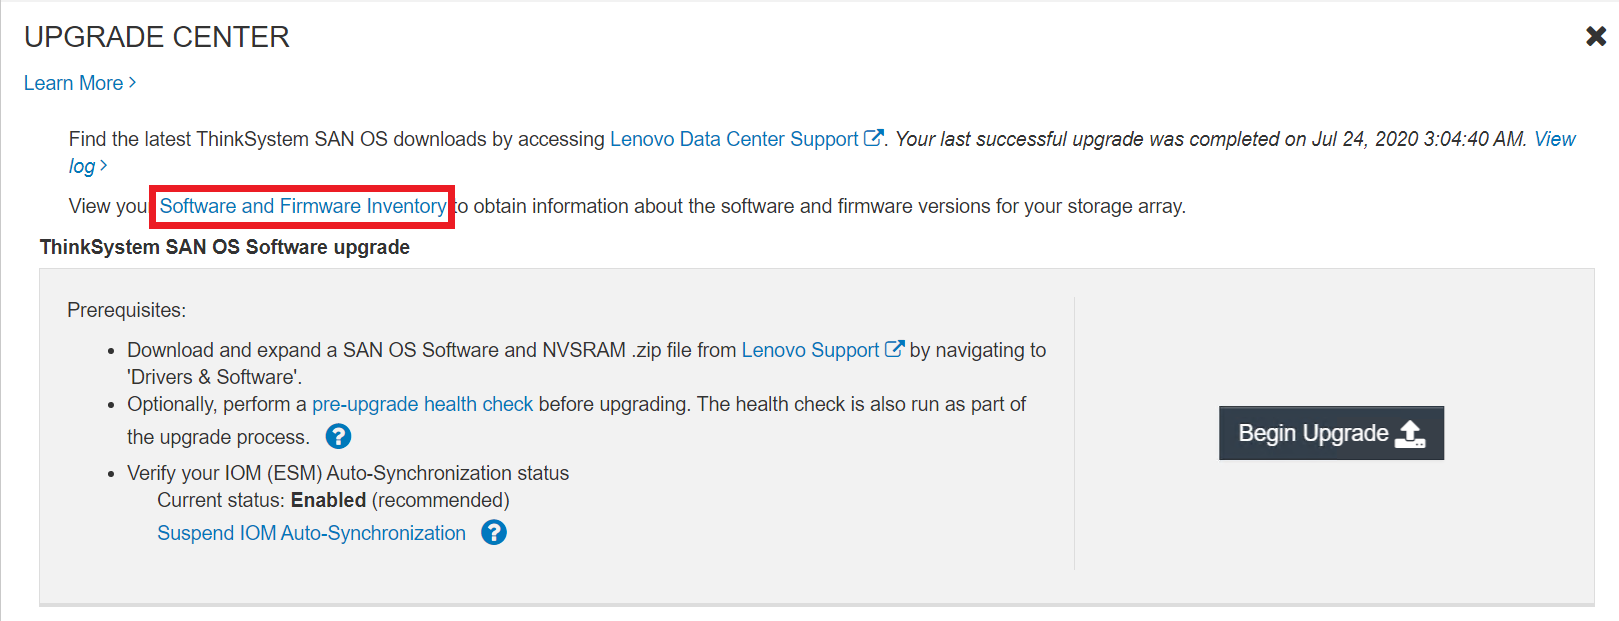
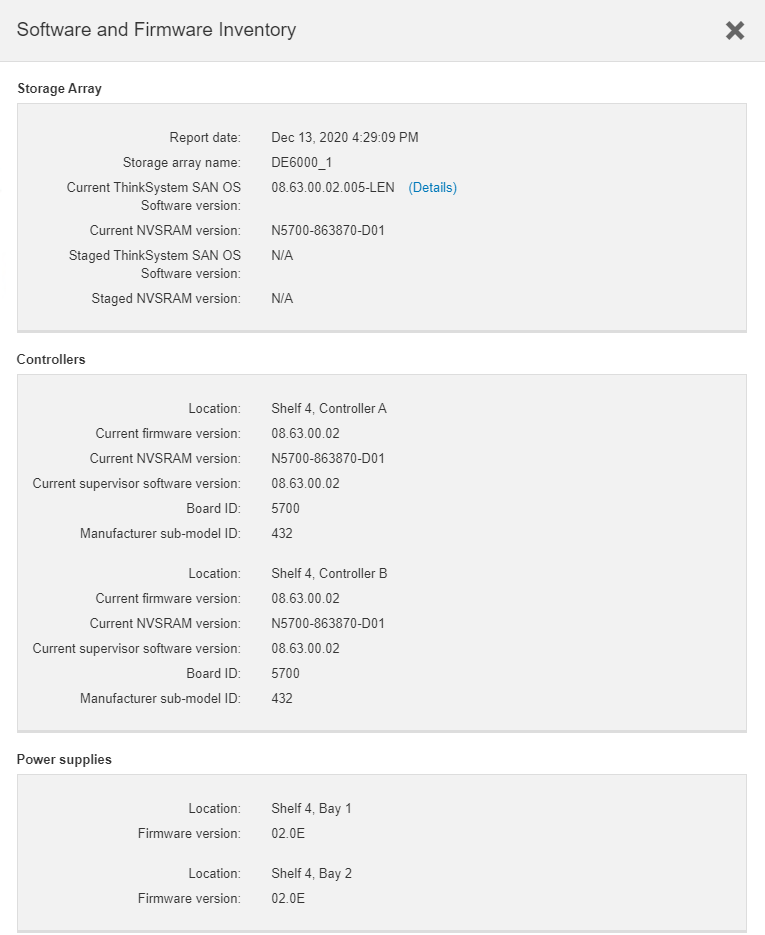
- To verify the new firmware and software version(s), navigate to Support, select UPGRADE CENTER, and click Software and Firmware Inventory.
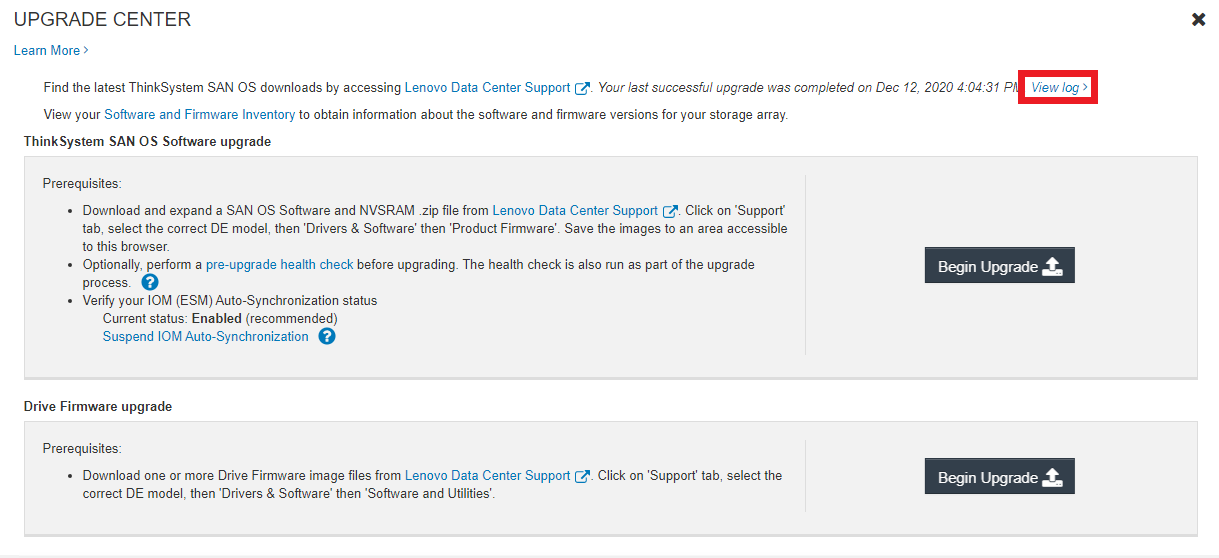
- On the UPGRADE CENTER page, click View log to see a list of what was upgraded.
- The file is saved in the Downloads folder for your browser with the name latest-upgrade-log-timestamp.txt.
- The file is saved in the Downloads folder for your browser with the name latest-upgrade-log-timestamp.txt.
Additional Information
- Upgrade software and firmware
- Upgrade drive firmware
- How to open a support ticket for Lenovo Data Center products
- Warranty Lookup
- How to upload a file to Lenovo Data Center support
- How to subscribe to Lenovo Data Center Group product notifications
- How to register your systems for Lenovo DCG Services

