How to enable Bring Your Own Meeting (BYOM) mode - ThinkSmart Core Gen 2
How to enable BYOM (Bring Your Own Meeting) mode - ThinkSmart Core Gen 2
How to enable BYOM (Bring Your Own Meeting) mode - ThinkSmart Core Gen 2
Description
Describes the Bring Your Own Meeting (BYOM) feature that allows users to connect their own device, such as a laptop, to the ThinkSmart Core Gen 2 devices, enabling them to host or join meetings using their preferred conferencing platform while leveraging the room's professional-grade hardware for a seamless experience.
Applicable Brands
ThinkSmart
Applicable Systems
ThinkSmart Core Gen 2 devices preloaded with Microsoft Teams Rooms Unified Communications (UC)
Solution
BYOM Hardware
Dedicated port, chipset, and drivers
BYOM Cables
Note: The BYOM Port requires a USB C 3.2 cable.
|
40CMTSC201 |
Lenovo USB-C to USB-C Cable - 3M |
3M cable for TS Core Gen 2 BYOM |
|
40CMTSC202 |
Lenovo USB-C to USB-C (Non display) Cable - 5M |
5M cable for TS Core Gen 2 BYOM |
3 meter default cable
| Model | Lenovo 3m BYOM Cable for ThinkSmart Core Gen 2 |
|---|---|
| Power Rating | 20V/3A |
| Data Rate | 5Gbps |
| Length | 3m +/- 10mm (including the connectors) |
| Cable Charging | PD 3.0 |
| Cable Display | DP 1.4 Alt mode |
| Connector | Type C to Type C |
5 meter optional cable (as accessory or selectable in CTO BOM)
| Model | Lenovo 5m BYOM Cable for ThinkSmart Core Gen 2 |
|---|---|
| Power Rating | 20V/3A |
| Data Rate | 5Gbps |
| Length | 5m +/- 10mm (including the connectors) |
| Cable Charging | PD 3.0 |
| Connector | Type C to Type C |
With both cables: power delivery to laptop = 45W (20 V, 2.25 A)
How to enable BYOM mode?
By default, Core Gen 2 device has BYOM mode disabled. You can enable BYOM mode using PowerShell script or via ThinkSmart Manager portal.
- Enable BYOM mode using the script
Download this script to enable BYOM on the device. Run PowerShell as an admin:- If no BIOS password is currently set, please enter the following command in the PowerShell window:
call .\enableBYOM.ps1
- If a BIOS password is currently set, please enter the following command in the PowerShell window:
call .\enableBYOM.ps1 -svp YourPasswordHere
- If no BIOS password is currently set, please enter the following command in the PowerShell window:
- Enable BYOM mode via ThinkSmart Manager portal
- Log into your organization on ThinkSmart Manager portal.
- Select ThinkSmart Core Gen 2 device on Device list.
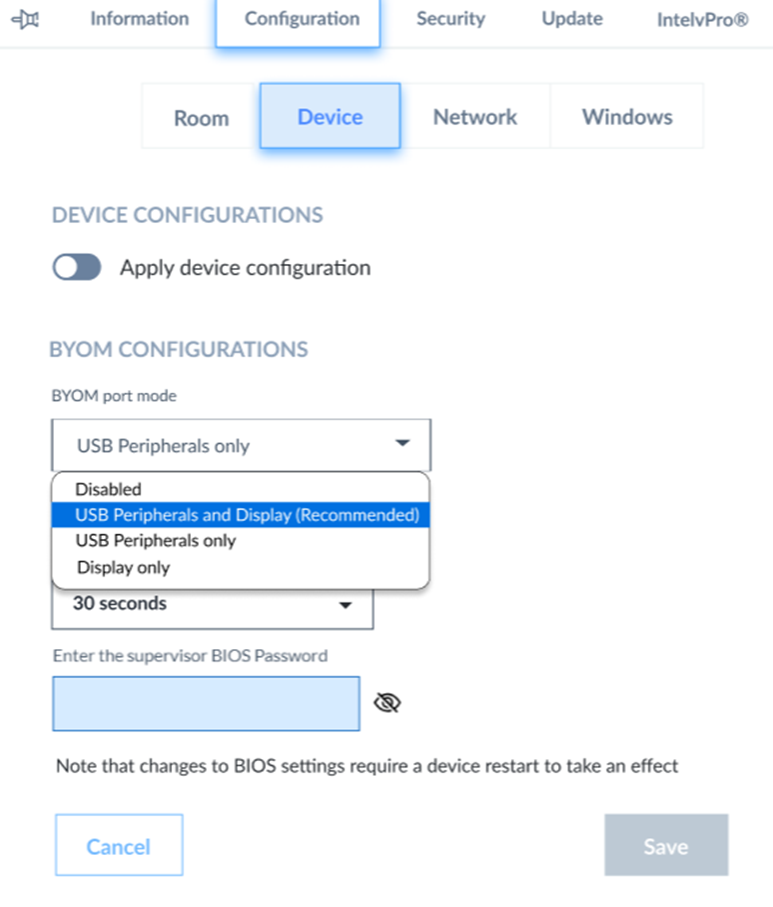
- Go to Configurations > Device.
- Select USB Peripherals and Display (Recommended) in BYOM port mode drop-down.
- Turn on BYOM mode toggle.
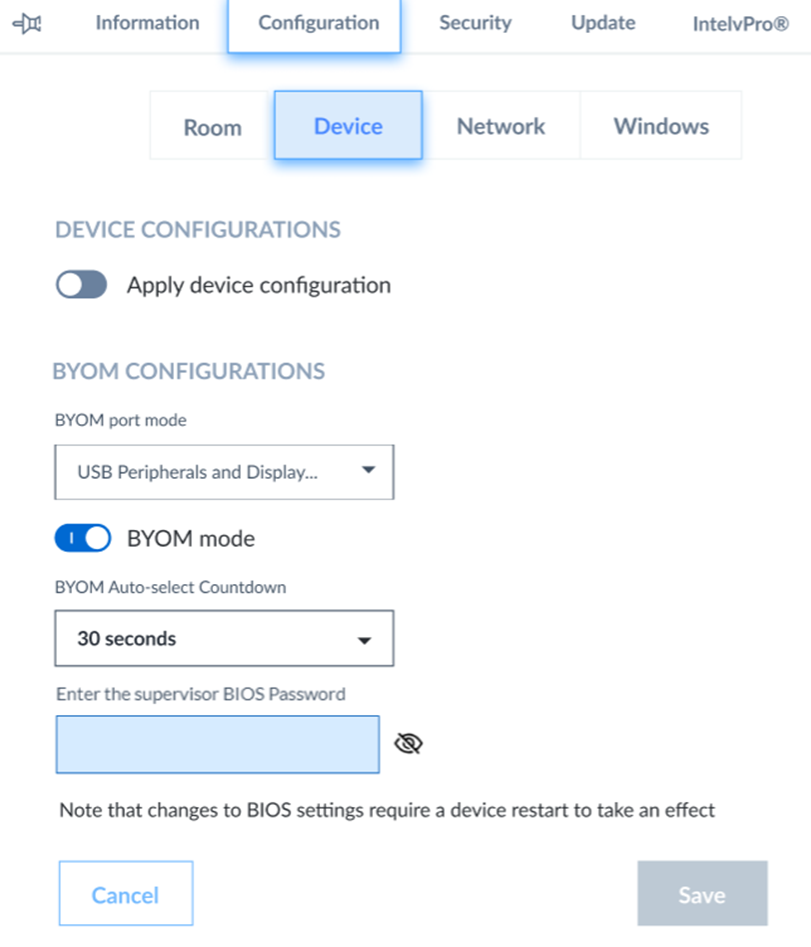
- Enter BIOS password if it was set directly on the device.
- Click the Save button.
- Confirm the pop-up message.
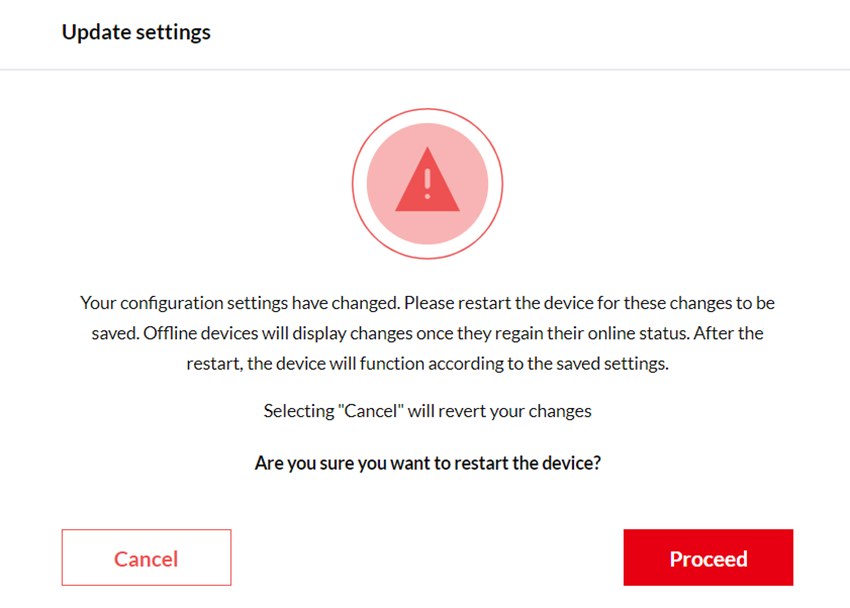
- Device will be restarted once you click the Proceed button to change the port mode.
Note: A restart is not required when changing only the status of the BYOM feature toggle, provided no other BYOM port mode is selected.
How to enter BYOM mode?
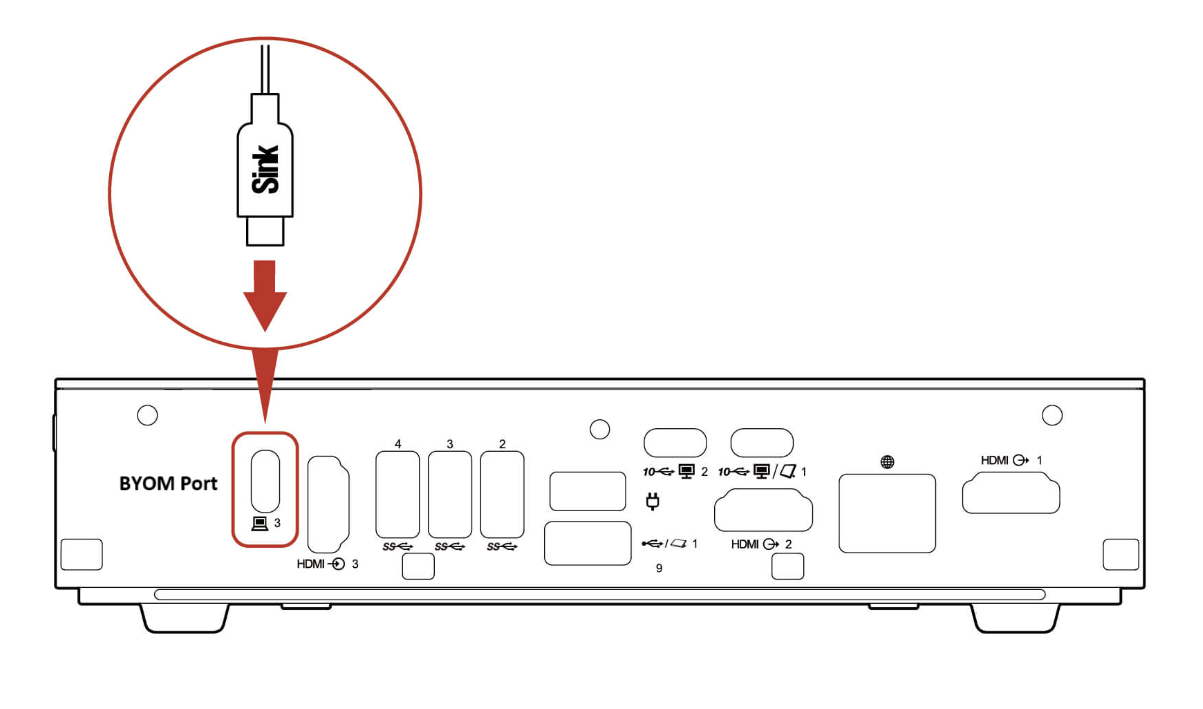
- Once you enable BYOM mode, you can connect the PC to the BYOM port of the ThinkSmart Core Gen 2 device.
- After that, you will see the confirmation pop-up message:
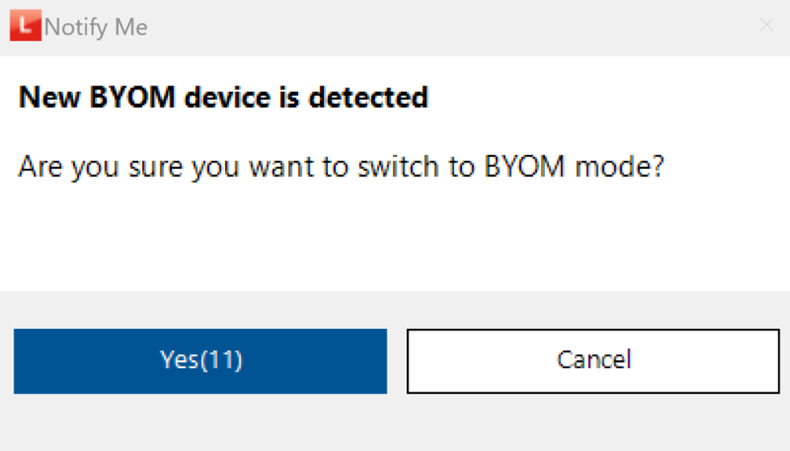
- Selecting Cancel will close the notification message and return to the UC app in Kiosk mode. The message will not appear again unless PC is disconnected and reconnected to the BYOM port.
- Click Yes or wait 30 seconds for the countdown timer to expire to open BYOM interface:
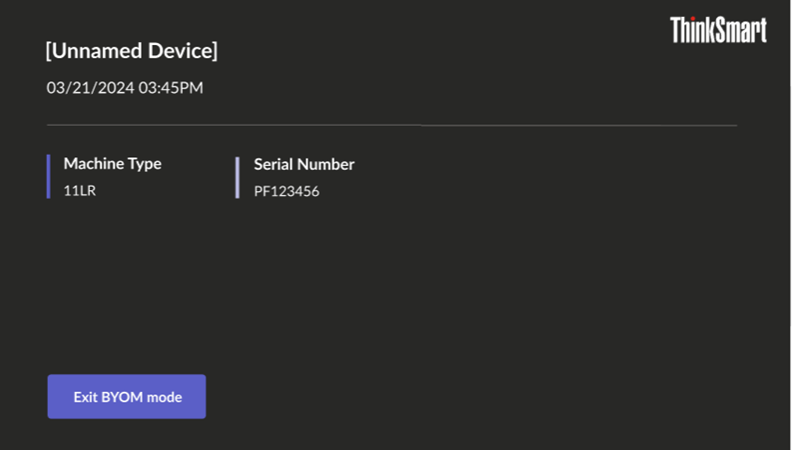
- You will see the device name and room location if it is claimed on ThinkSmart Manager portal, or machine type and serial number for not claimed devices.
- Click Exit BYOM mode or unplug BYOM cable to close BYOM interface.
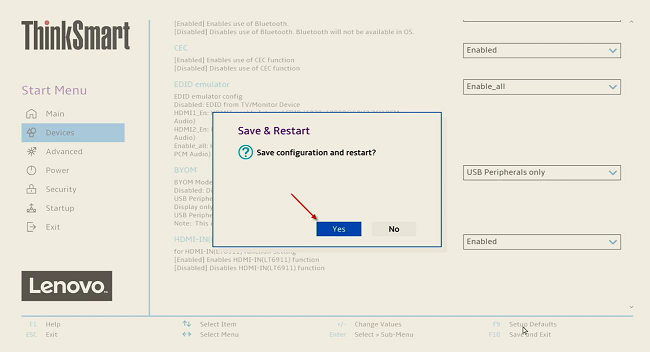
How to set BYOM Operational Modes in BIOS
Use the following steps:
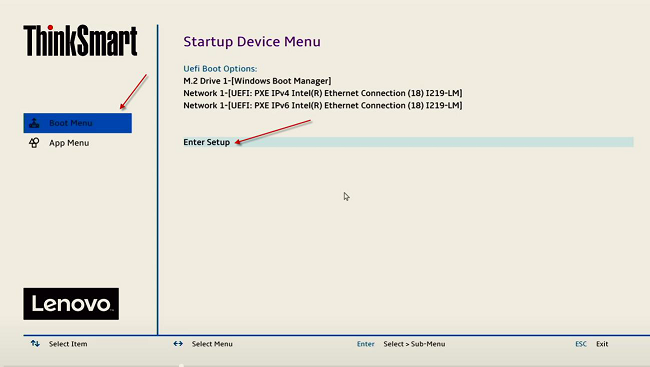
- Reboot the device.
- Press F12 when the Lenovo logo is displayed.

- Select Boot Menu and then Enter Setup.
- Select Devices.
- Select the option to configure in the BYOM section.
Options include:
Disabled
USB Peripherals and Display
Display only
USB Peripherals only
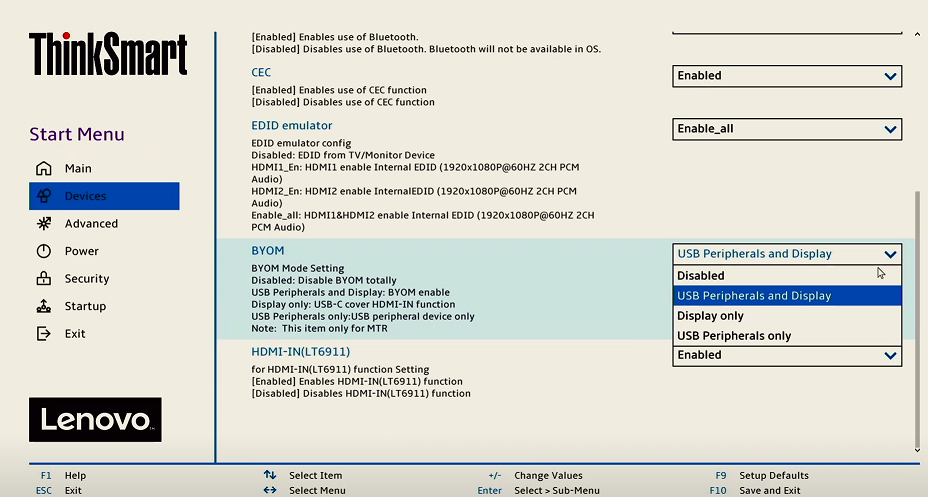
- Select F10, then Yes to save the changes.
Frequently Asked Question's (FAQ's) and Troubleshooting
- The BYOM notification does not appear immediately after device startup
When the device powers on, it may take 3–5 minutes for certain applications, including BYOM, to load. This delay is caused by factors such as system resource allocation, background processes, and dependency services that need to initialize. During boot-up, the system prioritizes critical tasks, causing non-essential applications to load later. Please wait for this time to elapse before plugging in the BYOM cable. - The BYOM notification may not appear if the BYOM cable is inserted within less than 1 minute of a previous connection
This intermittent issue can occur if a user repeatedly unplugs and plugs the cable into the BYOM port within a short time. To resolve this, please wait 1–2 minutes after unplugging the cable before reconnecting it.
Related Articles
Your feedback helps to improve the overall experience

